Showing posts with label summer. Show all posts

Wednesday, March 12, 2014

Greek Couscous Salad

From Friday to Tuesday we had a glimpse of spring weather. Indeed, Monday and Tuesday got into the 60s! The sun was shining. Scarves, hats, and mittens were unnecessary. Boots were left on the mat at home.

Then there was last night. The rain/hail/snow/windstorm came back with vengeance. It woke me in the middle of the night for a few hours while it was trying to break through my windows. In the morning I could hear people scraping the icy snow mixture off their cars. I almost threw the covers over my head and declared I wasn't coming out until winter leaves us alone.

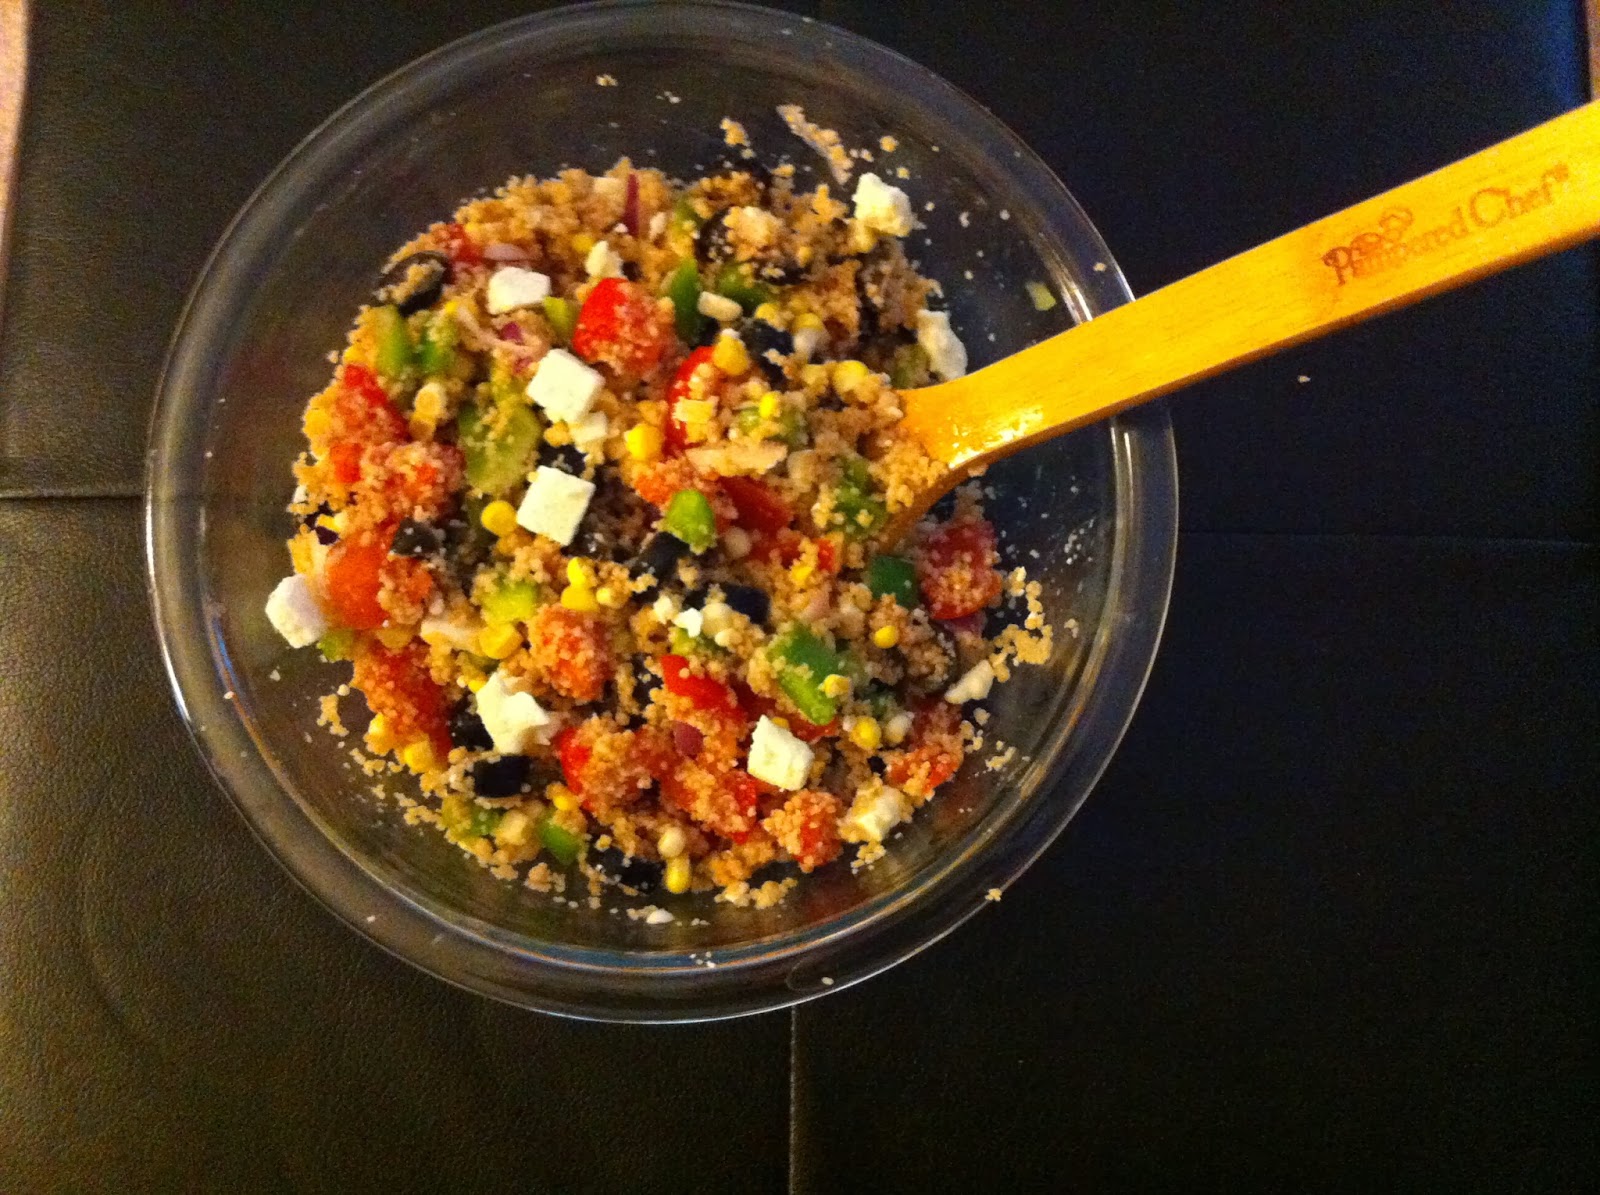
Unfortunately real life doesn't allow me to do that. So I'll settle for spring on my plate. In the form of this couscous salad. It goes perfect as a side to a grilled pork chop, chicken breast, or piece of fish. Make it. Sip a fruity cocktail. Pretend spring is out of hibernation for real.


Greek Couscous Salad 
Ingredients:
1 1/2 cups cooked couscous
1/2 cup chopped green pepper
1/2 cup chopped tomato
1/4 cup diced red onion
kernels from one ear of corn
1/3 cup sliced black olives
1/3 cup feta cheese
juice of 1 lemon
salt and pepper, to taste

Directions:
Stir together the couscous, vegetables, olives, and cheese. Squeeze the lemon juice on top and toss to coat. Season with salt and pepper, to your own taste.

Refrigerate until ready to serve.


Wednesday, September 18, 2013

Chicken Gyro Lettuce Wraps

You know how some days you feel like you are running around like a crazy person? That you keep doing lots of work but somehow it feels like the to-do list keeps growing and never shrinking? What happens when that is your life for months on end? Does that just make you a crazy person?

Hi, my name is Julie and apparently I am a crazy person.

At least I still make (sometimes) and eat (most of the time) yummy food. Very rarely lately do I share it with you, but what can I say? I'm a crazy person. Enjoy these quick and easy chicken gyro lettuce wraps. They'll make you feel a little less insane.


Chicken Gyro Lettuce Wraps (adapted from Rachael Ray Magazine)
Ingredients:
1/2 cup shredded cucumber
1/2 cup plain fat-free Greek yogurt
1/8 cup chopped fresh basil
1/8 cup chopped fresh mint
1/8 cup chopped fresh parsley
1/8 cup chopped fresh chives
1 lemon, juiced
2 cloves garlic, pressed
1/8 cup extra virgin olive oil
1/2 tsp paprika
1/2 tsp dried oregano
1/2 tsp ground coriander
1/2 tsp ground cumin
2 boneless skinless chicken thighs
salt and pepper
Romaine hearts, for serving
Chopped pepperoncini and tomatoes, for serving

Directions:
Place the cucumber in a colander and generously salt. Let rest for 10 minutes and then press out the liquid. Add the cucumber, yogurt, fresh herbs, 1/2 of the lemon juice, 1 clove of garlic and 1/4 tsp cumin to a food processor. Puree until almost smooth. Season with salt and pepper. Refrigerate until ready to serve.

Combine the other half of the lemon juice with the other clove of garlic and about 1/8 cup oil. Mix in the paprika, oregano, coriander, and 1/2 tsp cumin. Place the chicken in the marinade and toss to coat. Let sit for 15 minutes.

Heat a grill over medium-high heat. Shake of any excess marinade. Cook, flipping halfway through, for about 10 minutes until cooked through. Slice into pieces.

Serve the chicken on top of the romaine hearts garnished with pepperonicini, tomatoes, and cucumber sauce.

Serves 2.


Sunday, September 1, 2013

Tempeh Greek Wrap

I remember my first experience with tofu on the college salad bar. It was this gross watery white sponge without texture and flavor. Needless to say, I did not enjoy it. But then I learned to love tofu. It is great when marinated and paired with bold flavors.

After I gained an appreciation for tofu, I wanted to venture out to other high protein soy products. The one on the top of my list was tempeh. Finally I have conquered that task.

Here is my take on tempeh--- first off, do not expect it to be anything like tofu. It is actually a hard pressed soybean product so the texture is completely different. You can actually see the soybeans! It is chewy and therefore holds up well for sandwiches. Like this Greek wrap. The flavor of the tempeh is lemony because that's what you cook it in. But paired with the salty feta and olives plus a tangy Greek yogurt spread and lots of fresh vegetables make this perfect for any summer lunch or quick dinner.

The verdict-- I like tempeh. I think I'll play around with it some more.


Tempeh Greek Wrap (adapted from Cooking Light)
Ingredients:
4 oz tempeh
1/2 tbsp olive oil
1/2 cup water
juice of 1 lemon
zest of 1/2 lemon
1/4 cup Greek yogurt
1 garlic clove, minced
2 tbsp chopped fresh chives
salt and freshly ground pepper
Diced tomatoes and cucumber
Spinach leaves
Sliced red onion
Crumbled feta cheese
Sliced olives
Tortilla or wraps (I like 100 calorie La Tortilla wheat wraps)

Directions:
Heat the oil in a medium skillet over medium high heat. Add the tempeh and cook for 2 minutes on each side to brown slightly. Reduce heat to medium and pour in the water and juice from 1/2 of the lemon. Simmer for 10 minutes, flipping halfway through. Remove from pan and slice into 6-8 pieces.

In a small bowl, combine the yogurt, the other half of lemon juice, lemon zest and chives. Mix thoroughly and season with salt and pepper, to taste.

Spread about 2 tbsp of the yogurt mixture on the wrap. Top with half of the tempeh. Add tomatoes, cucumber, spinach, onion, feta and olives. Roll up.

Makes enough for two wraps.


Thursday, August 29, 2013

Summer Vegetable Minestrone (Slow Cooker)

This recipe is for my friend Bob. He asked me the other weekend for a good summer crockpot recipe. My go-to recipe is pulled pork because it is so easy and works anytime of the year. However, I had recently made this minestrone chalked full of summer produce that practically screams summertime.


Maybe not the best for the crazy 100 degree weather we've been having this week, but as long as you've got air conditioning, it'll be a great choice. Feel free to substitute any fresh vegetables that you desire... I was actually inspired by a springtime minestrone soup (follow the link below if you want it) but subbed in perfect summer vegetables like zucchini and corn.


Summer Vegetable Minestrone (adapted from HowSweetEats)
Ingredients:
1 medium onion, diced
2 carrots, peeled and diced
3 garlic cloves, minced
1 zucchini, chopped
kernels from one ear of corn
28 oz can diced tomatoes
16 oz can cannelloni beans, rinsed and drained
3 cups vegetable broth (homemade or low-sodium storebought)
3 cups water
8 oz uncooked small pasta (like mini penne)
6 oz fresh spinach
Salt and pepper, to taste
Freshly grated parmesan cheese, for serving

Directions:
In the crock of your slow cooker, combine the onion, carrot, garlic, zucchini, corn, tomatoes, beans, vegetable broth and water. Cook on low for 6-8 hours.

Stir in the pasta and spinach and cook for another 10-15 minutes until the pasta is cooked. Season with salt and pepper to your liking

Serve topped with parmesan cheese.

Serves 6-8.


Monday, July 22, 2013

Mom's Potato Salad

Let's talk about the miracle of life for a few moments.

My friends in college used to laugh at me because I told them that I was really excited one day to be pregnant. I mean, it is a little baby growing inside of you. It starts as two little cells and becomes a person! How amazing is that?! It truly is the miracle of life.

No, no, this is not a pregnancy announcement. I was just reminded of this perfect creation of new life when I went to visit my new baby niece this past weekend. She is this little bundle of joy (and squeaks) that makes everyone in the room glow with happiness. She is so tiny yet so full of life. I could have sat there holding her and staring at her precious face forever. My sister and her husband have this baby making thing down to perfection--they make the most adorable little kiddos. Both of my nieces are probably the prettiest little babies ever (not that I'm biased at all). Who would dare to contradict these faces?


Speaking of family, today I'm sharing my mom's potato salad. Feel free to double it if you are feeding a large family. I love that mine keeps growing.


Mom's Potato Salad (adapted from Better Homes and Gardens Cookbook)
Ingredients:
1 lb yukon potatoes
1/2 cup miracle whip light
1/2 tbsp yellow mustard
1 tbsp dill pickle juice
salt and freshly ground pepper, to taste
1 stalk celery, thinly sliced
1/2 small onion, thinly diced
2 small dill pickles, diced
3 hard boiled eggs, peeled and chopped
paprika

Directions:
Place the potatoes in a saucepan and cover with water. Bring to a boil, cover, reduce heat, and simmer for 20-25 minutes until just tender. Drain well. Cool. Peel and cube potatoes.

Mix together the miracle whip, mustard, pickle juice and salt and pepper.

Combine the potatoes, celery, onion, pickles and eggs in a large bowl. Add the dressing and toss to coat. Cover and chill for at least 6 hours.

To serve, top with paprika.


Friday, July 12, 2013

Corn and Crab Cakes

I think they are pumping something into the air of my building at work. No matter how many hours I sleep during the night, I am always exhausted getting up in the morning. And it isn't just me. I've been doing my investigatory research and found that I'm not the only one that is having this issue. Everyone seems to be drained of their energy these days.

Today I wanted to head home and nap in front of the pool. Unfortunately that did not happen. Instead I ran a few reactions, treated some cells, and updated my CV. Ah, the life of a postdoc.

Let's talk now about these crab cakes. They are summer on a plate (especially if you serve with grilled asparagus as I did). It is essential that you take the time to freeze the cakes after you form them-- this allows you to cook them without crumbling. To tell you the truth, I was really worried before I made this recipe; I wasn't sure I was going to like them. I used canned crab and I was worried it would be tasteless and just okay... But I'm telling you that the resulting product surprised me in a great way! They were delicious! Now I've checked crab cakes off my bucket list and my brain is whirling about flavors to play around with for next time.


Corn and Crab Cakes (adapted from Cooking Light August 2012)
Ingredients:
1/4 cup canned corn, rinsed and drained
1/8 cup chopped red bell pepper
1 1/2 tbsp chopped green onions
1 1/2 tbsp light mayonnaise
1/2 tsp dijon mustard
1/2 tsp Old Bay seasoning
4 oz canned crab, shell pieces removed
1 egg white
2/3 cup panko breadcrumbs
1/2 tbsp butter

Directions:
Combine the corn, pepper, onions, mayonnaise, mustard, Old Bay, crab, and egg white in a bowl until well blended. Stir in 1/3 cup panko. Divide into 4 equal pieces and form each into 1-inch thick patties. Place them on a baking sheet and freeze for about 20 minutes until firm.

Heat a large skillet coated with cooking spray over medium high heat. Add the remaining 1/3 cup panko and cook until toasted while stirring frequently. Remove to a shallow dish and wipe out the skillet.

Coat the crab cakes in the toasted panko. Spray both sides of the cakes with cooking spray.

Melt the butter in the skillet over medium-high heat. Add the crab cakes to the pan and cook for about 4 minutes on each side until golden brown.

Serves 2.


Wednesday, July 10, 2013

Barley Salad with Chickpeas

Salads are perfect for hot, humid summer evenings. They come together so quickly. They require no heating source so your air conditioning doesn't have to go into overdrive keeping your apartment cool. However, lettuce topped with chopped veggies can get a little boring. Adding grains is a great way to step up your salad to that next level. If you really want to put it over the top, add some dried fruit and nuts. Make your way to the fresh greens section of your grocery store and try something new. Chickpeas make a great alternative to meat as your protein source.

This recipe is adapted from my cooking for one cookbook, Serve Yourself. Originally it was designed with farro but I subbed barley because I had that in my pantry. It was refreshing and delicious!


Barley Salad with Chickpeas (adapted from Serve Yourself cookbook)
Ingredients:
2 tbsp chopped pecans
1 cup cooked pearl barley, cooled
1/3 cup chickpeas, rinsed and drained
1/2 cup lightly packed arugula leaves, coarsely chopped
1/4 cup canned diced tomatoes including juice
2 tbsp dried cherries
1 green onion, thinly sliced
6 large mint leaves, thinly sliced
1 tbsp extra-virgin olive oil
1 tbsp red wine vinegar
kosher salt and freshly ground pepper, to taste

Directions:
Toast the pecans in a dry skillet over medium-high heat until they turn dark brown and smell fragrant. Remove to a plate to cool.

Combine the pecans, barley, chickpeas, arugula, tomatoes, cherries, green onion, and mint in a bowl. Mix. Drizzle with the oil and vinegar and mix to combine. Season with salt and pepper, to taste.


Monday, July 8, 2013

Wine Slushies!!!

We know that I like to recreate recipes at home that I find at restaurants. Remember the potato pizza? And the immaculate reception inspired pot pie? And crab meat rangoons? What about the restaurant style dark dinner rolls? So from the moment I tasted the wine slushie at Sleepy Creek Vineyards, I knew I needed a homemade version. I loved the taste but could not justify buying both the wine and the slushie mix... especially since I was certain the mix consisted of sugar and only a few other ingredients. As is my norm, I immediately google-ed "homemade wine slushie mix" when I got home and found myself a recipe. And y'all, it is so simple. I've already made it twice! I plead the 5th in answering your question of how long it took me to finish the first batch (it was >1 day, however). Then my parents were in town for Sunday and I made it again because I like to be a bad influence on my mom and introduce her to alcoholic beverages that I think she will enjoy (she doesn't like beer or wine and will only occasionally drink a margarita or daiquiri). I was correct. The tartness and ice-y-ness of the drink was perfect for her. My dad enjoyed it too.


Here it is important to appropriately pick your wine. If you use a sweet wine, then your slushie will be sweet; if you use a drier wine, then your slushie will be even more tart. I like the latter best. This recipe only requires 4 ingredients: sugar, citric acid, a lemon and wine (I guess 5, if you include the water). FYI: Citric acid can be found in the canning section of your grocery store or Lowe's/Home Depot/etc.

I cannot express my enthusiasm for this drink enough. It is perfect for the summer. Do the darn thing!


Homemade Wine Slushies (adapted from Celebration Generation)
Ingredients:
1 1/3 cups granulated sugar
2 tsp citric acid
zest of 1 lemon
juice of 1 lemon
750 mL bottle of red wine*
3 cups water

Directions:
Combine the granulated sugar, citric acid and lemon zest in the bowl of a food processor. Pulse for about 3-4 minutes until the sugar is processed and everything is mixed well.

Place a gallon size freezer ziploc bag in a bowl. Pour the sugar mixture into the bag. Add the wine, water and lemon juice. Gently mix with a spoon to dissolve. Place into the freezer and allow to freeze for at least 3-4 hours until it reaches your desired consistency.**

*Note: the sweeter the wine you use, the sweeter the slushie will be. Also, I have only used red wine, but I imagine you could use white wine as well.

**Note: This will keep in the freezer for multiple days but will take on more of a granita or flavored ice texture. This is no problem- eat it with a spoon. Or remove it from the freezer and squish the bag with your hands after it has been sitting on the counter for a few minutes.


Wednesday, June 19, 2013

Chicken Week- Day 2- The Best Chicken Salad

I really meant to post everyday this week. That's part of the reason I decided to do another theme week. But yesterday afternoon I had to leave work because I was not feeling well. That meant I spent the remainder of the afternoon asleep on my couch before crashing for the night in my bed. That also meant that I didn't open up my computer to finish this post and tell you about "the best chicken salad". Sorry!


We've had the miracle whip vs mayonnaise discussion before. The last time I fell into the miracle whip category while I was enjoying my tuna salad. However, now we're talking chicken salad and I'm switching camps to mayonnaise. Like I always am with food, I appreciate it all. There is a time and a place for them all... aka the time and the place for Reeses pieces is whenever and where ever I can get my hands on them and the time and the place for Sprite Zero and saltines is when I'm sick and laying on my couch...

In order to make the best chicken salad, mayonnaise is essential. Plus you need a tart apple and some walnuts for texture. And dried cranberries to sweeten it. A little bit of lemon juice and salt and pepper and we are rocking. It is best served on a croissant but unfortunately I couldn't find any in my grocery store's baked good section so I went with a whole wheat ciabatta roll. The recipe below is for about 1 serving; you can definitely double it or quadruple it to make enough for the family. Because of the apple and my desire to not eat soggy walnuts, I suggest making it fresh on the day you are going to serve it. The leftovers are okay but definitely not the best anymore.


The Best Chicken Salad*
Ingredients:
1/2 cup diced cooked chicken
1/3 granny smith apple, diced
2 tbsp craisins
1 tbsp diced green onion
1 tbsp chopped walnuts
1 1/2 tbsp light mayo
juice of 1 lemon
salt and pepper, to taste

Directions:
In a small bowl, combine the chicken, apple, craisins, green onion, and walnuts. Squeeze the lemon juice over the mayo and mix. Pour the dressing on to the chicken mixture and stir until coated. Season with salt and pepper, to taste.

Refrigerate until ready to use. Serve on your bread of choice.


*In my opinion

Monday, September 17, 2012

Summer Pasta Salad

I don't know why, but this year I'm so excited for fall. Maybe it's because I'm back in the Midwest and fall time in Michigan was always my favorite time of the year. I think I have high expectations for fall in central Illinois although I'm guessing it may not be quite as wonderful. There aren't really as many trees and it'll probably be mostly sowed corn fields everywhere. But, nothing beats the weather. I love mornings and evenings when you need a jacket to be outside, but days that warm under the sun. There is a slight breeze, but nothing close to the bone-chilling wind that the winter will inevitably bring. The humidity is almost non-existent.

It makes me want to pick apples, carve pumpkins and go for long walks.

Plus the cooking gets wonderful in the fall. Pumpkins and other fall squashes. Apples. Stews and rich soups. Roasted chicken. Turkey. Casseroles. And more.

But before we jump into fall, we have to celebrate the last few days/weeks of summer produce. Like this summer pasta salad that is full with perfect tomatoes and zucchini. It is a creamy pasta salad, but some of the heavy mayo is replaced with Greek yogurt. It keeps it light and refreshing.

So get out there and stock up on the end of summer produce before autumn completely takes over.


What are you looking forward to most as we change seasons?


Summer Pasta Salad (adapted from SkinnyTaste)
Ingredients:
1 cup mini shells (or other small pasta)
1 cups grape tomatoes, halved
1 small zucchini, sliced and quartered
1/2 small onion, chopped (about 1/4 cup)
3 tbsp light mayo
2 tbsp plain Greek yogurt
1 tbsp red wine vinegar
1/2 tsp dijon mustard
dash of oregano
dash of freshly ground black pepper
dash of garlic powder

Directions:
Cook the pasta according to package directions. Drain and rinse with cool water.

Combine the pasta with the tomatoes, zucchini and onion in a bowl.

In a small bowl, whisk together the rest of the ingredients. Pour onto the pasta and mix thoroughly to combine.

Chill for at least an hour. Serve cold.


Friday, September 14, 2012

Chicken and Tomato Stuffed Spaghetti Squash

Last night I ate popcorn, a yogurt and a spoonful of peanut butter for dinner. No, I'm not sharing that recipe for you. Because, of course, there really is no recipe.

Instead, I'm sharing with you a recipe from the night before


      that was totally delicious


            and I'm so glad I made it


                 and I kinda wish I would have had the motivation to make the second half last night because it  
                 was a square meal


                         certainly more than popcorn, yogurt, and peanut butter


                              and you should totally make it too


                                     then we could swap stories, over popcorn, about how much we loved this meal


                                             it would be a lot of fun


                                                     I promise.


For reallllzzz though, have you had spaghetti squash before? I don't think that you can really approach it as a substitute for pasta because it has a little different texture and flavor, but I do think that it is a great way to make a low carb dinner. This filling is perfect to add some flavor to squash; it is composed of chicken, tomatoes and green olives, plus a little bit of basil and topped off with feta cheese. The chicken, tomatoes and basil make it almost a marinara flavor and the green olives add the perfect amount of salt.

AND it is a fun meal because you get to eat it out of the squash shell.

SO FUN.

SO PRETTY.


Chicken and Tomato Stuffed Spaghetti Squash (adapted from Heat Oven to 350)
Ingredients:
1 cup diced grape tomatoes (or other tomatoes, could be canned)
1/3 cup diced green olives
10-12 basil leaves, chopped
1 large chicken breast, diced
1 tbsp extra virgin olive oil
1 spaghetti squash, cut in half and seeds removed
3-4 tbsp crumbled feta cheese
Freshly ground pepper, to taste

Directions:
Preheat broiler to high.

Place the two halves of the spaghetti squash cut side down in a microwavable container. Cover with plastic wrap and microwave on high for 5-7 minutes, until soft and tender.

Heat the oil in a skillet over medium heat. Add the chicken and season with black pepper. Cook until browned on all sides and until almost all the pink is gone, about 5 minutes. Add the tomatoes, olives and basil. Simmer on low until the chicken is cooked completely and the sauce thickens, approximately 5 minutes.

Flip the squash halves over and using a fork pull the flesh into thin stands, almost angel hair pasta-like. Make a small hole in the center of the squash and divide the filling between the two halves. Sprinkle the top with feta cheese and season with additional black pepper.

Broil until the cheese is golden brown, about 3 minutes.

Serves 2 (1/2 squash per person).


Wednesday, September 12, 2012

Corn and Roasted Tomato Risotto (a how to)

I'm not sure how much you have perused the website. Besides the (almost) daily recipes, there is a link to a page on right that takes you to my Recipe Archive. Use it to get back to those recipes you want to make most easily. I have them categorized by type of dish to help you sort through them.

---------------------------------------------------------------------

Additionally, awhile ago I added another page link on the right labeled My (Cooking) Bucket List. Here I started a list of the foods I would like to try my hand at sometime in the future. I'm hoping to continue this blog and add those recipes as I attempt them. Plus, the bucket list will likely grow as I find more desires in the kitchen.

This bucket list idea was partially inspired by my infatuation with competitive cooking shows-- in particular, MasterChef. I certainly do not have enough skill for shows such as Chopped and Next Food Network Star, but the home cook aspect of MasterChef makes it a potentially obtainable dream for me. However, on MasterChef there are certain types of cuisines and dishes that the contestants are expected to be able to make. Take, for example, a few weeks ago when the bottom two cooks were tasked with creating THREE souffles in one hour. Holy cow, talk about pressure. Not only are souffles technically challenging, but they needed to infuse the correct flavors and add a little bit of extra umpf to stand out. Before I would ever try out for the show (not saying I'm committing to season 4), there are some things that I need to give a once (or twice, or three times) over.

----------------------------------------------------------------------


The first thing I put on my bucket list (and that has been on my bucket list FOREVER) was risotto. From what I understand this dish is really a challenge and staple for cooks of all levels. Even on Chopped and NFNS, a bad risotto can send you packing. Many of the recipes out there are designed for making risotto for four and since I wasn't comfortable enough with the dish to adapt things right out of the gate, I turned to my trusty "Serve Yourself" cookbook. Of course, it has a risotto! And a perfect one for summer-- packed full of fresh corn and roasted tomatoes topped with fresh basil.

To tell you the truth, I had this recipe on my menu for 3-4 weeks in a row until I finally made it. I am usually pretty good at sticking to the menu plans for the week (since I've already bought the groceries and planned everything out), but this risotto was just overwhelming. Mostly, I think, because I would be exhausted at the end of a work day and just not ready for a labor intensive meal. So, I'd fall back on picking up Panera on the way home or whipping up a quick salad or grilled cheese and putting off the plan. But finally, on a Saturday night, I said, "Julie, you gotta bite the bullet and do it. It's going to be yummy and you won't know how much effort it actually takes until you make it." And so I did. With no regrets. It was delicious and not nearly as scary as I had imagined. Risotto can now be crossed off the bucket list, and certainly, I will be making more. Watch out, world (or kitchen)!


Maybe you are like me and you are intimidated by risotto. For that reason, I took some pictures along the way to guide you in your risotto making. Kind of a "how to". If you're an expert, skip ahead to the recipe at the bottom that is written like normal. And certainly, as always, feel free to double or quadruple the recipe to feed your whole family. :)


Also, please note that I followed Joe's suggestion of making corn broth. When I read this recipe in his book, I asked why I had never thought of to do this before. Especially since I'm now in the middle of corn country and I can buy 8 cobs for $1 sometimes! Of course, I can't eat 8 cobs before they go bad, so I typically cut the kernels off and freeze them for future use. I never once thought to do anything with the husks, silks and used cobs. Talk about wasteful. This broth is soooo easy and flavorful! You can use it as a substitute for vegetable or chicken broth or stock in just about everything. You not only avoid the high amount of sodium in the prepackaged kind (that's why I like to make chicken stock too), but it doesn't cost you a cent more than what you were paying for the corn anyway. Some people are so smart. I'm just piggy-backing off of them; feel free to jump on as well. ;)


Okay for real, I'm on to the recipe.


Talk about the longest post ever.


Thanks for sticking with me.

-----------------------------------------------------------------------------

First and foremost, prep your ingredients. Cut your onion and garlic, grate your cheese, and start your tomatoes roasting (sorry for the lack of photo, I wasn't committed to the how-to until after I started cooking).

Bring your corn broth to a simmer and cover.


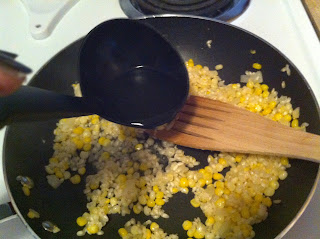
Heat the oil and add your onion and garlic. Cook until softened.


Add the corn and rice and stir until they are coated with oil.


Add the wine first, but then add the hot broth (1/4 cup at a time*), stirring constantly until all the liquid is absorbed. *I found that about using a ladle about half full was a good approximation for 1/4 cup.


Continue to cook until the rice reaches the desired consistency.


Lastly, stir in the tomatoes, followed by cheese and butter. Serve topped with the basil leaves and extra grated cheese.


Corn and Roasted Tomato Risotto (very slightly adapted from "Serve Yourself" cookbook)
Ingredients:
1/2 pint grape tomatoes
2 tbsp extra virgin olive oil
salt and pepper, to taste
1 to 1.5 cups corn broth (see below) or vegetable stock
2 tbsp coarsely chopped onion
1 garlic clove, chopped
kernels from 1 ear fresh corn
1/3 cup Arborio rice
1/4 cup dry white wine
2 tsp unsalted butter
2 tbsp freshly grated parmesan cheese
3 basil leaves, thinly sliced

Directions:
Preheat oven to 400 F.

Please the tomatoes on a baking sheet covered with aluminum foil. Toss with 1 tbsp oil and sprinkle with salt and pepper, to taste. Roast for 30 min, until the tomatoes are lightly browned and collapsed, turning halfway through.

Bring the corn broth to a simmer over medium heat in a small saucepan. Reduce the heat to low and cover.

Heat 1 tbsp oil in a small pan over medium heat. Add the onion and garlic and cook about 3-4 minutes until softened. Add the corn and rice and cook, stirring quickly, until the rice is well coated, about 1-2 minutes. Add the wine and cook, stirring frequently, until the liquid is almost gone, about 5 minutes. Add in 1/4 cup hot corn broth and repeat the cooking and stirring until the liquid is absorbed. Continue to add the broth (1/4 cup at a time) and stirring constantly until the rice has been cooking for about 20 minutes total. Taste the rice to make sure it is tender but still slightly firm. Add the tomatoes. Cook for 2-3 more minutes until the rice in tender, but not mushy, adding more liquid if necessary.

When the rice is cooked correctly, stir in the butter and cheese. Add salt and pepper as you like. Transfer to a bowl and top with the sliced basil and more freshly grated parmesan.


Homemade Corn Broth (from "Serve Yourself" Cookbook)
Ingredients:
4 ears of corn (including husks and silks and everything)
7 cups water

Directions:
Rinse the corn. Remove the husks and silks, discarding any browned or blackened spots. Cut into about 2-3 inch pieces.

Remove the kernels from the cobs. I like to stand the cob upright in a large bowl and slice from the top downward. It doesn't make as big of a mess in the kitchen. Cut the cobs into 2-3 inch pieces. Freeze the kernels if you are not going to use them immediately, for another use.

Add the cobs, husks and silks to a large stockpot. Cover with the water and bring to a boil. Reduce the heat to low and simmer, covered for about 1 hour. No need to stir or disturb.

Strain the broth into a large bowl. Squeeze the solids to remove as much liquid as possible. Use in place of vegetable broth/stock immediately or freeze for future use.



Tuesday, September 4, 2012

Italian Vegetable Stew

Ugh. My head is congested. My chest is congested. I slept for almost 48 of the 60 hours between Saturday night and Tuesday morning. It's crazy how you can sleep so much yet still be so tired. I guess that means your body is busy fighting off whatever disease you picked up from the fact that undergrads are back on campus. Don't worry that you have had like zero contact with them, it's just that they are back, bringing in their wake disease and destruction.

Okay, maybe it isn't their fault. But I'm blaming them nonetheless for my completely comatose state during this holiday weekend. I had grand plans of work plus rest and relaxation and updating a few recipes on the blog. Well, I got the rest, just not the relaxation nor the work. I sat on my couch watching episodes of Supernatural on Netflix, drinking Sprite Zero, and eating chicken noodle soup and mini-saltines. I didn't have the energy to open up my computer and come up with witty things about my recipes for y'all.

But before the sickness completely took me over (read, Saturday night at about 9:00 pm when I crawled into bed), I made this stew. I actually want to call it, clean-out-your-pantry-and-fridge-stew because that's totally what I did. I grabbed a half eaten eggplant, a 1/3 leftover zucchini, some mushrooms that wouldn't last another week, and a can of diced tomatoes. I mixed them all together with some seasonings and broth and let them simmer for about 4 hours on Saturday afternoon. I also threw in some browned Italian sausage because I felt like adding some meat to the mix, but that is totally optional, it would have been just as hearty without the meat. The stew turned out great, and it cleaned out my fridge. Which was totally a good idea when I was planning on grocery shopping for the week on Sunday, but in retrospec was a bad idea because now my fridge is practically empty and I didn't have the energy to plan out meals and go to the store.

At least I have leftovers. :)


Italian Vegetable Stew
Ingredients:
1/2 large eggplant, chopped
1/3-1/2 large zucchini, chopped
1 medium onion, chopped
5-6 baby portabello mushrooms, chopped
3 cloves garlic, minced
1 chipotle pepper in adobo sauce, minced, more or less depending on how spicy you want it to be
1 can petite diced tomatoes
1 1/2 cups low sodium chicken broth
1 cup water
1 tbsp chopped fresh basil
1/2 tbsp chopped fresh oregano
salt and freshly ground pepper, to taste
1/4 lb sweet Italian sausage, optional

Directions:
If using, brown the sausage in a small pan over medium heat, breaking up into smaller pieces. Cook for approximately 5-6 minutes until no longer pink.

Combine all the ingredients in a large pot and bring to a boil. Reduce the heat to low, cover, and simmer for 2-5 hours, until the vegetables are soft.

Serve hot with bread.

Serves 4-5.


Saturday, August 25, 2012

Sandwich Week- Day Six- Veggie BLT Pita Pockets

I feel like I'm cheating time.

Since last weekend I've been watching episodes of "24" on Netflix. The concept of the show is interesting (and addicting) because, as I'm sure you know, it follows the life of Jack Bauer for 24 hours. It is strange, however, that when you are watching it on Netflix you make it through the entire episode in about 40 minutes. Hence, the cheating time. :)


These pita pockets are delicious. What really makes them is the crispy squash and jalapenos. You could serve the vegetables by themselves with some ranch dipping sauce. However, adding them to the pita pocket to dress up a BLT works well too.

Making and eating this may allow you to kick butt and save lives like Jack Bauer.*


Crispy Pita BLTs (adapted from Taste of Home June/July 2012)
Ingredients:
1/3 cup light mayo
1 garlic clove, minced
1/2 tsp grated lemon zest
1/2 cup whole wheat flour
3/4 cup milk
1 cup panko bread crumbs
1 tsp chili powder
2 medium summer squash, cut into 1/4 in slices
2 jalapeno peppers, cut into 1/4 in slices, seeds removed
Cooking spray
4 pita pockets, halved
Romaine lettuce
Tomato slices
8 slices of bacon, cooked to your desired crispiness, halved

Directions:
Preheat oven to 475 F. Spray a baking sheet with cooking spray.

Combine the mayo, garlic and lemon zest in a small bowl; cover and chill until ready for serving.

Place the flour, milk and panko with chili powder in three separate shallow bowls. Dredge the squash and jalapeno in the flour, followed by the milk, and lastly the panko mixture. Place on the prepared baking sheet. Spray the top of the vegetables with additional cooking spray.

Bake for 12-14 minutes, flipping the veggies halfway through, until golden brown.

Assemble the sandwiches by spreading the mayo mixture on the inside of the pitas, filling with lettuce, tomato, bacon and breaded vegetables.

Serves 4.


*No guarantees. :)

Friday, August 24, 2012

Sandwich Week- Day Five- Italian Eggplant Grilled Cheese

In college, one of the most exciting days at our dining hall was grilled cheese and tomato soup lunch day. There's something about a hot, overly buttery, thickly sliced white bread sandwich filled gooey processed American cheese. A perfect compliment for piping hot tomato soup.

I make a lot of grilled cheeses at my house (no, I do not have any children). American cheese to go along with tomato soup. Pimento cheese BLTs. Roasted beets with pepper jack. And so many more. It's just something about that hot cheese goo-ing out during each bite. You can probably make just about anything into a grilled cheese.

Like earlier this week when I made this Italian Eggplant Grilled Cheese: eggplant, spinach, tomato and mozzarella cheese. Please forgive (or enjoy, depending on your taste) this eggplant kick I've been on lately. I can't help it when a beautiful eggplant is only a dollar at the farmer's market! If you wanted to adapt this sandwich for your meat-loving, eggplant-hating friends, just substitute in some Italian meat like prosciutto or pancetta or salami. Or I certainly won't judge you if you go for both eggplant and Italian meat ;)


Italian Eggplant Grilled Cheese
Ingredients:
2 pieces of sandwich bread (I used whole wheat)
3 slices of eggplant about 1/4 in thickness
3-4 thin slices of tomato
small handful of fresh spinach leaves
fresh mozzarella cheese slice

Directions:
Preheat a George Forman grill or grill pan.

Grill the eggplant slices until cooked, about 3-4 minutes (flip over halfway if using a grill pan).

Assemble the sandwich by arranging the cheese on one of the pieces of bread, layering with spinach, tomato and the grilled eggplant. Top with the other piece of bread. Grill the sandwich until the cheese is melted, approximately 3-4 minutes (flipping over halfway if using a grill pan).


Monday, August 20, 2012

Sandwich Week- Day One- Roasted Beet Grilled Cheese

Okay, I'm doing it. I'm doing a theme week on this here blog.


Sandwiches, sammies, clubs, grinders, heroes, hoagies, layered stuff between two pieces of something. Whatever you call them, everyone enjoys a sandwich. Breakfast, lunch, dinner, or dessert. Any meal can include a sandwich.

I like them because they are quick and easy. Plus they're an excuse to eat with your hands (I've never been a fancy lady). :) I don't think I enjoy them as much as the "Sandwich King", winner of the Next Food Network Star 2011, but I share his belief that they can be a meal any time of day.

So join me this week as I venture into the world of sandwiches!


To start out day 1, I'm bringing you a roasted beet grilled cheese. Remember when I told you that I have recently fallen in love with beets? Well, if you are going to turn on the oven to roast some beets, you might as well do a couple extra. They are perfect diced up into a salad or to step up a grilled cheese sandwich. This was delicious! I used some pepper jack cheese that I had in the fridge, but I would totally suggest mozzarella or gouda or havarti, all of which would be creamy and perfect.

This is a grown-up grilled cheese. Try it out!


Roasted Beet Grilled Cheese
Ingredients:
1 medium beet, roasted and cut into 1/4 in slices
1 oz pepper jack cheese (or desired cheese)
1 whole wheat ciabatta roll
1 tbsp butter

Directions:
Slice off the top and bottom of the ciabatta roll so you have a flat surface (eat the thin slices you take off or save to make croutons or breadcrumbs). Cut the roll in half. Spread 1/2 tbsp of butter on the outsides of both pieces of bread.

Heat a skillet over medium heat. Once hot, add one piece of bread, butter-side down to the pan. Layer on your cheese and beets. Top with the other piece of bread, butter-side up. Cook until the bottom of the bread is browned and the cheese is starting to melt, approximately 2-3 minutes. Flip over and brown the other side, approximately 2-3 minutes again.

Remove from the heat, cut, and demolish. (or at least that's what I did). 


Friday, August 17, 2012

Peach Pancakes

Pancakes, Farmer's Market Style.

You know what it takes to make pancakes, farmer's market style? 

A very, very small amount of effort. 

Pick up some fruit (peaches, as below, or blueberries or strawberries or raspberries or apples or cherries or etc.) from your farmer's market, get out your normal pancake supplies and get to cooking!

So ridiculously simple that you should probably do it tomorrow morning.

Do.

It.

Tomorrow.

Morning.


I totally love the Better Homes and Garden cookbook (I actually have TWO of them!) and I always turn to it for simple and reliable recipes. That's from where I pulled this base pancake recipe. I love it because it is so adaptable. Like for the incorporation of fruit (point and case below) or substitution with whole wheat flour. If I don't have buttermilk in the house, I simply mix up the sour milk described below. It works great. You need the sour milk or buttermilk in order to generate fluffy pancakes (it's chemistry!! an acid-base reaction that allow air to be incorporated into the batter).


Peach Pancakes (adapted from Better Homes and Garden Cookbook)
Ingredients:
1 3/4 cups all-purpose flour
2 tbsp sugar
2 tsp baking powder
1/2 tsp baking soda
dash of salt
1 egg, slightly beaten
1 1/2 cups milk + 1 1/2 tbsp white vinegar (or 1 1/2 cups of buttermilk)
2 tbsp canola oil
1 1/2 peaches, chopped finely
1-2 tbsp of butter, sliced into very small pats
1/2 peach, sliced, for garnish
Butter, syrup and/or powdered sugar, for serving

Directions:
Combine the milk and vinegar in a measuring cup and let stand at room temperature for 5 minutes. **This is an easy way to make homemade buttermilk, in case you don't want to make another trip to the store.**

Combine the flour, sugar, baking powder, baking soda and salt in large bowl.

Add the egg to milk mixture and stir with a fork. Add all of the wet mixture to the flour. Stir until just moistened. Add the chopped peaches and stir to combine.

Heat a griddle or heavy skillet over medium heat. Add one pat of butter and move the pan until the melted butter spreads over it. Using a ladle, add about 1/4 cup batter onto the skillet. Cook over medium for 1-2 minutes on each side until golden brown turning halfway through when the pancake has a bubbly surface. Repeat, adding butter pats between pancakes, cooking however many fit in your pan, until all the batter is used up. Keep warm in a low oven until ready to serve.

Garnish with extra peach slices, butter, syrup, and powdered sugar as desired.

Makes approximately 12 pancakes.


Monday, August 13, 2012

Zucchini Pasta

Imagine this--


You're sitting on your couch on a Sunday evening (after drinking way too much coffee), watching some Breakout Kings (very good show, I would recommend finding it on Netflix), relaxing and preparing for the start of a new week. All of a sudden you hear a loud crash to your left. You look over wondering what in the heck just happened. You sprint to your laundry room thinking that something fell or broke. But no, nothing is out of place. Next you look around your kitchen trying to find the source of the noise. You open up your pantry and the top two shelves have collapsed.

The next couple hours include trying to unload all of the food from the pantry while trying to hold up the shelves and not cause any of the bottom four shelves to break as well, making a trip to Lowe's to find replacement hangers for the wooden shelves (and not finding exact replacements but instead splurging for metal instead of plastic ones in hopes of making them more sturdy), trying to get the shelves to go back in because the metal brackets stick out from the holes more than the plastic ones, and finally putting all of your food back on the shelves.


What a night! I mean, aren't shelves in pantries supposed to support a half dozen types of flour, multiple kinds of pasta and every type of canned bean? Plus you need your tomato soup and chicken 'n stars in case you get sick. And all your cooking oils and vinegars and seasonings and everything. Cheap-o apartment building.

I think I'll put in metal shelves that are soldered to the sides of the pantry when I have my own house.


So if you ever get mad at the inanimate objects in your house when they fail to do their job, make this nice and summer-y "pasta". It'll help you calm down and remember that even though you may have spent the evening yelling at your apartment, you are lucky to have a place to store lots of food and the money to buy that food.

You know, it'll put things in perspective.


Zucchini Pasta (adapted from food.com)
Ingredients:
1 medium zucchini, sliced lengthwise into 1/8 in slices
2 cloves of garlic, minced
1/4 lb ground turkey
1 large tomato, chopped
1/4 cup chopped onion
1 tbsp extra virgin olive oil
1 bay leaf
1/4 tsp dried thyme
3 basil leaves, chopped
1/4 tsp sugar
salt and pepper, to taste
parmesan cheese, for garnish.

Directions:
Heat 1/2 tbsp oil over medium heat in a saucepan. Add the turkey and cook until browned, approximately 6-7 minutes. Add 1 clove of garlic, onion, tomato, bay leaf, basil and sugar. Cook, uncovered until moisture has evaporated, about 5 minutes. Season with salt and pepper. Remove the bay leaf.

In a skillet, heat the other 1/2 tbsp oil and garlic clove over medium heat. Add the zucchini strips and cook, stirring constantly, for about 3 minutes until the zucchini is tender and golden.

Serve the zucchini hot topped with the turkey mixture. Garnish with freshly grated parmesan cheese, if desired.


Sunday, August 12, 2012

Eggplant Manicotti

I love coffee. Coffee. Coffee. Coffee.

I may be on my second large cup of the day. I brewed it to sit out on my porch to do some reading and enjoy the beautiful cooler weather outside. It was glorious.

Grad school turned me into a coffee addict. I admit it. I'm addicted. I'm okay with drinking a cup everyday for the rest of my life. Don't judge me, okay?

Sometimes my coffee drinking goes a little overboard. Sometimes the caffeine affects me in funny ways. Like this one time when I was proctoring an organic chemistry exam and my boss had brought in coffee for the students. Most students didn't come down to the front to get it and as a results, my boss and I drank almost an entire jug of Dunkin' Donuts ourselves. Needless to say, back in lab later that afternoon, I had waaayyy too much energy. And when I have way too much energy, I can be kinda funny. Or at least people laugh at me. ;)

Coffee has nothing to do with this recipe. But I figured I'd tell you anyway.


This eggplant "manicotti" is great. The eggplant replaces pasta as the shell. If you want to cut time on making this dish, just pick up a jar of marinara from the store. But the homemade version below is very good. You can make it ahead of time, if you'd like.


Now please excuse me while I go make coffee #3.


Eggplant Manicotti (adapted from Now Eat This! Cookbook)
Ingredients:
1 large eggplant, cut into 1/6 in thick slices lengthwise
salt and pepper
cooking spray
1 cup of ricotta cheese (fat-free or low fat, preferred)
1/2 cup chopped fresh basil and oregano
1/2 cup grated parmesan cheese
1 1/2 cups marinara sauce (your favorite jarred or from recipe below)
1 cup shredded mozzarella cheese

Directions:
Preheat oven to 450 F.

Line baking sheet with parchment paper. Place the eggplant slices on the baking sheet. Season with salt and pepper and spray lightly with cooking spray. Roast eggplant until almost tender, about 20 minutes. Remove from oven and cool until you can handle it.

Combine the ricotta, 1/4 cup parmesan, basil and oregano in a medium bowl. Season with salt and pepper.

Spread 3/4 cup of marinara sauce in the bottom of a 8x10 baking dish.

Spoon 1/8 of the ricotta mixture on to each eggplant and roll up to encase the filling. Place the eggplant, seam side down, in the baking dish. Cover the eggplant with the remaining marinara. Sprinkle with the mozzarella and remaining parmesan cheese.

Bake until heated through, approximately 20 minutes.

Serves 4.


Easy Low-fat Marinara (adapted from Now Eat This! Cookbook)
Ingredients:
1/4 tbsp extra virgin olive oil
3 garlic cloves, minced
3/4 cup diced yellow onion
1 tsp crushed red pepper
28 oz can tomato puree
1/4 cup water
small piece of parmesan cheese rind
1/4 cup chopped fresh basil
1 tbsp chopped fresh oregano

Directions:
In a large saucepan, heat the oil over medium heat. Add the garlic, onion, salt and crushed red pepper. Cook, stirring occasionally, until the onion and garlic are translucent, approximately 5 minutes.

Add the tomato puree, water and cheese rind. Bring to a simmer, cover, reduce heat to low and cook for 25 minutes.

Chop the basil and oregano and stir into the sauce. Simmer, uncovered for 10 minutes. Season with salt and crushed red pepper to taste.

Makes approximately 3 cups.


Saturday, August 11, 2012

Beet and Brown Rice Sliders

Give me a second to explain before you automatically hit the little x in the corner of your screen. I know, I know, beets. You have this strong aversion to beets. But why? Have you actually ever had beets before or is your dislike due to stigma? Have you eaten beets that didn't come out of a can?

To tell you the truth, I had never tasted beets before 2012. When I moved, I told myself that I was going to expand my vegetable repertoire. A few on my list included beets, brussel sprouts, and various greens. The first time I made beets, I simply roasted them in the oven (375 F for 30-60 minutes depending on the size) until they were soft. I ate them as a side for some meal, because I was a little wary; however, I loved them! They have this sweet and earthy (aka tastes like the air smells after it rains) taste that is delicious. Ever since then, I've been trying to incorporate this gorgeous purple roots into main dishes. I have a few successes to share with you.

Let's start today with these beet and brown rice patties. I found this in the July 2012 Cooking Light Magazine in my parents house. I heavily adapted the recipe but followed the general idea. They were great. And the extras even heated up well. I roasted the beets the day before, peeled them when they cooled and then grated them after they spent the night in the fridge. I would definitely suggest that.

Come on. Give beets a chance! They may surprise you.


Beet and Brown Rice Sliders (heavily adapted from Cooking Light July 2012)
Ingredients:
1/2 cup cooked, shredded beet (about 1 medium)
1/2 cup cooked, cooled brown rice
1/4 cup panko breadcrumbs
1/2 tbsp dried parsley
1 tbsp finely chopped onion
dash each of salt and pepper
1 egg white
1 tbsp Dijon mustard
1 tbsp extra virgin olive oil
cooking spray
12 slices of whole wheat baguette
3 tbsp blue cheese crumbles (or other cheese of choice)

Directions:
Preheat oven to 450 F. Spray a baking sheet with cooking spray and allow it to warm in the oven.

Combine the beets, rice, panko, parsley, onion and salt and pepper in a bowl. Mix the egg white and mustard and then add to the bowl. Stir until well mixed. Form the mixture into 6 evenly sized small patties (be careful to press together, it may crumble slightly).

Heat the oil over medium heat in a large skillet. Add the patties and cook for approximately 2 minutes. Remove the patties, flipping to place the top side down on the preheated baking sheet.

Place the baguette slices on the baking pan with the patties and bake for approximately 10 minutes. Remove the sheet and place one patty on 6 of the baguette slices. Top with 1/2 tbsp of blue cheese crumbles. Bake for an additional 2 minutes until the blue cheese is hot.

Top each sandwich with another slice of the baguette and enjoy.

Makes 2-3 servings.