Showing posts with label sandwich. Show all posts

Tuesday, October 8, 2013

Cottage BELT

Let's talk about belts for a few minutes.


I purchased this one brown belt from the Buckle when I was in high school. Yeah, remember when you used to want to buy everything from the Buckle like their really expensive jeans and Doc Martens? Well, I bought this great brown belt. I wore it ALL THE TIME.


Then, of course I realized I needed a black belt, because we all know that one of the biggest fashion faux pas is a brown belt with black shoes or vice versa. So I bought a black belt from the Buckle for those intermittent times I wore black shoes. And there we go, a belt for every occasion.


As I have grown up (and definitely out of my Doc Martens, but not jeans, still L-O-V-E jeans), I have become a black-based outfit person. That means in the past 12 or 13 years since I invested in that black belt, I have worn it A LOT. It has worn holes... yes, multiple holes that have seen me through the shrinking and expanding stomach through the years. So imagine my disappointment when I realized that the belt was heading towards the end of its life. The stitching holding the buckle in place was about to give way forever. :(


I had to purchase a new belt. Nothing as great as my old one, but it'll get me through the days.


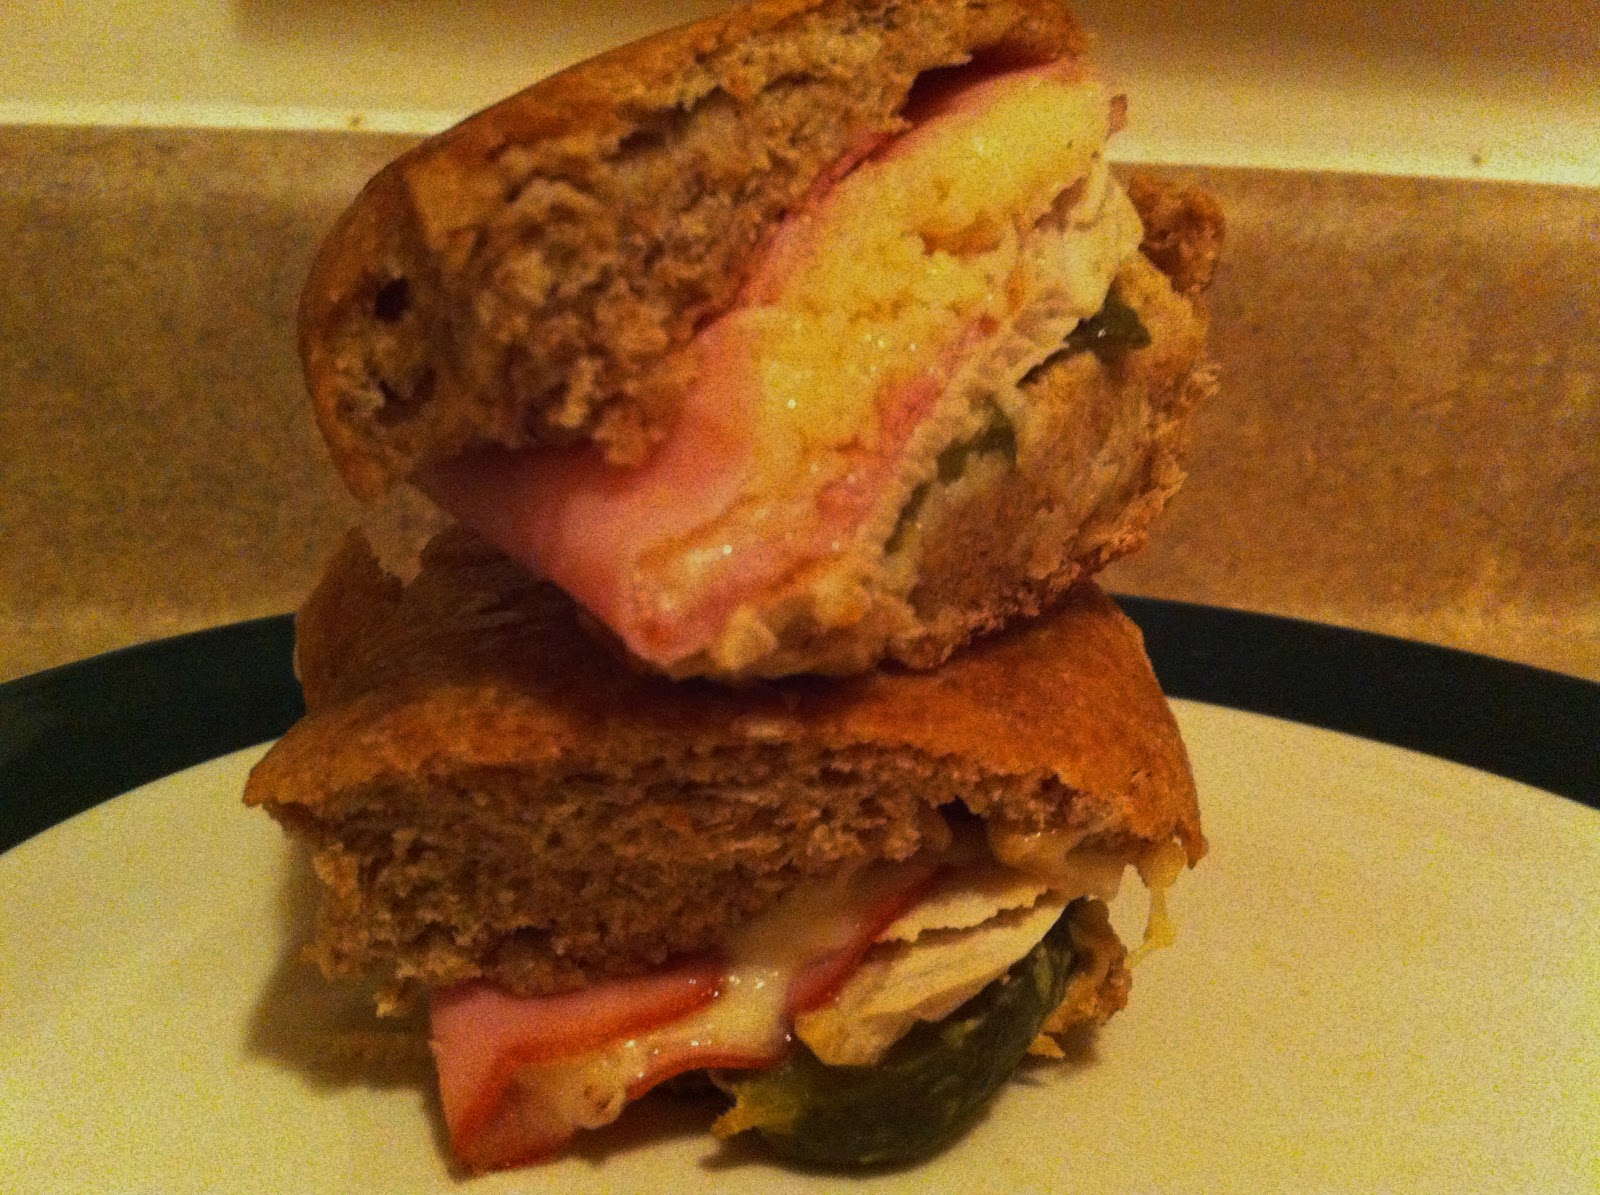
Now you want to know about the best belt? A Bacon, Egg, Lettuce and Tomato sandwich. Haha, you see what I did there? I know you probably don't need me to spell out how to make a BLT (with an egg), but I wanted to speak a little on this cottage bacon. I got it at the meat lab on campus. It is less fatty than typical bacon and mighty delicious. You should try it out.


Wear your belt and eat one too.


Did anyone else have a crazy sparkly belt when they were in high school?

Cottage BELT
Ingredients:
2 pieces cottage bacon, cooked to your desired crispness
1 egg, cooked over medium
1 large lettuce leaf, torn in half
1 thick slice tomato
1 english muffin, toasted
1/2 tbsp light miracle whip (or mayo)

Directions:
Spread the miracle whip on one of the muffin halves. Top with the lettuce, tomato, bacon and egg. Top with other half of muffin.


Sunday, September 1, 2013

Tempeh Greek Wrap

I remember my first experience with tofu on the college salad bar. It was this gross watery white sponge without texture and flavor. Needless to say, I did not enjoy it. But then I learned to love tofu. It is great when marinated and paired with bold flavors.

After I gained an appreciation for tofu, I wanted to venture out to other high protein soy products. The one on the top of my list was tempeh. Finally I have conquered that task.

Here is my take on tempeh--- first off, do not expect it to be anything like tofu. It is actually a hard pressed soybean product so the texture is completely different. You can actually see the soybeans! It is chewy and therefore holds up well for sandwiches. Like this Greek wrap. The flavor of the tempeh is lemony because that's what you cook it in. But paired with the salty feta and olives plus a tangy Greek yogurt spread and lots of fresh vegetables make this perfect for any summer lunch or quick dinner.

The verdict-- I like tempeh. I think I'll play around with it some more.


Tempeh Greek Wrap (adapted from Cooking Light)
Ingredients:
4 oz tempeh
1/2 tbsp olive oil
1/2 cup water
juice of 1 lemon
zest of 1/2 lemon
1/4 cup Greek yogurt
1 garlic clove, minced
2 tbsp chopped fresh chives
salt and freshly ground pepper
Diced tomatoes and cucumber
Spinach leaves
Sliced red onion
Crumbled feta cheese
Sliced olives
Tortilla or wraps (I like 100 calorie La Tortilla wheat wraps)

Directions:
Heat the oil in a medium skillet over medium high heat. Add the tempeh and cook for 2 minutes on each side to brown slightly. Reduce heat to medium and pour in the water and juice from 1/2 of the lemon. Simmer for 10 minutes, flipping halfway through. Remove from pan and slice into 6-8 pieces.

In a small bowl, combine the yogurt, the other half of lemon juice, lemon zest and chives. Mix thoroughly and season with salt and pepper, to taste.

Spread about 2 tbsp of the yogurt mixture on the wrap. Top with half of the tempeh. Add tomatoes, cucumber, spinach, onion, feta and olives. Roll up.

Makes enough for two wraps.


Wednesday, August 7, 2013

Pretzel Hot Dog Buns

Another bites the dust. And another one gone and another one gone. Another one bites the dust.


Check another one off that bucket list.

I made hot dog buns!

And to make them even yummier, I made pretzel hot dog buns! Holy moly you gotta get on this as soon as possible. Before summer is done and the barbecue is packed up. On second thought, these may be your excuse for hot dogs any time of the year. Or they'd make one hell of a hoagie today, tomorrow and every day from now on.


Pretzel Hot Dog Buns (adapted from Jeff Mauro on Food Network)
Ingredients:
1/2 cup milk
1/4 cup water
3 tbsp brown sugar
1 tbsp honey
1.5 tsp instant yeast
1 tbsp garlic olive oil (or 1 tbsp olive oil and 1 garlic clove minced)
1 1/2 cups all purpose flour
1/2 cup bread flour
1/4 cup baking soda
kosher salt

Directions:
Line a baking sheet with parchment paper.

Combine the milk, water, sugar and honey in a microwave safe measuring cup. Microwave for about 45 seconds until it reaches 105 F. Pour into the bowl of stand mixer and sprinkle with yeast. Let sit for 10-15 minutes until bubbly.

Add the oil and flour to the mixer. Mix on medium speed about 5-7 minutes until the dough is smooth and pulls away from the sides of the bowl.

Turn the dough out on floured surface and split into 4 equal pieces. Roll each into a ball and place on your baking sheet. Cover with a clean towel and let rest for 15 minutes. Roll each ball into a 7-inch log. Place back on the baking sheet. Cover again and let rest another 30 minutes.

Preheat oven to 425 F.

Bring a large pot of water to a boil. Add the baking soda. Add two buns at a time and boil for 30 seconds on each side. Repeat with the other two buns. Place them back on the baking sheet and immediately sprinkle with kosher salt. Cut slits across the top of the breat.

Bake 10-15 minutes until golden brown. Once cooled, slice down side and serve with hot dogs topped with mustard and pickles (or whatever you prefer).

Makes 4 hot dog buns.


Friday, June 21, 2013

Chicken Week- Day 4- Buffalo Chicken Salad

Let's be honest. Did you really think I could make it through a week of chicken without throwing in some buffalo sauce? Of course not! I know that I already posted the best chicken salad but this one is giving it a run for its money. Creamy buffalo and yogurt sauce with crunchy carrots and celery. Plus blue cheese.

Sign me up.

1 million times over.


Buffalo Chicken Salad
Ingredients:
1 cup diced cooked chicken
1 celery stalk, diced
4 baby carrots, thinly sliced
1 green onion, diced
1/8 cup blue cheese crumbles
1/2 cup plain Greek yogurt
1 1/2-2 tbsp buffalo sauce


Directions:
In a bowl, toss together the chicken, celery, carrots, green onion, and blue cheese. Mix together the yogurt and buffalo sauce in another bowl, then pour over the chicken mixture and stir together.

Serve as a sandwich or wrap with lettuce and tomato. Or serve on crackers or pita chips. Or eat with a spoon. No judgement here.


Wednesday, June 19, 2013

Chicken Week- Day 2- The Best Chicken Salad

I really meant to post everyday this week. That's part of the reason I decided to do another theme week. But yesterday afternoon I had to leave work because I was not feeling well. That meant I spent the remainder of the afternoon asleep on my couch before crashing for the night in my bed. That also meant that I didn't open up my computer to finish this post and tell you about "the best chicken salad". Sorry!


We've had the miracle whip vs mayonnaise discussion before. The last time I fell into the miracle whip category while I was enjoying my tuna salad. However, now we're talking chicken salad and I'm switching camps to mayonnaise. Like I always am with food, I appreciate it all. There is a time and a place for them all... aka the time and the place for Reeses pieces is whenever and where ever I can get my hands on them and the time and the place for Sprite Zero and saltines is when I'm sick and laying on my couch...

In order to make the best chicken salad, mayonnaise is essential. Plus you need a tart apple and some walnuts for texture. And dried cranberries to sweeten it. A little bit of lemon juice and salt and pepper and we are rocking. It is best served on a croissant but unfortunately I couldn't find any in my grocery store's baked good section so I went with a whole wheat ciabatta roll. The recipe below is for about 1 serving; you can definitely double it or quadruple it to make enough for the family. Because of the apple and my desire to not eat soggy walnuts, I suggest making it fresh on the day you are going to serve it. The leftovers are okay but definitely not the best anymore.


The Best Chicken Salad*
Ingredients:
1/2 cup diced cooked chicken
1/3 granny smith apple, diced
2 tbsp craisins
1 tbsp diced green onion
1 tbsp chopped walnuts
1 1/2 tbsp light mayo
juice of 1 lemon
salt and pepper, to taste

Directions:
In a small bowl, combine the chicken, apple, craisins, green onion, and walnuts. Squeeze the lemon juice over the mayo and mix. Pour the dressing on to the chicken mixture and stir until coated. Season with salt and pepper, to taste.

Refrigerate until ready to use. Serve on your bread of choice.


*In my opinion

Tuesday, May 28, 2013

Smashed Chickpea Sandwich

Am I right that cleaning kitchen appliances is the worst thing about cooking? Especially the food processor and blender which have so many parts where little pieces of food can get stuck requiring you to scrub, rinse, scrub, rinse, repeat until finally clean.

Let's say you were craving the taste of hummus but didn't want the extra effort of cleaning your food processor. Then a smashed chickpea sammy is perfect for you! Totally adaptable like hummus itself to whichever flavors you are in the mood for, but only necessitating a fork and bowl to prep. This time I used some fresh veggies, a little bit of lemon juice and thyme. This little sandwich is great for lunch or even as a light summer dinner. Try it out (and let me know what other flavors you come up with!).


Smashed Chickpea Sandwich (inspired by Smitten Kitchen)
Ingredients:
1/2 cup chickpeas (cooked, rinsed if from can)
1/4 cup shredded carrots
1/4 cup finely diced cucumbers
1 tbsp minced red onion
juice of 1/2 lemon
1/2 tsp fresh thyme
1/2 tbsp extra virgin olive oil

salt and pepper, to taste
hamburger bun, toasted
2 green leaf lettuce leaves

Directions:
Mix the chickpeas, carrots, cucumbers, onion, lemon juice and thyme in a bowl. Use a potato masher or fork to smash everything together. Add the olive oil and mix to combine. Taste and season with salt and pepper as desired.

Serve atop toasted hamburger buns with lettuce leaves. Open face is the way to go!


Monday, February 4, 2013

Grilled Balsamic Veggies and Hummus Wrap

The Baltimore Ravens won the Super Bowl last night. Holla!

And now here I sit wishing I had a great crab-based recipe to share with you in their honor. Unfortunately I have a number of options on that bucket list that have just not been accomplished. Here's my short term goal-- put a crab recipe on the schedule in the next few weeks, perfect it, and share it with you (probably won't happen this week because menu planning was this weekend). I'm counting on all of you to hold me to it!


Instead of Baltimore-inspired food, I'm sharing with you today a recipe to use of some of your leftover hummus from your Super Bowl party... if you have any left. If you don't, just make up another batch. Or purchase a tub from the grocery store. I don't know--- just make this happen. It is so quick and easy and perfect for lunch or dinner. If you aren't a big portobello mushroom fan, you could substitute some other vegetable like zucchini or eggplant.


You could skip the last step of shallow frying in the pan if you wanted to avoid extra oil or if you wanted it to be a cold sandwich, but I think the crunch of the browned wrap really makes it great. Plus your hummus is hot and creamy.


Grilled Balsamic Veggies and Hummus Wrap
Ingredients (for one wrap):
1 portobello mushroom, sliced
1/2 cup sliced peppers (mini sweet or bell work well)
1 slice red onion, cut in half and pulled apart
1 tbsp balsamic vinegar
1 tbsp extra-virgin olive oil
salt and pepper
2 tbsp hummus (homemade or storebought, flavor of choice)
10 inch tortilla or wrap (I used a 100 calorie whole wheat wrap)

Directions:
Place the sliced mushrooms, peppers and onions in a bowl. Drizzle with vinegar and oil, season with salt and pepper and toss to coat completely. Marinate in fridge for 15-30 minutes.

Preheat George Foreman Grill or grill pan. Place the vegetables on the grill and cook for approximately 5-7 minutes until hot through.

Warm the wrap in the microwave for 30 seconds to make it pliable. Spread the hummus on the wrap. Top with the grilled vegetables. Fold in sides and roll up.

Heat 1/2 tbsp olive oil over medium high heat in a pan. Place the wrap seam side down in the hot pan. Cook for 2-3 minutes until browned. Flip and cook for another 2-3 minutes until browned.


Monday, December 3, 2012

Turkey Cubano

Can I get a "holla" for the Blue Express on Duke's campus?

For those of you who cannot understand the words coming out of my mouth (or should I say the words I have typed on your screen), you are missing out. Well, kinda. Campus food can be hit or miss, right? Connected to the building where I spent many of my waking hours during grad school hidden in a basement lab was the Blue Express, one the campus's dining establishments. Every day of the week (and every week was the same) they had a sandwich special. My first year I liked the Wednesday schwarma. Then I learned to enjoy the Thursday gyro or the Tuesday portabello on pita. But the sandwich that defined the end of my graduate career was definitely the Friday cubano. Grilled to perfection and seasoned with dill pickles, mustard and mayo, the ham and pork sammy was the goodness of Friday lunch. I was typically (and still am) a "bring your lunch to work" gal, but when I didn't have a lunch for Friday this was certainly the go-to.

Anywho... this recipe is the Blue Express cubano re-purposed in IL and with ingredients I found in my fridge last week... I used left over turkey from Thanksgiving in place of the pork, went for shredded swiss, and a wheat baguette from my freezer.

Really it's the combo of the mustard and pickle that just makes the sandwich for me.

No, Julie, you should not eat a dill pickle dunked in mustard; that would be bad.


Turkey Cubano
Ingredients:
2-3 slices leftover roasted turkey
2 slices deli ham
1 thinly sliced pickle
1 tsp deli mustard
1 oz swiss cheese (shredded or sliced)
6 inch baguette (I used my homemade wheat baguette), sliced in half

Directions:
Preheat oven, or toaster oven, to 400 F.

Spread the mustard on one side of the baguette. Top with the pickle, turkey, ham and cheese. Wrap with aluminum foil. Bake for 15 minutes, until the cheese is melted.

Heat a large skillet (or panini press) to hot. Unwrap the sandwich and add to the hot pan. Press down with another large pan (or the top of the press) and cook for 2-3 minutes. Cut in half before serving.


Friday, November 16, 2012

Wheat Potato Bread

I've gotten into this habit of making breads on the weekends. This is certainly not a bad habit. It's actually a great habit. My house smells of baking bread and I get to enjoy fresh from the oven, soft and chewy bread on a weekly basis. Apparently this week is extra bread-y because this is my second yeast recipe (see baguettes); I didn't actually make them in the same weekend. Just getting to posting them both now...


ANYWHO... One of my goals after starting my postdoc was to experiment with yeast a little more (outside of lab, I'm not working with yeast in lab). I would say that is a goal that I've been sticking with... it keeps me away from campus at least one day a week and experimenting in the kitchen.


I wanted to make potato bread because for some reason, completely forgotten to me now, I bought one of those boxes of instant potato flakes. I know it was for some recipe because I think instant potatoes by themselves taste like wet cardboard, but somehow they got shoved to the back of my pantry and I didn't end up making my planned dish (whatever it was). In trying to find new things to do with this box o' flakes, I came across this potato bread recipe that used either leftover mashed potatoes or instant potatoes. Obvi I went with the instant ones. I decided to sub in some whole wheat flour for some of the all purpose.

The potato bread was good and worked for sandwiches and toast, however it doesn't quite have the feel of normal sandwich bread. It is a little more dense and flaky bordering on a quick bread. But I still enjoyed it.

I can't wait to experiment more with yeast. Come along on the journey with me :)


Wheat Potato Bread (adapted from The Frugal Girl)
Ingredients:
3/4 cup warm water
1 package active dry yeast
1/2 cup mashed potatoes (rehydrated instant flakes as described on box, or leftovers)
1 tbsp sugar
1 tbsp canola oil
1/2 tbsp salt
1 1/2 cup whole wheat flour
1 - 1 1/2 cups all purpose flour

Directions:
Combine the warm water and yeast in a bowl and let sit for a few minutes until foamy. Stir in the potatoes, sugar, oil and salt. Stir in the whole wheat flour and enough of the all purpose flour to make a sticky dough. Turn out onto a floured surface and knead for 7-8 minutes, adding more all purpose flour as needed, until the dough is smooth.

Place the dough in a large lightly oiled bowl, cover with a towel and allow to rise 1 hour. Punch down the dough and roll out into a large rectangle about 8 inch by


Monday, October 8, 2012

Bacon Guac Grilled Cheese

Travel is exhausting.

I went to NC for Scott's bday (Happy last year in your twenties, old man!) this weekend. I was supposed to be back on Sunday at 8:30 pm. I got back today (Monday) at 2:45 pm.

I had to come into work to get a few things accomplished since I was not planning on another vacation day and I had things to do. Now I'm sleepy and planning something quick and easy for dinner. I wish I had half of an avocado, some bacon, salsa and cheese in my apartment; I would totally make this sandwich again. It is gooey, flavorful and so tasty.

Instead I'll just stare at the picture on my computer screen, drool over my keyboard and lust for my taste buds to eat this again one day soon.


Bacon Guacamole Grilled Cheese
Ingredients:
1/2 avocado
2-3 tbsp salsa (homemade or store bought)
4 slices roma tomato
handful shredded colby jack cheese
2 slices bacon
2 slices your favorite sandwich bread
1/2 tbsp spreadable butter

Directions:
Cook the bacon in your microwave to your desired crispness. For me it takes about 3 minutes total, turning over after the first 2.

In a small bowl, mash the avocado with a fork. Stir in the salsa. **This is essentially a quick and easy guac. Feel free to substitute if you have another homemade guac.

Spread 1/4 tbsp butter on one side of each piece of bread. Spread the guacamole on the opposite side of one piece of bread. Top with the tomato slices, shredded cheese and bacon pieces. Top with the other piece of bread.

Heat a non-stick pan coated with cooking spray over medium-high heat until hot. Place the sandwich butter side down on the hot pan. Cook for about 2 minutes until the bottom is browned. Carefully flip over and brown the other side, about 2-3 minutes, until browned and the cheese is melted.


Saturday, August 25, 2012

Sandwich Week- Day Six- Veggie BLT Pita Pockets

I feel like I'm cheating time.

Since last weekend I've been watching episodes of "24" on Netflix. The concept of the show is interesting (and addicting) because, as I'm sure you know, it follows the life of Jack Bauer for 24 hours. It is strange, however, that when you are watching it on Netflix you make it through the entire episode in about 40 minutes. Hence, the cheating time. :)


These pita pockets are delicious. What really makes them is the crispy squash and jalapenos. You could serve the vegetables by themselves with some ranch dipping sauce. However, adding them to the pita pocket to dress up a BLT works well too.

Making and eating this may allow you to kick butt and save lives like Jack Bauer.*


Crispy Pita BLTs (adapted from Taste of Home June/July 2012)
Ingredients:
1/3 cup light mayo
1 garlic clove, minced
1/2 tsp grated lemon zest
1/2 cup whole wheat flour
3/4 cup milk
1 cup panko bread crumbs
1 tsp chili powder
2 medium summer squash, cut into 1/4 in slices
2 jalapeno peppers, cut into 1/4 in slices, seeds removed
Cooking spray
4 pita pockets, halved
Romaine lettuce
Tomato slices
8 slices of bacon, cooked to your desired crispiness, halved

Directions:
Preheat oven to 475 F. Spray a baking sheet with cooking spray.

Combine the mayo, garlic and lemon zest in a small bowl; cover and chill until ready for serving.

Place the flour, milk and panko with chili powder in three separate shallow bowls. Dredge the squash and jalapeno in the flour, followed by the milk, and lastly the panko mixture. Place on the prepared baking sheet. Spray the top of the vegetables with additional cooking spray.

Bake for 12-14 minutes, flipping the veggies halfway through, until golden brown.

Assemble the sandwiches by spreading the mayo mixture on the inside of the pitas, filling with lettuce, tomato, bacon and breaded vegetables.

Serves 4.


*No guarantees. :)

Friday, August 24, 2012

Sandwich Week- Day Five- Italian Eggplant Grilled Cheese

In college, one of the most exciting days at our dining hall was grilled cheese and tomato soup lunch day. There's something about a hot, overly buttery, thickly sliced white bread sandwich filled gooey processed American cheese. A perfect compliment for piping hot tomato soup.

I make a lot of grilled cheeses at my house (no, I do not have any children). American cheese to go along with tomato soup. Pimento cheese BLTs. Roasted beets with pepper jack. And so many more. It's just something about that hot cheese goo-ing out during each bite. You can probably make just about anything into a grilled cheese.

Like earlier this week when I made this Italian Eggplant Grilled Cheese: eggplant, spinach, tomato and mozzarella cheese. Please forgive (or enjoy, depending on your taste) this eggplant kick I've been on lately. I can't help it when a beautiful eggplant is only a dollar at the farmer's market! If you wanted to adapt this sandwich for your meat-loving, eggplant-hating friends, just substitute in some Italian meat like prosciutto or pancetta or salami. Or I certainly won't judge you if you go for both eggplant and Italian meat ;)


Italian Eggplant Grilled Cheese
Ingredients:
2 pieces of sandwich bread (I used whole wheat)
3 slices of eggplant about 1/4 in thickness
3-4 thin slices of tomato
small handful of fresh spinach leaves
fresh mozzarella cheese slice

Directions:
Preheat a George Forman grill or grill pan.

Grill the eggplant slices until cooked, about 3-4 minutes (flip over halfway if using a grill pan).

Assemble the sandwich by arranging the cheese on one of the pieces of bread, layering with spinach, tomato and the grilled eggplant. Top with the other piece of bread. Grill the sandwich until the cheese is melted, approximately 3-4 minutes (flipping over halfway if using a grill pan).


Tuesday, August 21, 2012

Sandwich Week- Day Two- Roast Beef Horseradish Sandwich

According to Rachael Ray, this is "the absolute best roast beef sandwich".

Although, I suppose I changed it up a little bit, so maybe it isn't the "absolute best" anymore. But in my professional opinion, it is pretty darn good. The horseradish sauce really makes this sammy. The horseradish plus the roast beef topped with a little bit of spinach makes it quite delicious. I think you could add some sharp cheddar cheese to round out the flavors completely; although, it certainly doesn't need it.

If you have some leftover steak, you could slice it really thin and sub it for the roast beef. You'll just be thanking me (and Rachael) for the sauce!

Oh, and as a tip, chop your fresh chives (hopefully from your little indoor herb garden that is somehow flourishing this year) using kitchen shears. A little bit of time-saver, plus you can cut them right into your bowl and avoid having to scrape them off a wet cutting board. :)


Roast Beef Horseradish Sandwich (adapted from Everyday with Rachael Ray, December 2010)
Ingredients:
For Horseradish Sauce (makes enough for 3-4 sandwiches):
1/2 cup low-fat sour cream (or Greek yogurt)
1 tbsp prepared horseradish
2 tbsp unsweetened all-natural applesauce
2 tbsp panko breadcrumbs (or regular breadcrumbs)
2 tbsp finely chopped fresh chives
salt and pepper, to taste

For Assembly (per sandwich):
1 wheat ciabatta roll, cut in half (or other desired crusty bread)
4 slices of thinly sliced deli roast beef
1 tbsp minced onion
1 tbsp chopped parsley
Handful of spinach leaves

Directions:
Combine all the horseradish sauce ingredients. Keep in fridge until ready to use.

Heat the roll in a toaster oven (or regular oven) at 350 F for about 3-4 minutes until warmed and slightly browned. 

Assemble the sandwich by first spreading a liberal amount of the sauce on half of the roll. Arrange the roast beef, onion, parsley and spinach on the roll. Top with the other half of bread.


Monday, August 20, 2012

Sandwich Week- Day One- Roasted Beet Grilled Cheese

Okay, I'm doing it. I'm doing a theme week on this here blog.


Sandwiches, sammies, clubs, grinders, heroes, hoagies, layered stuff between two pieces of something. Whatever you call them, everyone enjoys a sandwich. Breakfast, lunch, dinner, or dessert. Any meal can include a sandwich.

I like them because they are quick and easy. Plus they're an excuse to eat with your hands (I've never been a fancy lady). :) I don't think I enjoy them as much as the "Sandwich King", winner of the Next Food Network Star 2011, but I share his belief that they can be a meal any time of day.

So join me this week as I venture into the world of sandwiches!


To start out day 1, I'm bringing you a roasted beet grilled cheese. Remember when I told you that I have recently fallen in love with beets? Well, if you are going to turn on the oven to roast some beets, you might as well do a couple extra. They are perfect diced up into a salad or to step up a grilled cheese sandwich. This was delicious! I used some pepper jack cheese that I had in the fridge, but I would totally suggest mozzarella or gouda or havarti, all of which would be creamy and perfect.

This is a grown-up grilled cheese. Try it out!


Roasted Beet Grilled Cheese
Ingredients:
1 medium beet, roasted and cut into 1/4 in slices
1 oz pepper jack cheese (or desired cheese)
1 whole wheat ciabatta roll
1 tbsp butter

Directions:
Slice off the top and bottom of the ciabatta roll so you have a flat surface (eat the thin slices you take off or save to make croutons or breadcrumbs). Cut the roll in half. Spread 1/2 tbsp of butter on the outsides of both pieces of bread.

Heat a skillet over medium heat. Once hot, add one piece of bread, butter-side down to the pan. Layer on your cheese and beets. Top with the other piece of bread, butter-side up. Cook until the bottom of the bread is browned and the cheese is starting to melt, approximately 2-3 minutes. Flip over and brown the other side, approximately 2-3 minutes again.

Remove from the heat, cut, and demolish. (or at least that's what I did). 


Saturday, August 11, 2012

Beet and Brown Rice Sliders

Give me a second to explain before you automatically hit the little x in the corner of your screen. I know, I know, beets. You have this strong aversion to beets. But why? Have you actually ever had beets before or is your dislike due to stigma? Have you eaten beets that didn't come out of a can?

To tell you the truth, I had never tasted beets before 2012. When I moved, I told myself that I was going to expand my vegetable repertoire. A few on my list included beets, brussel sprouts, and various greens. The first time I made beets, I simply roasted them in the oven (375 F for 30-60 minutes depending on the size) until they were soft. I ate them as a side for some meal, because I was a little wary; however, I loved them! They have this sweet and earthy (aka tastes like the air smells after it rains) taste that is delicious. Ever since then, I've been trying to incorporate this gorgeous purple roots into main dishes. I have a few successes to share with you.

Let's start today with these beet and brown rice patties. I found this in the July 2012 Cooking Light Magazine in my parents house. I heavily adapted the recipe but followed the general idea. They were great. And the extras even heated up well. I roasted the beets the day before, peeled them when they cooled and then grated them after they spent the night in the fridge. I would definitely suggest that.

Come on. Give beets a chance! They may surprise you.


Beet and Brown Rice Sliders (heavily adapted from Cooking Light July 2012)
Ingredients:
1/2 cup cooked, shredded beet (about 1 medium)
1/2 cup cooked, cooled brown rice
1/4 cup panko breadcrumbs
1/2 tbsp dried parsley
1 tbsp finely chopped onion
dash each of salt and pepper
1 egg white
1 tbsp Dijon mustard
1 tbsp extra virgin olive oil
cooking spray
12 slices of whole wheat baguette
3 tbsp blue cheese crumbles (or other cheese of choice)

Directions:
Preheat oven to 450 F. Spray a baking sheet with cooking spray and allow it to warm in the oven.

Combine the beets, rice, panko, parsley, onion and salt and pepper in a bowl. Mix the egg white and mustard and then add to the bowl. Stir until well mixed. Form the mixture into 6 evenly sized small patties (be careful to press together, it may crumble slightly).

Heat the oil over medium heat in a large skillet. Add the patties and cook for approximately 2 minutes. Remove the patties, flipping to place the top side down on the preheated baking sheet.

Place the baguette slices on the baking pan with the patties and bake for approximately 10 minutes. Remove the sheet and place one patty on 6 of the baguette slices. Top with 1/2 tbsp of blue cheese crumbles. Bake for an additional 2 minutes until the blue cheese is hot.

Top each sandwich with another slice of the baguette and enjoy.

Makes 2-3 servings.


Tuesday, July 3, 2012

Bacon, Fried Green Tomato and Pimento Cheese Sammy

During my first year of grad school, our go-to bar was this great place, Tyler's Taproom. It has pool, a few televisions, foosball, and best of all, A LOT of beer choices. There is a wall (actually two) that is full of taps as well as lots of assorted bottles. They have lots of seasonal and unique flavor profiles. Unfortunately, the food at Tyler's was only okay; they had a few good burgers, but it really wasn't even that good. After awhile, we stopped frequenting Tyler's and would only go for birthday or defense celebrations. Imagine my surprise when in my last year of grad school, I discovered that they had revamped their menu significantly. They added a number of new and interesting sandwiches and entrees. One of them representing the south in every bite- a pimento cheese and fried green tomato BLT. This weekend I set out to curb my craving for this sandwich (unfortunately I couldn't make the trip to Durham), by recreating it in my kitchen. 

In my opinion, a great sandwich should be gooey, messy and above all, delicious. This will not disappoint. Let me introduce you to the players for our sandwich today:


The bread is the vehicle for all the goodness. This seeded sourdough bread I got from a local bakery was perfect as the base. Next, you need crispy bacon- none of that flimsy, greasy stuff (what do you think this is? an all-night diner?). And, of course, the stars of the show, the pimento cheese and the fried green tomatoes. 

I'm going to assume you know how to pick up some bread from the store (or make it yourself) and microwave/bake yourself some super crunchy bacon. I'll focus here on the recipes for the pimento cheese and the FGT. 

I lightened the pimento cheese by subbing Greek yogurt for some of the mayo. It is so yummy that I won't judge you if you eat it on top of some celery or mini bell peppers (side note: I'm obsessed with those mini bell peppers right now. Perfect for salads or perfectly snackable!).

The FGT are really baked green tomatoes, but that just sounds silly. The green tomatoes are sour and complement the cheese and bacon perfectly. The crust was crunchy and not too heavy. I ate one by itself and I think I would have preferred to dunk it in some ranch. I think these work great for a sammy but I'm not sure I would recommend eating them without additional flavoring. You could certainly step up the breading with some chili powder or cumin or even some shredded parm if you wanted to play around with FGT in order to eat them plain.

On to the good stuff. Doesn't that just look AMAZING?!?! 


If you're going all out Tyler's style, serve them alongside some good and garlicky french fries as I did. And don't plan on kissing anyone right after dinner. ;)


Pimento Cheese (adapted from Rachael Ray Magazine July 2012)
Ingredients:
1 1/2 cup shredded sharp cheddar cheese
1 tbsp diced onion
1 1/2 tbsp light mayo
1 1/2 tbsp Greek yogurt
2 tbsp chopped pimentos
1 tsp cider vinegar
1/2 tsp paprika

Directions:
Add all ingredients to a bowl and mix until combined completely. Chill until ready to serve.


Baked "Fried" Green Tomatoes (adapted from A Veggie Adventure)
Ingredients:
1/8 cup wheat flour
1/8 cup yellow cornmeal
1/2 tsp kosher salt
1/4 tsp black pepper
1/2 tsp sugar
1/4 tsp paprika
1/2 cup buttermilk
1 large green tomato, core removed and cut into 1/3 slices

Directions:
Preheat oven to 400 F. Place a baking sheet in the oven as it is heating to get it hot.

Stir together the flour, cornmeal, salt, pepper, sugar and paprika in a shallow bowl. Add the buttermilk to a different shallow bowl.

Remove the baking sheet and spray with cooking spray. Working quickly, dip each tomato slice into the buttermilk and then into the breading, shaking off excess. Arrange on baking sheet.

Bake for 30 min, flipping once at the halfway point.


Bacon, FGT, and Pimento Grilled Cheese (Inspired by Tyler's Taproom)
Ingredients:
1/3 cup pimento cheese (see above)
2 slices FGT (see above)
2 slices of good quality sourdough (or other bread of choice)
3 slices of crispy cooked bacon
~1/2 tbsp butter or margarine

Directions:
Heat a frying pan on medium heat.

Spread approximately 1/4 tbsp of butter on one side of each piece of bread. On the opposite side of one piece of bread, spread the pimento cheese. Stack on the FGT and then the bacon. Top with the other piece of bread, butter side out.

Add the sandwich to the heated pan, butter side down (put the slice with the pimento cheese on it as the bottom piece), cover sandwich with a lid, and cook until browned, approximately 2 min. Carefully flip over and cook the other side until browned, approximately 2 min.

Remove from the heat and consume! :)

Monday, June 11, 2012

Avocado Egg Salad

This one's for you, Mom.


Do you have those certain meals that you always eat the same sides with?

Like pork chops, applesauce and macaroni and cheese? Or lasagna, garlic bread and salad with Italian dressing? Or meatballs, mashed potatoes and green beans? Those are just a few that we had in my house growing up. Even to this day, I have trouble eating certain main dishes without the sides that I have been trained to eat alongside them.

So, this weekend when I decided to finally try my hand at the avocado egg salad from Skinnytaste that has been sweeping the Pinterest and blogging communities, I knew I was missing something. You see, whenever my mom makes egg salad (which at her house, and typically at mine, consists of hard boiled eggs chopped and mixed with light Miracle Whip, no mayo), she ALWAYS has barbecue potato chips. Now, I don't normally keep chips in my house this days (because I'll eat them all since I have no self control when it comes to food), so I decided to try my hand at making some homemade bbq potato chips. I cut the potatoes really thin with my mandolin, then brushed them with some bbq sauce mixed with a little salt. I baked them until they got crispy. I must admit that they were pretty good, but that the bbq flavor was not quite as good as a bag of Lays. I need to come up with a spice mix to toss with the chips as opposed to the sauce... that would be better, I think. I'll keep you posted. As for the egg salad, I adapted the recipe slightly to adjust for size and flavor preferences. If you like avocado, I would definitely suggest making this. Although, I won't be removing the old faithful Miracle Whip egg salad from the rotation quite yet.


Avocado Egg Salad (adapted from Skinnytaste)
Ingredients:
2 hard boiled eggs, chopped
1/2 avocado, chopped
1 tbsp light mayo
1 tsp red wine vinegar
salt and pepper, to taste

Directions:
Combine the avocado, mayo and vinegar and mash with a fork until smooth. Add the eggs and mix to combine. Season with salt and pepper.

Baked Barbecue Potato Chips
Ingredients:
1 medium potato, sliced very thinly
2 tbsp barbecue sauce
1/4 cup water
1/2 tsp salt

Directions:
Preheat oven to 450 F.

Spread the potato slices on a baking sheet.

Mix the barbecue sauce, water and salt in a small bowl until the salt dissolves completely. Brush on both sides of the potato slices.

Bake for approximately 20 minutes, flipping over halfway through. When you pull the potatoes out they should be slightly crispy, but they will become crispier as they sit out of the oven. If they are not crispy after 2 minutes out of oven, bake for longer. Watch closely because the cooking time really depends on the size of your potato slices.

Serve egg salad as a sandwich, wrap or whatever you desire with potato chips on the side.


Oh and don't forget a pickle. We always have a pickle with this meal as well.


Wednesday, May 23, 2012

Beans, Beans


The magical fruit.


I would say that black beans are typically my go-to bean of choice. They are perfect for burritos, burgers, nachos or as a side. Sometimes I enjoy chickpeas (in the form of hummus, in particular) and pinto beans (in chili, of course). Recently, I’ve been trying to expand my bean repertoire. 

Meijer was having a sale on canned beans and I decided to pick up a can of butter beans. I had never had them before, but I figured I could make bean burgers with them and see how I felt. So, for those of you who are new, like me, to the butter bean world, these beans are HUGE! I mean like 3 times as large as a “normal” bean. They aren’t really round and puffy like a “normal” bean either- they are pretty flat. From my extensive google-ing (ok, I just looked on Wikipedia), butter beans are another form of lima beans. But they aren’t green; they are off white in color similar to a Northern bean. 

Anyway, that’s really all beside the point. The most important question is, what do they taste like? They definitely taste good but are not strongly flavored one way or another. Just like many beans, they will pick up the flavors you throw at them, so really being creative with what you put in and on your bean burger is essential. I started with a Cooking Light base recipe for black bean burgers that I made a while ago (see the link below) and changed things up a little bit. I added some CRP for a little kick, but I think it would have been even better if I had gone for some minced jalapeno. However, I had no jalapenos in my apartment, so I used what I had. The egg and bread crumbs are essential for forming a patty that won’t fall apart. If you are a vegan, I’m not sure what you can substitute in here for the egg, but please let me know if you have had success with anything. The burger itself was not super flavorful and next time I may play around with additional seasonings. However, the cucumber relish is superb if you pile it on top. I actually used this jalapeno infused honey that I picked up from the farmers’ market the other week and that really put it over the top. You can obviously use whatever honey you have in stock. 

You may want to use this cucumber relish to top off hotdogs from the grill at your Memorial Day party this weekend. I’m thinking it will taste good on just about everything. :)


Butter Bean Burgers with Cucumber Relish (Recipe inspired by Cooking Light, June 2001 issue)
Ingredients:
Burgers:
15 oz can butter beans, rinsed and drained
1/3 cup dry breadcrumbs
¼ cup minced onion
1 tsp crushed red pepper
1 egg
Salt and pepper, to taste
Cooking spray
4 hamburger buns or sandwich thins
Parmesan cheese, for topping

Relish:
½ cup finely chopped cucumber
1/3 cup finely chopped red bell pepper
¼ cup finely chopped onion
1 tbsp apple cider vinegar
2 tsp honey
Salt and pepper, to taste

Directions:
Combine all of the relish ingredients on a bowl. Chill until ready to use.

For burgers, place beans in a bowl and partially mash with a fork. Stir in the breadcrumbs, onion, CRP, egg and salt and pepper until completely combined and moist. Divide into 4 equal portions and shape into ½ in thick patties.

Preheat George Forman grill (or pan or outdoor grill) coated with cooking spray. Grill for 10 minutes (flip halfway through if not using George Forman) until heated through.

Toast the buns or sandwich thins. Top each bun with a patty, ¼ cup relish and sprinkle with parmesan cheese.