Showing posts with label sides. Show all posts

Thursday, April 3, 2014

Garlic Sticks

I listen to the radio as I drive to and from work every day which means that typically my entire day only consists of 20 minutes of radio listening. Therefore, I have to pick my station very carefully. In the mornings, I am always hard pressed to find a station playing music constantly so I pick my go-to station by the characters on the morning show. I've settled into a station that I like here and one of the things that they do shortly before 9am (which is typically when I'm finishing up my drive in) is list 5 random facts of the day. Sometimes they are funny, sometimes they make you think, sometimes they are a little gross. But regardless I can start my day off my learning something.

Earlier this week, one of the facts of the day was that not having friends can be hazardous to your health. The study they were quoting apparently said that being friendless is like smoking 15 cigarettes a day. How or why someone measured that is beyond me but it made me thankful for all of my wonderful friends. Throughout all of the stages of my life, my friends have helped to brighten my days and I suppose to keep me healthy. For that, my friends, I thank you. And as I move on to the next stage of my life and make new friends (here's hoping), I want to thank you in advance for keeping me healthy.


So put down those "cigarettes", invite some friends over, and fellowship over these garlic sticks. They are a perfect combination of garlic and cheese and soft and crunch.


Garlic Sticks (Topping adapted from One Preppy Cookie)
Ingredients:
1/5 recipe frozen homemade pizza dough (if you want to up the amount of garlic, when you make the pizza dough use garlic infused olive oil instead of regular olive oil)
1 tbsp freshly shredded parmesan cheese
1/8 tsp kosher salt
1/8 tsp freshly ground pepper
1/4 tsp garlic powder
1/4 tsp Italian seasoning
1/4 tsp onion powder
2 tbsp unsalted butter, melted
1/2 cup mozzarella cheese

Directions:
Let the frozen pizza dough thaw over the course of the day in the refrigerator. Remove from the refrigerator and let stand at room temperature covered with towel for 10-30 minutes before baking.

Preheat oven and baking stone to 500F.

Whisk the parmesan cheese, salt, pepper, garlic powder, Italian seasoning, and onion powder into the melted butter.

Roll or pull the dough into a circular shape, as thin as you can; brush with the butter mixture and sprinkle with the mozzarella cheese. Transfer to the preheated baking stone.

Bake for 8-10 minutes until golden and crunchy. Let cool for about 5 minutes before slicing.

Serve with pizza sauce (homemade or other) for dipping.


Wednesday, March 12, 2014

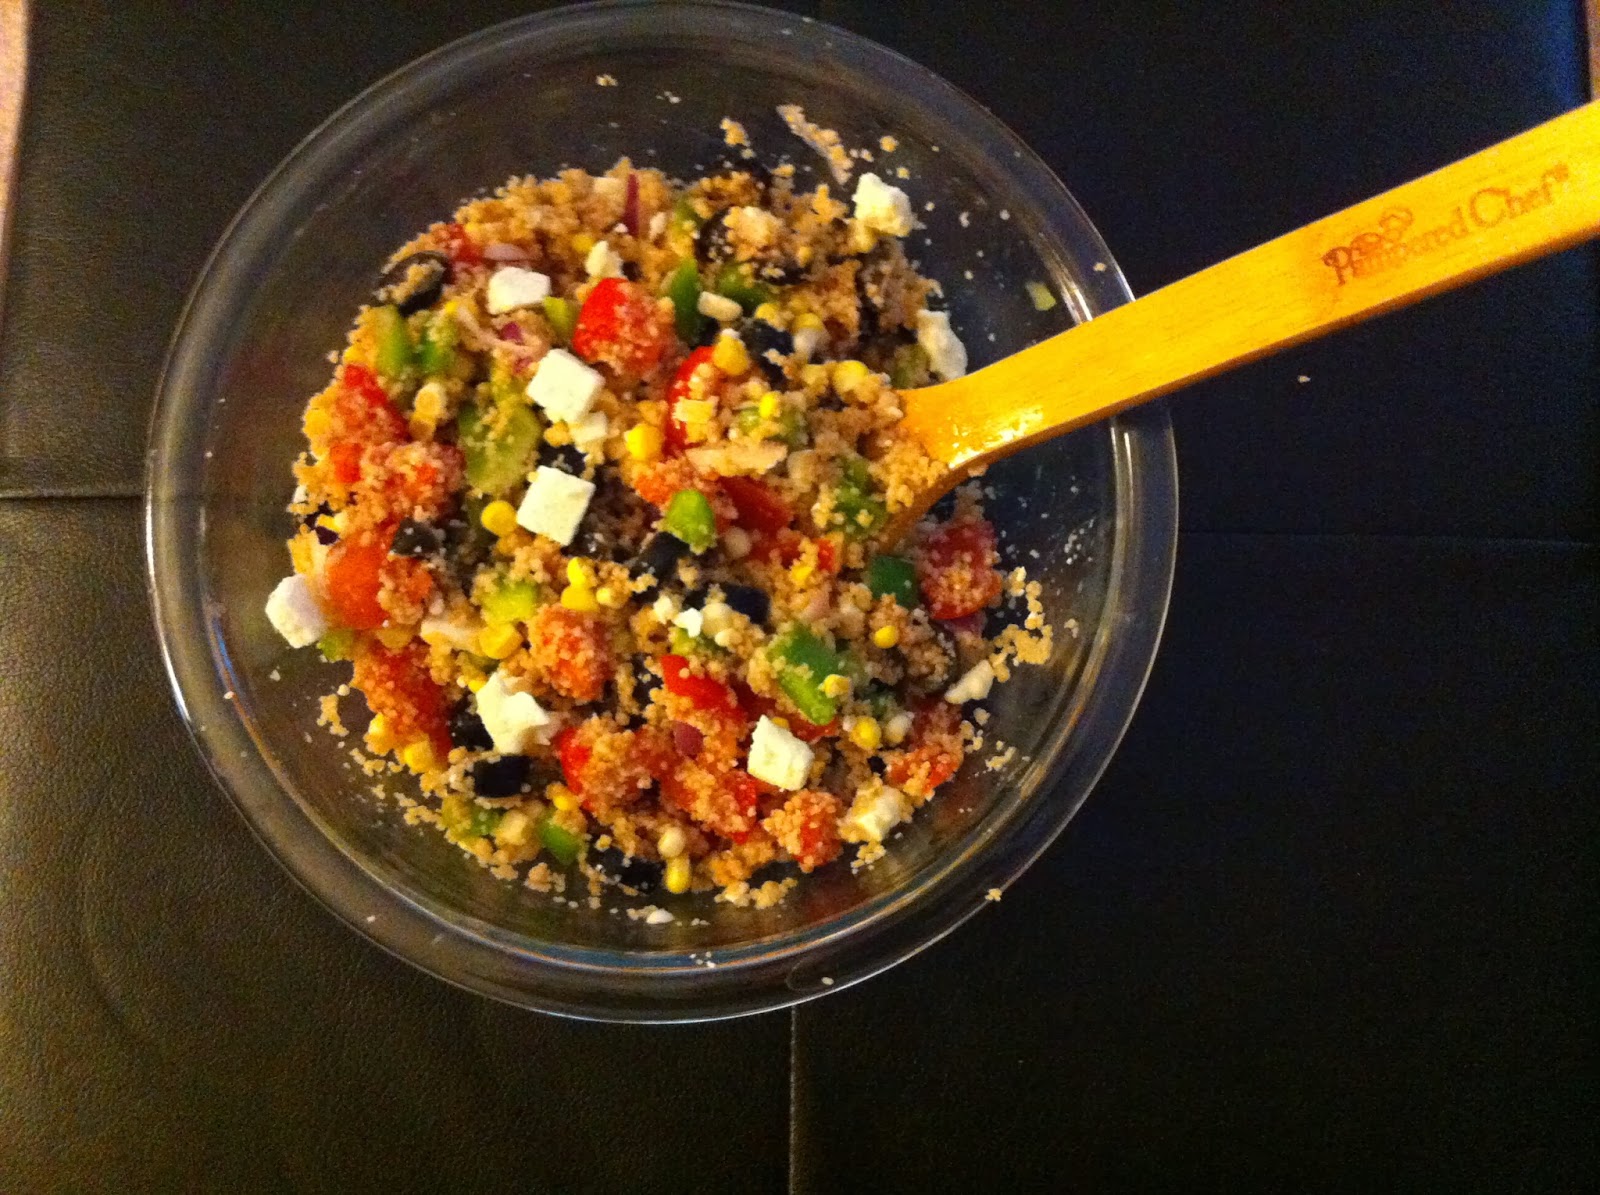
Greek Couscous Salad

From Friday to Tuesday we had a glimpse of spring weather. Indeed, Monday and Tuesday got into the 60s! The sun was shining. Scarves, hats, and mittens were unnecessary. Boots were left on the mat at home.

Then there was last night. The rain/hail/snow/windstorm came back with vengeance. It woke me in the middle of the night for a few hours while it was trying to break through my windows. In the morning I could hear people scraping the icy snow mixture off their cars. I almost threw the covers over my head and declared I wasn't coming out until winter leaves us alone.

Unfortunately real life doesn't allow me to do that. So I'll settle for spring on my plate. In the form of this couscous salad. It goes perfect as a side to a grilled pork chop, chicken breast, or piece of fish. Make it. Sip a fruity cocktail. Pretend spring is out of hibernation for real.


Greek Couscous Salad 
Ingredients:
1 1/2 cups cooked couscous
1/2 cup chopped green pepper
1/2 cup chopped tomato
1/4 cup diced red onion
kernels from one ear of corn
1/3 cup sliced black olives
1/3 cup feta cheese
juice of 1 lemon
salt and pepper, to taste

Directions:
Stir together the couscous, vegetables, olives, and cheese. Squeeze the lemon juice on top and toss to coat. Season with salt and pepper, to your own taste.

Refrigerate until ready to serve.


Monday, September 2, 2013

Roasted Chickpeas

Oh chickpeas. How do I love thee? Let me count the ways.

1. Creamy in a hummus
2. Mixed into a salad
3. Smashed on a sandwich

And I'm adding a new one today.

4. Crispy and by the handful


Roasted Chickpeas (Cooking technique from A Spicy Perspective although it is all over the internet)
Ingredients:
1 can chickpeas, drained, rinsed and patted dry
1 tbsp extra virgin olive oil
kosher salt*
freshly ground pepper*

Directions:
Preheat oven to 425 F. Line a baking sheet with foil.

Spread the chickpeas on the baking sheet and drizzle with oil. Sprinkle on the salt and pepper-- I think I used about 1/4 tsp of each. Mix to coat.

Bake for 15 minutes. Stir to mix well. Bake for additional 15 minutes. Remove from oven and let cool before eating. They will crisp up a little bit.

*Feel free to try out whatever seasonings you would like.


Monday, July 22, 2013

Mom's Potato Salad

Let's talk about the miracle of life for a few moments.

My friends in college used to laugh at me because I told them that I was really excited one day to be pregnant. I mean, it is a little baby growing inside of you. It starts as two little cells and becomes a person! How amazing is that?! It truly is the miracle of life.

No, no, this is not a pregnancy announcement. I was just reminded of this perfect creation of new life when I went to visit my new baby niece this past weekend. She is this little bundle of joy (and squeaks) that makes everyone in the room glow with happiness. She is so tiny yet so full of life. I could have sat there holding her and staring at her precious face forever. My sister and her husband have this baby making thing down to perfection--they make the most adorable little kiddos. Both of my nieces are probably the prettiest little babies ever (not that I'm biased at all). Who would dare to contradict these faces?


Speaking of family, today I'm sharing my mom's potato salad. Feel free to double it if you are feeding a large family. I love that mine keeps growing.


Mom's Potato Salad (adapted from Better Homes and Gardens Cookbook)
Ingredients:
1 lb yukon potatoes
1/2 cup miracle whip light
1/2 tbsp yellow mustard
1 tbsp dill pickle juice
salt and freshly ground pepper, to taste
1 stalk celery, thinly sliced
1/2 small onion, thinly diced
2 small dill pickles, diced
3 hard boiled eggs, peeled and chopped
paprika

Directions:
Place the potatoes in a saucepan and cover with water. Bring to a boil, cover, reduce heat, and simmer for 20-25 minutes until just tender. Drain well. Cool. Peel and cube potatoes.

Mix together the miracle whip, mustard, pickle juice and salt and pepper.

Combine the potatoes, celery, onion, pickles and eggs in a large bowl. Add the dressing and toss to coat. Cover and chill for at least 6 hours.

To serve, top with paprika.


Thursday, June 27, 2013

Vinaigrette Coleslaw

Summertime = pool time, barbecues, bonfires, and mosquitoes.

For those barbecues, you'll be needing something delicious to serve up with your hamburgers and hotdogs. How about this delicious vinaigrette coleslaw? It works great if you are going to be outside for the day because there is no mayo to go rancid in the sun. I made it a long time ago for a pig roast in grad school and one of my friends raved that it was the best coleslaw he has ever had. He was eating it straight from the bowl. But that's his opinion, you make the decision yourself.

And don't forget your bug spray!


Vinaigrette Coleslaw (adapted from Better Homes and Gardens Cookbook)
Ingredients:
3 tbsp cider vinegar
2 tbsp sugar
2 tbsp extra virgin olive oil
1/2 tsp celery seeds
1/4 tsp dry mustard
1/4 tsp kosher salt
1/4 tsp freshly ground pepper
4 cups shredded cabbage
1 1/2 cups shredded carrots
2 green onions, thinly sliced

Directions:
Combine the vinegar, sugar, oil, celery seeds, mustard, salt, and pepper in a jar. Shake well to mix. Combine the cabbage, carrots and green onions in a large bowl. Drizzle with the vinaigrette and toss to coat. Cover and chill.


Wednesday, January 2, 2013

Mandarin Orange Spinach Salad

The holidays are over and we're back into the swing of things.

I guess I'm still a novice food blogger because although I had great intentions of posting delicious recipes and witty commentary during my time off from work, I found myself relaxing and enjoying the time almost completely unplugged. The lack of turning on my computer resulted in a lack of blog posts.

I did some cooking and baking with the family for the holidays (don't worry, recipes to come!). I got to spend time with the cutest niece in the entire world. When I got back to town last Thursday, I had a nasty cold that kept me on the couch on Friday (despite my plans of working that day). Then Scott came to town, well we spent the weekend in St. Louis, for New Years. All in all a successful holiday season for this girl.

I also got to meet up with some friends from college and from high school while I was in Michigan. With the latter group, we had pizza lunch and I volunteered to bring a salad. This salad was quick and easy to whip together and enjoyed by everyone the girls, in particular. A healthy start for the new year!

Happy 2013!


Mandarin Orange Spinach Salad
Ingredients:
8-10 oz fresh baby spinach
15 oz can mandarin oranges, drained
1/4 large red onion, chopped thinly
1/3 cup craisins
1/4 cup sliced almonds
1/3 cup crumbled feta cheese
4 tbsp red wine vinegar
1 tbsp dijon mustard
1/3 cup extra virgin olive oil

Directions:
Toss together the spinach, oranges, onion, craisins, almonds and cheese.

Whisk the mustard and vinegar in a small bowl. While whisking, stream in the oil.

Either serve with the dressing on the side or toss with the spinach mixture.


Sunday, December 16, 2012

Cheese Stuffed Buns

"The best way to spread Christmas cheer is singing loud for all to hear."

"Buddy the elf, what's your favorite color?"

"We elves try to stick to the main four food groups- candy, candy canes, candy corns and syrup."

"Smiling's my favorite."

"You smell like beef and cheese. You don't smell like Santa."

"Fran-sis-co."

"CONGRATULATIONS! World's best cup of coffee."

"Watch out! The yellow ones don't stop."

"SANTA'S COMING! I KNOW HIM!."

"What's a Christmasgram? I want one!"


Guess what I did yesterday? You got it- I watched one of the greatest holiday movies ever- ELF. I love it. Will Ferrell is so funny and now I'm officially in the Christmas spirit. :)


I also made these delicious cheese stuffed buns. They are soft and chewy full of melty cheese and a hint of garlic. Perfect straight out the oven, or even reheated the next day. You should add them to your holiday plans; the oven will be on for cookie baking anyway, right? Feel free to use whatever cheese you want but you certainly don't want to miss out on these.


Cheese Stuffed Buns (adapted from Heather Christo Cooks)
Ingredients:
1/2 cup hot water (110-115 F)
1 tsp sugar
1 tsp instant yeast
1 tsp garlic powder
1 tsp salt
1/8 cup extra virgin olive oil
1 1/2 cups all purpose flour
4 oz monterey jack cheese, cut into 8 equal cubes
1 1/2 tbsp unsalted butter, melted

Directions:
Combine the hot water, sugar and yeast in a medium to large bowl. Allow to stand until bubbly, about 5-10 minutes. Add the garlic powder, salt and oil; mix. Add in about 1 cup of the flour and mix. Turn out onto a clean surface and knead in the additional 1/2 cup flour. Continue to knead for 5-6 minutes until it is a smooth soft dough. Place in a lightly greased bowl and cover with plastic wrap. Allow to rise until doubled, about 2 hours, depending on the temperature of your house.

Preheat oven to 375 F. Line a baking sheet with parchment paper.

Punch down the dough and divide into 8 equal pieces. Flatten each piece slightly and place a cube of cheese into the center. Close the dough around it and form into a ball. Place buns on prepared baking sheet. Brush with melted butter.

Bake for 10-12 minutes until golden on top. Remove and brush with more melted butter.

Serve hot.

Makes 8 buns.


Tuesday, November 27, 2012

Green Bean Bundles

While I was growing up we had family friends that lived almost right across the street. The daughter, Aimee, is my age and we went to school together for as long as I can remember. Once we were late for 3rd grade because we were playing on the snow banks in the church parking lot we had to walk through. I remember this vividly because I have always been, and will always be, a rule follower and walking into the classroom during the pledge of allegiance is not the action of a good little girl! We would play for hours with these plastic animals in her basement- my favorite was the family of white tigers. Sometimes when her mom and my dad were both out of town on business trips, we would combine the remainder of our families and head out to dinner at Ponderosa (don't even get me started on how terrible that place is...); the waitress once thought that Aimee and I were twins. 


Because both of our extended families were located in states far away, there were many Thanksgiving that we would break bread together. I don't know why (I will hazard a guess because my sister HATES green bean casserole) but one year Sara showed up with these green bean bundles. Both families loved them and they have become a permanent staple of our Thanksgiving feast. These guys a lot less labor intensive than the traditional GBC (especially if you make it from scratch, which is yummy, but not good for the mushroom haters) but a third of the ingredients is bacon. Come on, you can never go wrong with bacon, right? So try them out, even your green vegetable haters (aka my dad) will eat a bundle or two.


Green Bean Bundles (from the kitchen of our childhood neighbor, Sara)
Ingredients:
2 16-oz cans whole green beans, drained
12-16 slices bacon, cut in half
1 8-oz bottle French dressing

Directions:
In the microwave, cook the slices of bacon until they are slightly cooked but still malleable (about 1-2 minutes total). Pat dry with paper towel.

Arrange the green beans into bunches of 8 and wrap a half slice of bacon around each bundle, securing with a toothpick. Place all the bundles in a large baking dish. Pour the dressing over the beans. Cover and chill for at least 3 hours.

Preheat oven to 350 F.

Bake uncovered for 40 minutes, turning over the bundles halfway through the cooking time. Serve hot.


Monday, November 26, 2012

Orange Cranberry Sauce

I know this is a little backwards-- sharing with you Thanksgiving recipes AFTER the holiday. But I certainly cannot post recipes before I have actually made the dishes and until this blog has been around for awhile, I won't have the holiday dishes until after the holiday. So bear with me, ok? And enjoy the insight into Thanksgiving in my parents household.

Typically, Thanksgiving is all full of tradition at our house. Yes, the food is pretty traditional, but it is more the activities that make the weekend. My dad makes a pie (or two or three) early in the morning and a cinnamon crisp from extra crust for breakfast. We watch the Lions football game (because we're in Michigan). We eat food. We take at least one walk around the block (either before or after dinner or both). We scour the multitude of ads and make our plan of attack for Black Friday. We (the girls only-- my mom, sister and I) get up nice and early and head out with the crazies for some shopping which typically includes a soft pretzel partway through the morning and long lines and coupons and everything else associated with the madness of the day. Then we head home laden with bags to rest up for the afternoon. Friday night (and sometimes Saturday depending on the schedule) kicks off the Christmas season with leftover turkey sandwiches, chips and dip, pickle tray, and raw veggies in front of the television playing "White Christmas". We sing along (because obviously we know all the words) and lament the fact that every year the housekeeper cannot help but pick up the phone and overhear the wrong part of the conversation between Bob and Ed.

Well this year, unfortunately my sister and her family did not get to make the trip to Michigan for Thanksgiving. So we did a few things differently. Some of those included food! We have also been a canned cranberry sauce family (and don't get me wrong, I love the ridged deliciousness) but I had been itching to make my own and my parents were all for it. So we did. I read a lot of recipes online and we decided to add orange to enhance the flavor and start with a small amount of sugar and work our way up. We like tart things for the most part, so feel free to up the sugar if you want.


We all loved it. It is safe to say this is a permanent replacement (or depending on how many people are in town for the holiday maybe a permanent addition?) to our Thanksgiving feast. It would go great with pork or beef, if you are looking for a quick and easy side for Christmas as well. My only regret-- that we didn't make more!


Orange Cranberry Sauce
Ingredients:
12 oz bag of fresh cranberries
zest of 1 orange
juice of 2 oranges, plus water to reach 3/4 cup
dash of cinnamon
4 tbsp granulated sugar
4 tbsp brown sugar

Directions:
Rinse and drain cranberries. Place them in a medium pot. Add the orange zest, juice with water, cinnamon and 3 tbsp of each sugar. Bring to a boil, lower heat and simmer for about 10 minutes, stirring occasionally.

Taste the cranberries and add last 1 tbsp of each sugar if still very tart. You can add additional sugar, equal amounts of each type, until you get to your desired sweetness. The total of 8 tbsp leaves it pretty tart; I've seen recipes up to double that amount so go wild if you want it sweeter.

Remove from the heat and refrigerate for a few hours until it sets up. Serve cool.

Makes about 2 cups of cranberry sauce.


Monday, September 17, 2012

Summer Pasta Salad

I don't know why, but this year I'm so excited for fall. Maybe it's because I'm back in the Midwest and fall time in Michigan was always my favorite time of the year. I think I have high expectations for fall in central Illinois although I'm guessing it may not be quite as wonderful. There aren't really as many trees and it'll probably be mostly sowed corn fields everywhere. But, nothing beats the weather. I love mornings and evenings when you need a jacket to be outside, but days that warm under the sun. There is a slight breeze, but nothing close to the bone-chilling wind that the winter will inevitably bring. The humidity is almost non-existent.

It makes me want to pick apples, carve pumpkins and go for long walks.

Plus the cooking gets wonderful in the fall. Pumpkins and other fall squashes. Apples. Stews and rich soups. Roasted chicken. Turkey. Casseroles. And more.

But before we jump into fall, we have to celebrate the last few days/weeks of summer produce. Like this summer pasta salad that is full with perfect tomatoes and zucchini. It is a creamy pasta salad, but some of the heavy mayo is replaced with Greek yogurt. It keeps it light and refreshing.

So get out there and stock up on the end of summer produce before autumn completely takes over.


What are you looking forward to most as we change seasons?


Summer Pasta Salad (adapted from SkinnyTaste)
Ingredients:
1 cup mini shells (or other small pasta)
1 cups grape tomatoes, halved
1 small zucchini, sliced and quartered
1/2 small onion, chopped (about 1/4 cup)
3 tbsp light mayo
2 tbsp plain Greek yogurt
1 tbsp red wine vinegar
1/2 tsp dijon mustard
dash of oregano
dash of freshly ground black pepper
dash of garlic powder

Directions:
Cook the pasta according to package directions. Drain and rinse with cool water.

Combine the pasta with the tomatoes, zucchini and onion in a bowl.

In a small bowl, whisk together the rest of the ingredients. Pour onto the pasta and mix thoroughly to combine.

Chill for at least an hour. Serve cold.


Monday, August 27, 2012

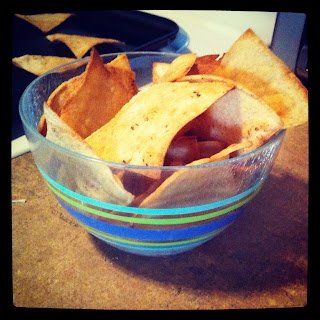
Easy Baked Tortilla Chips

Happy Monday!

I think you should make some nachos.

Or salsa.

Or guacamole.

Enjoy any and all of them atop some fresh-from-the-oven tortilla chips.

They will wipe away all the Monday blues.

They are so easy you will not have to stress your tired brain at the end of the day.

You can add whatever flava-flave you would like. I would suggest salt and peppa. Or maybe chili powder for a little kick. Or cinnamon sugar if you desire something sweet. So adaptable depending on your mood.


Baked Tortilla Chips
Ingredients:
4-8 corn tortillas, cut into quarters
Cooking spray
Salt, about 1-2 tsp
Additional seasonings (such as black pepper, chili powder, cumin, cinnamon sugar, etc), as desired

Directions:
Preheat oven to 400 F.

Spray a baking sheet with cooking spray. Lay the tortilla quarters on the sheet without overlapping. (I can fit about 4 tortillas per sheet, but this'll change depending on the size of your sheet). Spray the tops of the tortillas with cooking spray. Sprinkle with salt and pepper and additional seasonings as desired.

Bake for 10 minutes, flipping halfway through, until the tortillas are browned. Watch carefully to make sure they do not burn.


Thursday, August 16, 2012

Cabbage Salad

"On the other side of a street I knew
Stood a girl that looks like you
I guess that's deja vu
But I thought this can't be true
Cause you moved to west L.A. or New York or Santa Fe
Or wherever to get away from me
Oh but that one night
Was more than just right
I didn't leave you 'cause I was all through
Oh I was overwhelmed and frankly scared as hell
Because I really fell for you
Oh I swear to you
I'll be there for you
This is not a drive by (y y y y)"

Train (Drive By)


Last night I went to the Train concert at the Illinois State Fair with one of my most wonderful cousins, Mallory. Here we are with them in the background:


We had a blast! 

And I love Train. :) 

Can you really believe that it has been over 10 years since "Drops of Jupiter" came out? Reminds me of the high school days. I didn't realize "Drive By" was Train when I first heard it on the radio because it was super upbeat and even more pop-y. But I love it. When I found out they were coming to the fair, I knew I had to go. And it did not disappoint. 

Last night I ate some amazing Cuban nachos and drank a few beers at the fair. You know all that healthy, good-for-you fair food. 

In honor of the healthy food I ate last night, I'm bringing you a....

....SALAD. :)


This cabbage salad is great. My mom makes it every time my sister and I go home. Although, growing up it was never my favorite (it was always my sister's fav), I have learned to love it; so much so, that I've started making it myself. I have no idea where my mom originally got the recipe, so I can't share a source with you. But, you should make it anyway. It would be great for a picnic or as an alternative to a green salad as a side for dinner any night of the week. I would suggest keeping the cabbage, nuts, and dressing separate and mixing it up fresh right before you serve it.


Cabbage Salad (from my mommy's kitchen to yours)
Ingredients:
Grated cabbage (1/2-1 head)
1/2 stick unsalted butter (or margarine)
1 package of Ramen noodles, broken into pieces (discard flavoring packet)
1/2 cup slivered or chopped almonds
1/4 cup sunflower seeds
1/8 cup sesame seeds
1/4 cup canola oil
1/8 cup apple cider vinegar
1/8 cup sugar
1 tbsp low sodium soy sauce

Directions:
Melt the butter in a skillet over medium heat. Add the Ramen, almonds, sunflower seeds and sesame seeds and saute for approximately 10-15 minutes, stirring frequently until toasted and golden.

Heat the oil, vinegar, sugar and soy sauce in a small saucepan over medium heat, stirring to dissolve the sugar, for approximately 10 minutes.

Cool the dressing and nuts (store both separately in the fridge). Pour over grated cabbage, mix and serve.


Saturday, July 28, 2012

Guacamole

I'm not one of those people that has a go-to guacamole recipe. Like with many things that I make, I simply go with whatever I have in the fridge and pantry. Sometimes I'll pick up those guac seasoning packets from the store and mix it with the mashed avocado and a little bit of tomato. However, as with store-bought taco seasoning, the packets are full of sodium and do not really allow you to adapt the size of your dish. And because avocados don't last long once you open them up, it is always better to make only what you will eat in a day or two.

Did you ever wonder why your guacamole turns brown so soon after making it? It's all about the science! Fruits contain an enzyme called polyphenol oxidase is capable of oxidizing the phenols in the fruit when exposed to oxygen in the air. The oxidases can be inhibited (stopped from doing their function) temporarily by the addition of acid such as lime juice. Alternatively, if you store the pit of the avocado (see picture below) in an air-tight container with the guacamole, it will consume the oxygen in the bowl and prevent browning. Since there are a large number of these enzymes within the fruit, these things are only temporary fixes and without a doubt eventually the green color will turn to brown. Don't ask what they do to the guacamole in grocery stores to keep it a fluorescent green color; I don't wanna know.

Anyway, this is the guacamole, Scott and I whipped up for the fajitas last weekend. It was quite flavorful and delicious and I would definitely recommend it.


Guacamole
Ingredients:
1 large avocado
10 grape tomatoes, halved
1 tbsp parsley, chopped
juice of 1/2 lime
1 tsp ground cumin
salt and pepper, to taste

Directions:
Mash the avocado in a bowl. Add the tomatoes, parsley, lime juice and cumin and mix. Season with salt and pepper to taste. Refrigerate, covered with the pit, until ready to serve. 

Makes approximately 1.5 cups.


P.S. Thanks for sitting through the science lesson :)

Wednesday, July 25, 2012

Homemade Salsa

Salsa may be one of my favorite foods.

I love the salsa that you get at Mexican restaurants as soon as you sit down. I like the large jugs of Pace salsa that accompany departmental events and parties. I prefer the fresh salsa you can pick up from the vegetable section of the grocery store. And, no surprise I'm sure, I really enjoy making homemade salsa.

I love that you can make just about any fruit and vegetable into a "salsa". Take for example the cucumber and mango salsas that I've already shared with you. Just chop your ingredients up and serve them atop some crispy tortilla chips or as a garnish for a burger or fish and you've successfully created a "salsa". Of course, some meals, like our steak fajitas, call for a more traditional salsa-- tomatoes, onions and jalapenos. Simple enough. I always add a little bit of red wine vinegar and lime juice to deepen the flavor and give some more acidity to the tomatoes. Depending on how acidic your tomatoes are, you may need to adjust the flavors to your own taste. Feel free to add cilantro, if you can stomach the flavor, as that is typically found in salsa as well. Me, I skip it... just the beauty of flexibility when creating recipes at home.


Homemade Salsa
Ingredients:
4 roma tomatoes, cut into quarters
1 small onion, cut into large chunks
1-2 garlic cloves
1 jalapeno pepper, cut into quarters (seeded if desired)
juice of 1/2 lime
3 tbsp red wine vinegar
2 tsp kosher salt
1 tsp freshly ground pepper

Directions:
Combine tomatoes, onion, jalapeno and garlic in a food processor. Pulse until finely chopped. Add lime juice, red wine vinegar, salt and pepper. Pulse until the desired consistency is reached. Season with additional salt and pepper, if desired. Chill until ready to serve.

Makes approximately 4 cups.


Tuesday, July 17, 2012

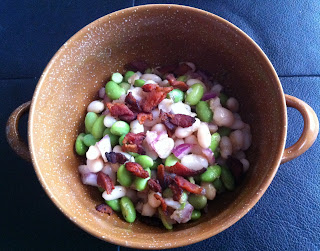
White Bean Edamame Salad

Hey there hot weather. I missed you dearly for that one week that you decided to leave IL. Now here you are back in full force. Welcome. (note: a slight hint of sarcasm)

Actually, hot weather doesn't bother me too much because I spend my days in an (over)air-conditioned building. The biggest issue is the walk to and from my car in my jeans and tennis shoes. That said, if you want a bowl of summer-y goodness, you have come to the right place. The white beans and edamame are hearty but light. The tang of the red onion mixed with the red wine vinegar and honey makes the flavor delectable. Plus, don't forget the bacon. The bacon threatens to make this a meal in and of itself, or a perfect side dish for a picnic at the beach (or pool or backyard or etc).

If you want to adapt it for a vegetarian or vegan diet, just substitute some olive oil for the bacon grease and omit the bacon crumbles. However, I wouldn't suggest it... this recipe is perfect and doesn't require tweaking. :)


White Bean Edamame Salad (adapted from A Spicy Perspective)
Ingredients:
1 1/2 cups cooked Northern Beans (or 15 oz can, drained and rinsed)
1 cup frozen edamame, thawed
1/2 cup chopped red onion
3 pieces bacon (plus + 1 tbsp bacon grease after cooked)
1 tbsp red wine vinegar
1 tbsp honey
1 tbsp dried parsley (or 3 tbsp of chopped fresh parsley)
1/4 tsp paprika
dash of salt and pepper

Directions:
Using kitchen shears, cut the bacon into small pieces. Cook in a skillet over medium heat, stirring occasionally until crispy. Using a slotted spoon, transfer the bacon to a small bowl lined with paper towels to soak up grease.

Combine 1 tbsp of bacon grease, red wine vinegar, honey, parsley, paprika, salt and pepper in a small bowl. Whisk to mix thoroughly.

In a larger bowl, combine the beans, edamame and onion. Drizzle with the dressing and toss to mix. Chill in fridge until ready to serve. Top with bacon before serving.

Note: You can add the bacon before you chill the salad, but it will get a little soggy from the dressing. Still tastes good, but at least the first time around you may want crispy bacon. Leftovers with soggy bacon are still great :)


Tuesday, July 3, 2012

Bacon, Fried Green Tomato and Pimento Cheese Sammy

During my first year of grad school, our go-to bar was this great place, Tyler's Taproom. It has pool, a few televisions, foosball, and best of all, A LOT of beer choices. There is a wall (actually two) that is full of taps as well as lots of assorted bottles. They have lots of seasonal and unique flavor profiles. Unfortunately, the food at Tyler's was only okay; they had a few good burgers, but it really wasn't even that good. After awhile, we stopped frequenting Tyler's and would only go for birthday or defense celebrations. Imagine my surprise when in my last year of grad school, I discovered that they had revamped their menu significantly. They added a number of new and interesting sandwiches and entrees. One of them representing the south in every bite- a pimento cheese and fried green tomato BLT. This weekend I set out to curb my craving for this sandwich (unfortunately I couldn't make the trip to Durham), by recreating it in my kitchen. 

In my opinion, a great sandwich should be gooey, messy and above all, delicious. This will not disappoint. Let me introduce you to the players for our sandwich today:


The bread is the vehicle for all the goodness. This seeded sourdough bread I got from a local bakery was perfect as the base. Next, you need crispy bacon- none of that flimsy, greasy stuff (what do you think this is? an all-night diner?). And, of course, the stars of the show, the pimento cheese and the fried green tomatoes. 

I'm going to assume you know how to pick up some bread from the store (or make it yourself) and microwave/bake yourself some super crunchy bacon. I'll focus here on the recipes for the pimento cheese and the FGT. 

I lightened the pimento cheese by subbing Greek yogurt for some of the mayo. It is so yummy that I won't judge you if you eat it on top of some celery or mini bell peppers (side note: I'm obsessed with those mini bell peppers right now. Perfect for salads or perfectly snackable!).

The FGT are really baked green tomatoes, but that just sounds silly. The green tomatoes are sour and complement the cheese and bacon perfectly. The crust was crunchy and not too heavy. I ate one by itself and I think I would have preferred to dunk it in some ranch. I think these work great for a sammy but I'm not sure I would recommend eating them without additional flavoring. You could certainly step up the breading with some chili powder or cumin or even some shredded parm if you wanted to play around with FGT in order to eat them plain.

On to the good stuff. Doesn't that just look AMAZING?!?! 


If you're going all out Tyler's style, serve them alongside some good and garlicky french fries as I did. And don't plan on kissing anyone right after dinner. ;)


Pimento Cheese (adapted from Rachael Ray Magazine July 2012)
Ingredients:
1 1/2 cup shredded sharp cheddar cheese
1 tbsp diced onion
1 1/2 tbsp light mayo
1 1/2 tbsp Greek yogurt
2 tbsp chopped pimentos
1 tsp cider vinegar
1/2 tsp paprika

Directions:
Add all ingredients to a bowl and mix until combined completely. Chill until ready to serve.


Baked "Fried" Green Tomatoes (adapted from A Veggie Adventure)
Ingredients:
1/8 cup wheat flour
1/8 cup yellow cornmeal
1/2 tsp kosher salt
1/4 tsp black pepper
1/2 tsp sugar
1/4 tsp paprika
1/2 cup buttermilk
1 large green tomato, core removed and cut into 1/3 slices

Directions:
Preheat oven to 400 F. Place a baking sheet in the oven as it is heating to get it hot.

Stir together the flour, cornmeal, salt, pepper, sugar and paprika in a shallow bowl. Add the buttermilk to a different shallow bowl.

Remove the baking sheet and spray with cooking spray. Working quickly, dip each tomato slice into the buttermilk and then into the breading, shaking off excess. Arrange on baking sheet.

Bake for 30 min, flipping once at the halfway point.


Bacon, FGT, and Pimento Grilled Cheese (Inspired by Tyler's Taproom)
Ingredients:
1/3 cup pimento cheese (see above)
2 slices FGT (see above)
2 slices of good quality sourdough (or other bread of choice)
3 slices of crispy cooked bacon
~1/2 tbsp butter or margarine

Directions:
Heat a frying pan on medium heat.

Spread approximately 1/4 tbsp of butter on one side of each piece of bread. On the opposite side of one piece of bread, spread the pimento cheese. Stack on the FGT and then the bacon. Top with the other piece of bread, butter side out.

Add the sandwich to the heated pan, butter side down (put the slice with the pimento cheese on it as the bottom piece), cover sandwich with a lid, and cook until browned, approximately 2 min. Carefully flip over and cook the other side until browned, approximately 2 min.

Remove from the heat and consume! :)

Sunday, June 17, 2012

Black Eyed Pea Hummus

What did you do on Saturday night? I spend my night making this:


A complete disaster in my kitchen!

Albeit, a beautiful and yummy disaster. I'll soon be sharing with you some of the things that I made. I included a few labels to get you thinking about what they might be... It really was an enjoyable evening. I donned my apron and kinda just went at it prepping food, following recipes, and making a few things up myself.

One of the things I started out with was hummus. I've been longing to make hummus since I got my new food processor, so I figured it would be a good place to start. Of course, I thought I had chickpeas in my pantry; however, when I went to grab them, I didn't have any. So I went with black eyed peas instead. I roasted a bulb of garlic and combined that with a few seasonings in the processor. The resultant mixture was delicious! I may have ate it with some blue corn chips for dinner. Don't judge. :)


Black Eyed Pea Hummus
Ingredients:
1 15-oz can black eyed peas, drained and rinsed
1 bulb of garlic plus 1 tsp olive oil
3 tbsp tahini paste
juice of 1/2 lemon
1 tbsp chili powder
1 tbsp paprika
1 tbsp extra virgin olive oil
1-2 tbsp water to reach desired consistency
salt and pepper, to taste

Directions:
Preheat oven to 375 F. Cut off the top part of the garlic bulb to expose the cloves. Remove excess skin and then drizzle top with 1 tsp olive oil. Roast for 45 min. Allow to cool and then squeeze out the bulbs.

Combine the peas, garlic, tahini and lemon juice in the bowl of a food processor. Pulse until mashed completely. Add the chili powder and paprika and pulse to combine. While the food processor is going, add the olive oil followed by water until it reaches the desired consistency. Season with salt and pepper. 

Garnish with extra paprika. Serve with tortilla chips, crackers or cut vegetables.


Thursday, May 17, 2012

Stuffed Bell Peppers with Spicy Mac and Cheese


Do you ever have “one of those days”? You know, the day when you walk over to the MS building and totally get lost and cannot find the room to drop off your samples so you have to walk back to your lab and look it up online because you are too embarrassed just to ask someone. And then 30 minutes later, you are rotovapping down your last glimmer of hope for the day because you’ve already had two reactions fail, and your product bumps for like the twelve time. And then you have to struggle to fight back the tears welling up in your eyes. No? me either… Okay, okay. This may be a true story of an over-emotional moment one afternoon this week. So to attempt to brighten my day, I turned my iPod to Taylor Swift and rocked out to her girly music. This helped A LOT. Day looked up significantly. What about you? Do you have music that will automatically give you that little pick-me-up? What do you do when you have “one of those days” and you just need to put a smile on your face?

You know what else puts a smile on my face? COOKING!! (and EATING!) And on a day that isn’t the happiest, we all need a little comfort food. For me, comfort food tends to revolve around gooey, melting, delicious cheese. So today I’m sharing with you a great recipe for spicy mac and cheese. I stuffed it into some green bell peppers, but you could certainly skip that step and serve it alongside whatever you wanted.


Spicy Mac and Cheese Stuffed Bell Peppers (Mac and Cheese Recipe from Annie’s Eats)
Ingredients:
2 cups penne pasta, cooked according to the directions on the box and drained
¼ cup onion, finely chopped
¼ cup roasted red pepper, finely chopped
1 jalapeno pepper, finely minced (remove seeds if you don’t like a lot of spice)
2 tbsp butter, divided
2 tbsp all-purpose flour
1 ¼ cup milk
¼ tsp cayenne pepper
¼ tsp onion powder
¼ tsp garlic powder
1 dash salt
1 dash black pepper
4 oz. colby jack cheese, shredded
2 oz. pepper jack cheese, shredded
2 oz. sharp cheddar cheese, shredded
2-4 bell peppers (depending on the size), tops removed and cored

Directions:
Preheat oven to 375 F.

Melt ½ tbsp butter in a small skillet over medium-high heat. Add the onion, red pepper and jalapeno and cook, stirring occasionally until fragrant and tender, about 5 min. Remove from heat and set aside.

In a medium saucepan, melt 1 ½ tbsp butter over medium-high heat. After the butter has melted completely, whisk in the flour. Cook, whisking constantly, until it turns a light golden brown color and begins to foam, about 2 min. Whisk in the milk. Cook, whisking frequently, until it begins to thicken, about 5 min. Reduce heat to medium-low and whisk in spices. Finally, add the cheeses and whisk until completely melted and incorporated. 

In a bowl, combine the cooked, drained pasta with the onion and pepper mix and cheese. Mix completely and then spoon into the cored bell peppers. Place the peppers into a baking dish with a small amount of water in the bottom.

Bake for 25 minutes or until the mixture is heated through.

Enjoy!