Thursday, January 31, 2013

Creamy Lemon Hummus (and Superbowl Ideas)

SUPERBOWL XLVII

It is happening this Sunday. Are you ready?!

This is the first year that I'm actually really excited about watching the game because the Ravens are playing! It is Ray Lewis's last game and I'm very optimistic that they will take home the trophy. For good luck, here's a picture of Scott and me when we went to a Raven's game a few years ago. Although they lost that game so maybe it isn't good luck...


In the past, the thing that has made me the most excited for the Superbowl is not the game nor the commercials but the food. I love a party where everyone cooks up their favorite appetizers and you eat with your fingers all evening. For that reason, I've put together a list of fairly quick and easy snacks for your coming Superbowl party. Make one of these and you're sure to bring smiles to the faces of your fellow party-goers.


Savory Snacks for Your Superbowl Party:


And in case that list wasn't extensive for you, I'm sharing with you a recipe for literally the creamiest homemade hummus I have ever made. When Deb of Smitten Kitchen posted that the key to making creamy homemade hummus was to peel the chickpeas, I wasn't sure if I believed her. Was it really worth the effort, I asked myself? Like any good scientist, I set out to test the hypothesis. I've made hummus plenty of times and I have found that it is not quite as creamy as what you can pick up at the grocery store. But this peeling of the chickpeas, genius. It was quite certainly creamy! And totally comparable to the tubs you get at the store. Experiment successful -- hypothesis confirmed-- certainly worth the effort. I will never go back to the skins again. 


Creamy Lemon Hummus (adapted from Smitten Kitchen)
Ingredients:
About 2 cups cooked chickpeas (canned or cooked yourself)
1/2 cup tahini paste
2 tbsp freshly squeezed lemon juice, plus more to taste
2 cloves of garlic, chopped
1/2 tsp salt, plus more to taste
1/4-1/3 cup water


Directions:
Peel the skins of the chickpeas.

Place the chickpeas in your food processor. Pulse on high for approximately 1 minute until they form powdery clumps. Add the tahini pasta, lemon juice, garlic and salt. Pulse again until pureed completely. While the processor is on, stream in the water until you get a smooth, creamy texture.

Taste and season with additional lemon and salt as needed.

Makes about 2 cups.

Serve as a dip for vegetables and chips or in place of hummus for any recipe.


Wednesday, January 30, 2013

Crispy Fish with Lemon-Dill Sauce

You know how when you plan a trip to North Carolina in January you expect nice, warm, sunshiny weather?

Yeah... I went to NC this past weekend and experienced a winter storm!?! What in the heck my beloved state? How could you do that to me?

Besides the weather, it really was a nice visit. I got to meet some of my friends' brand new baby girl... she is so adorable and slept beautifully the whole time we were there. I must admit it scares me a little bit to hold someone that little. She just is so precious. :) I got to catch up with another old friend over a meal of good southern fried green tomatoes and pimento cheese topped off with a Duke basketball win. I also went to a wedding for two of my dear friends. I got to see lots of folks from grad school and celebrate the union of two special people. Of course, the cherry on the cake was seeing Scott as always.

Now I'm back into the grind of work. And cooking. Quick and easy, but also healthy, is always a requirement after I've been traveling. I need to shed the layer of grease from fast food but I don't have a lot of extra time since I'm catching up on everything else.


For this, I can always turn to fish. This recipe is done in the blink of an eye and can most likely be prepared with ingredients you already have in your pantry and freezer. Pair it with some steamed broccoli and you are good to go. Feel free to use whatever type of white fish without a lot of inherent flavor-- this week I used tilapia, but it works great with cod and catfish as well. The lemon-dill sauce is basically a homemade tartar sauce that I could eat by the spoonful. It adds some tang and cream to the crisp of the fish.


Crispy Fish with Lemon-Dill Sauce (adapted from Cooking Light April 2010)
Ingredients:
For Fish:
1 egg white
1/2 cup panko breadcrumbs
1/2 tsp paprika
1/2 tsp onion powder
1/2 tsp garlic powder
2 6-oz skinless white fish fillets (tilapia, cod, catfish or pollock)
salt and pepper

For Lemon-Dill Sauce: 
1/4 cup light mayonnaise
2 tbsp finely diced dill pickle (about 1 small)
2 tsp fresh lemon juice
2 tsp chopped fresh dill

Directions:
Preheat broiler on high. Place a wire rack on a baking sheet and spray with cooking spray.

Lightly beat the egg white in a shallow dish. Combine the panko, paprika, onion powder and garlic powder in another shallow dish. Sprinkle both sides of the fish lightly with salt and pepper. Dip each fillet into the egg white and then the panko mixture, pressing to adhere. Place on the wire rack. Mist the top of the fish with cooking spray. Broil for about 8 minutes, flipping over halfway through, until fish is cooked to your desired doneness.

For the sauce, combine the mayo, pickle, lemon juice and dill in a small bowl and mix thoroughly.

Serve the fish topped with the sauce.

Serves 2.


Tuesday, January 29, 2013

Tex-Mex Rice and Black-Eyed Peas with Chicken Sausage

My mother has ingrained in me a love of buying things on sale. She is not as cray-cray as those people on Extreme Couponing but she certainly appreciates a coupon, a BOGO, a clearance rack, or a rebate in any form. My dad likes to laugh (I think he has to laugh so he doesn't get frustrated) that she always has to make sure she spends enough at Kohl's to get her Kohl's bucks to come back and purchase more. I'm like my mom in many ways and I'm glad to have at least half her enthusiasm for a good deal.


When I'm planning on my meals for the week, you will find me perusing the Meijer ad and examining the Mperks coupons in order to save myself a little green. This is especially important for household things such as swiffer refills and laundry detergent as well as protein! Meat and tofu can be so expensive and if I'm planning a meal around a particular protein, you're gonna beat that I'm looking for it to be on sale. Sometimes the schedule may not be flexible enough, but I do stock up my freezer with chicken breasts, pork loins and fish when they are discounted.

Last week, Mperks had a coupon for these bad boys:


Chipotle Chicken Sausages!

I decided I would give them a whirl. When choosing for what to use them, the chipotle made me automatically gravitate towards Tex-Mex. I threw them into this southwest-style version of rice and beans. I've made the rice and black-eyed peas recipe without any sausage and it can certainly hold up as a vegetarian or vegan option. The chipotle sausage just added an extra little kick. This is a quick and easy meal that I would definitely recommend. :)


Tex-Mex Rice and Black-Eyed Peas with Chicken Sausage (adapted from Food Network Magazine)
Ingredients:

1/2 tbsp extra-virgin olive oil
1/2 cup fresh salsa, plus more for serving
1/4 tsp ground cumin
14 oz can black-eyed peas, drained
1 cup water
1/2 cup cooked white rice
2 chipotle chicken sausages, sliced (optional, do not use for vegetarian/vegan)
2 cups fresh baby spinach
2 tbsp chopped fresh parsley
sour cream, for serving

Directions:
Heat the oil in a medium saucepan over medium-high heat. Add the salsa and cumin and cook while stirring until softened, about 5 minutes. Add the black-eyed peas, water, rice, and sausage (if using). Cook, stirring occasionally, until the beans are creamy and tender, about 15 minutes. Stir the spinach and parsley in the pan until wilted, about 1 minute.

Serve garnished with additional salsa and sour cream.

Serves 2-3.


Tuesday, January 22, 2013

Grapefruit Green Smoothie

How long would you need to clean and de-clutter your house for a guest? Are you ready for someone to stop by right this second?


The other day I was talking with a couple of my friends about this exact topic. One of them is good friends with a girl who married a London native; apparently they live there now and she is expected to be ready for guests at less than a moment's notice. Like she dresses nicely and always has the table cleared off. I'm imagining she has cookies coming out of the oven and not a dirty dish in sight.

Is that you? If it is, do you want to be my live-in maid? I'll pay you with yummy food.

Maybe it is a cultural thing but the three of us Americans (I could totally be generalizing and please excuse or correct me if I'm wrong) agreed that we certainly need at least a day to really get ready for our guests. For me, it would require making sure all the dishes are cleaned, clearing off old magazines and mail from my kitchen table, giving my toilet and countertops a little scrub, and on most days, making my bed. It would also require the foresight to not come home and immediately change into sweatpants. If you were coming over, I'd probably bake you cookies too.

I promise I won't make you eat this green smoothie if you are frightened of putting spinach into a blender. But I do encourage you in the comfort of your own home, no matter how clean or messy it is, to give a green smoothie a chance. You've probably heard people rave about the nutritional properties and how you can't taste the spinach at all. I'd tell you those same things but you won't actually believe me until you try one. I went with grapefruit and banana and it was quite delicious. There are so many options just like with any smoothie that you can chose whichever fruit you enjoy the most. Try it out!


And I'm totally serious about the live-in maid thing.... any takers?


Grapefruit Green Smoothie
Ingredients:
1 grapefruit, peeled and segmented (with as much of the pith as you want)
1 fresh or frozen banana, sliced
2 cups fresh spinach
1/4 cup water
ice, approximately one handful

Directions:
Combine the grapefruit, banana, spinach and water in a blender. Pulse until smooth. Add ice and pulse again until you have the desired consistency.


Monday, January 21, 2013

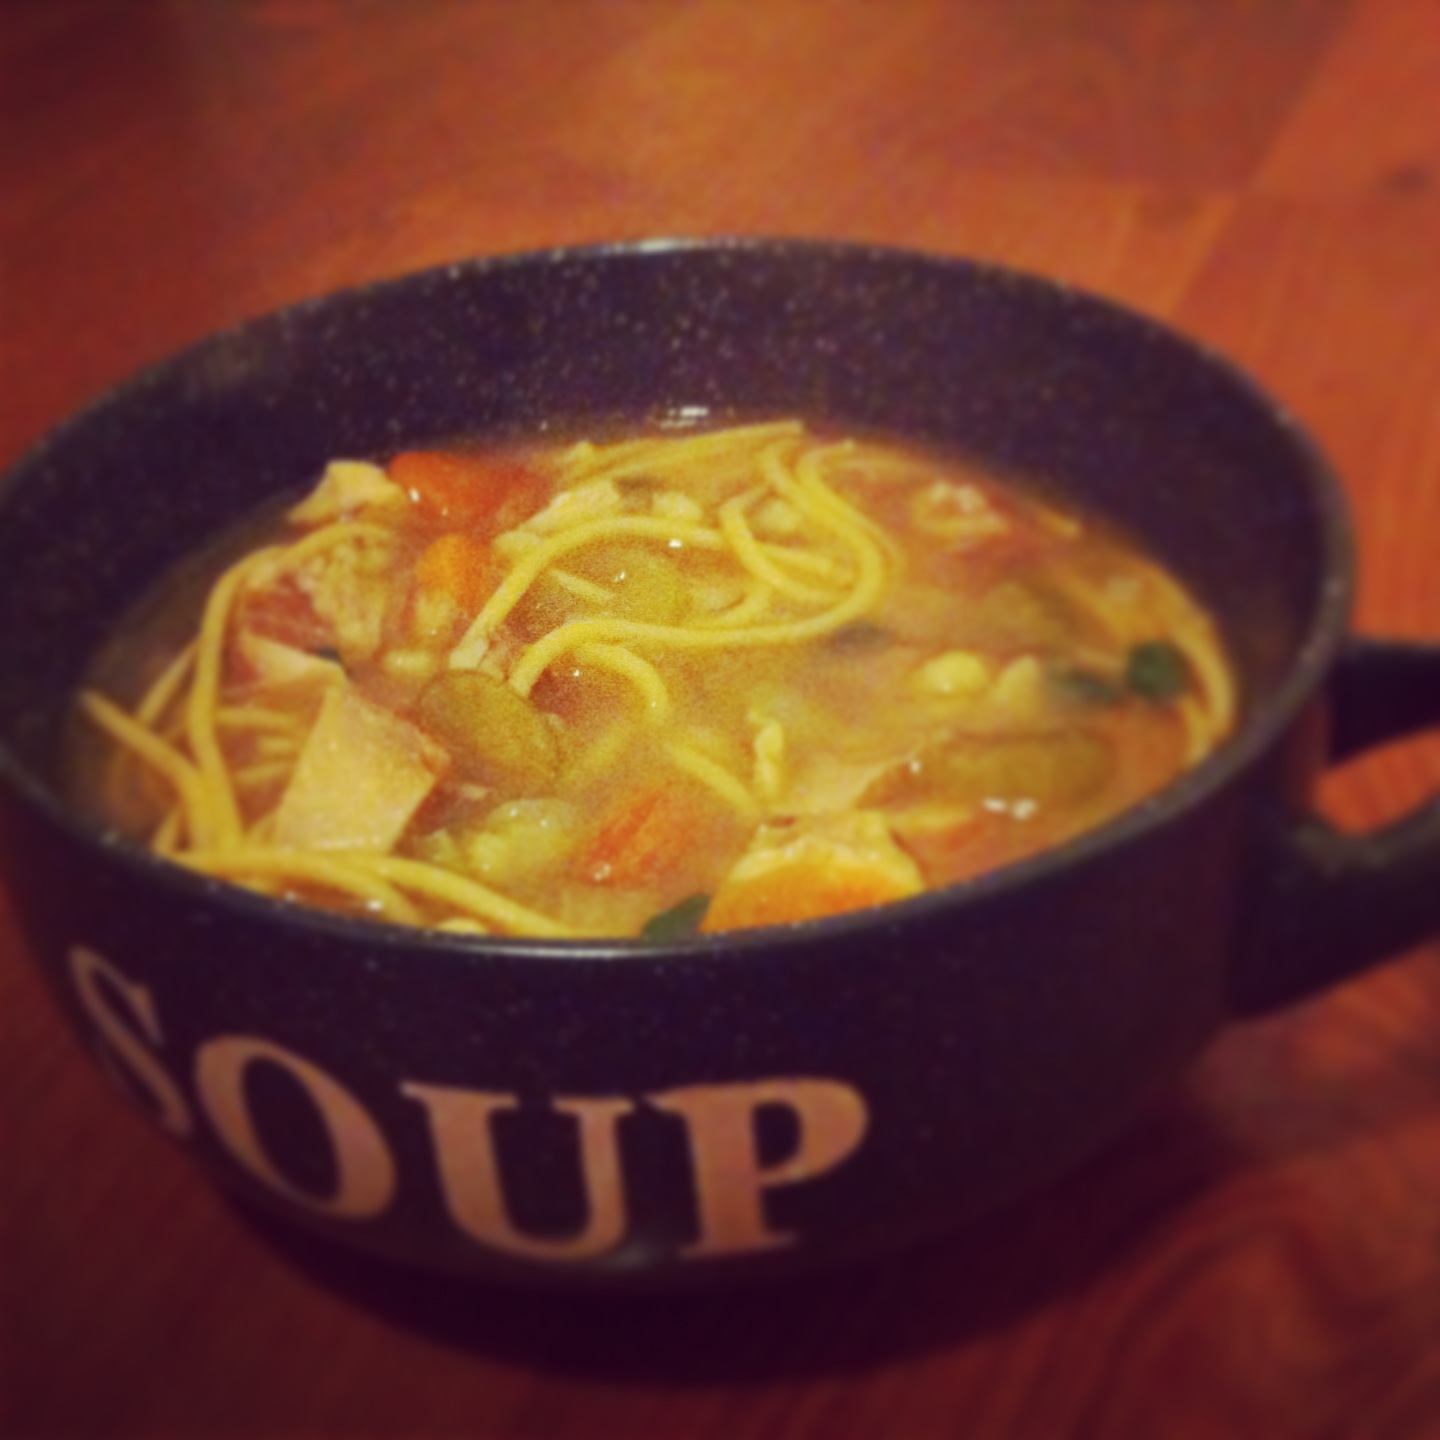
Easy Chicken Noodle Soup

Brrr it's cold in here.
There must be some Torros in the atmosphere.
O E O E O.
Ice ice ice.

Seriously ice ice ice; today has a windchill of -7. NEGATIVE SEVEN. I almost froze off my toes, fingers, nose, and ears walking into work from my car today. And I was wearing a scarf, hat and mittens. Yeah. Brrrrr cold. It is days like today that I miss North Carolina winters. I long for lows in the 20-30s and varied elevations that can block some of the wind.

Days like today also make me want hot, steaming soup. Good thing I made this chicken noodle soup last week so I had leftovers to warm up for lunch today. It helped warm my core (although my extremities are still feeling phantom breezes).

The best thing about this recipe is that it is quality comfort food. Not only is the weather in full winter force, but many people have been succumbing to the flu. This will remedy both those things. I know when you are sick you have no desire to be cooking anything, but this is perfect because even your significant other with no kitchen experience can whip it up in a heart beat. I used leftover chicken thighs from a recipe I was testing for a fellow blogger last week. You could certainly use a precooked rotisserie chicken from the grocery store. Or just quickly boil a few chicken breasts and throw those in. To make it even more simple for your loved one to wait on you, they could pick up prediced onion, carrots and celery.

Do it! Your body will thank you.


Chicken Noodle Soup (adapted from a recipe card from Kroger)
Ingredients:
1 tbsp extra virgin olive oil
1 cup chopped onion
1 cup chopped carrot
1 cup chopped celery
1 tbsp flour
4 cups vegetable stock (homemade) or low sodium chicken broth
1 cup water
1/4 tsp salt, more to taste
1/4 tsp freshly ground pepper, more to taste
3 tbsp pearled barley
1 1/2 cups chopped, cooked chicken thighs and/or breasts
3 oz whole wheat spaghetti noodles, broken in half
1/4 cup chopped fresh flat leaf parsley

Directions:
Heat oil in a large pot oven medium high heat. Add onion, carrot and celery and saute for about 3 minutes. Stir in the flour and mix to coat. Whisk in broth and water. Add salt and pepper and bring to a boil. Cover, reduce heat and simmer for about 5 minutes. Add the barley, bring back to a boil, cover and simmer for 15-20 minutes until the barley is tender. Add the chicken and noodles. Bring back to a boil and cook 8-10 minutes until noodles are cooked completely and chicken is hot. Stir in parsley. Taste and add additional salt and pepper, as desired.

Serves 4-6.


Sunday, January 20, 2013

Sunflower Seed Loaf

Science Sunday Post # 2

Food Molecule #2

CARBOHYDRATES.

Probably some of the most beloved food molecules that are a specialty of plants, they make up delicious warm from the oven bread, sugary cookies and cupcakes, fruit, potatoes, and so much more. Carbohydrates sometimes have a bad rap because of things like the Atkins diet. However, they give flavor, bulk and texture to our food. They are made of up simple sugars such as glucose, galactose, and fructose.


Depending on how these simple monosaccharides are combined in polymers known as oligosaccharides different structures and properties result. For example, alpha-linked monosaccharides make up starch that is a large component of potatoes, rice, wheat and corn; most people have no trouble digesting these foods and will get a lot of energy from these foods. On the other hand, beta-linkages of monosaccharides make up cellulose and fiber which we cannot digest. These foods, including fruits, vegetables and bran, are important for our diet because as the cellulose passes through our digestive system, it absorbs water and becomes bulk of mass that helps to clean out our intestines.


To celebrate carbohydrates, I'm sharing with you a recipe for sunflower seed bread. It is great toasted and topped with peanut butter or as a sandwich with your favorite toppings. Mmm. I do love my carbohydrates :)


Sunflower Seed Loaf (adapted from King Arthur's Flour Whole Grain Baking)
Ingredients:
1/2 cup raw sunflower seeds
1/2 cup sesame seeds
4 tbsp unsalted butter, cut into 6 pieces
1 1/4 cup lukewarm milk
2 tsp sesame oil
1/2 cup whole wheat flour
1/2 cup old-fashioned rolled oats
1/4 cup cornmeal
1/4 cup rye flour
2 cups all-purpose flour
1/4 cup dark brown sugar
1 1/4 tsp salt
2 1/4 tsp instant yeast

Directions:
Preheat oven to 350 F. Line a large baking sheet with parchment paper. Spread the sunflower and sesame seeds on the pan. Bake for 10-12 minutes until they begin to brown.

Mix together all the ingredients. Either knead by hand or stand mixer until it is a soft and smooth dough. Place in a bowl, cover with a towel and allow to rise until puffy 1-2 hours.

Grease a 9 x 5 inch loaf pan. Gently deflate the dough and press into a 9 X 4 inch rectangle. Roll hot dog style so you have a 9 inch log. Place in prepared pan and cover with lightly greased plastic wrap. Allow to rise at RT for another 1-2 hours until puffy.

Preheat oven to 350 F, again (because you probably should leave it on for the 4 hours of rising!).

Uncover and bake for 15 minutes. Tent with foil and then bake for another 30-35 minutes. Let cool slightly and then remove from pan and let cool on a wire rack. Cool for at least 30 minutes before slicing.


Thursday, January 17, 2013

Double Decker Taco Supreme

Fast food.

What are your thoughts?

I think fast food has its pluses and minuses. Obviously the speed and availability are the top two reasons to eat fast food. On the other hand, it is the caloric overload and altogether lack of nutrition that says maybe you should avoid fast food on a normal basis. When you are traveling and in need something quick and easy, almost everyone will stop to get fast food. Honestly, I don't eat a lot of fast food mostly because I enjoy cooking so much. And if I'm going to pick dinner up on my way home, I usually fall back on Panera or Jimmy Johns (are those considered fast food? I don't know). I'm not going to tell you I never eat fast food; that would be a lie. I enjoy a french fry or a spicy chicken sandwich or a roast beef sammy every now and again. But the fast food restaurant that I love the most is good ole T-bell.


To celebrate our one month of dating anniversary, Scott took me to Taco Bell. Although it may seem a little funny to you, it was a sweet gesture because I hadn't been to Taco Bell since I moved to NC about 9 months previous. We also both picked up Taco Bell and skyped while watching a Duke basketball game to celebrate our 5 year anniversary since we live halfway across the country from each other. It has become one of "our" restaurants. Ha ha. This ecard is so appropriate for us:


Anyway, I love the Taco Bell double decker taco supreme. I have loved it ever since I was a little girl when joined the menu temporarily. At some point it became a permanent menu item which means I almost always purchase one when I go there. Last week when I made the refried beans, I figured what better way to use them then to recreate my beloved DDTS at home. So delicious. I cannot even describe it. You'll have to make it to understand.


I even splurged on Taco Bell mild sauce to push it completely over the top. I was quite surprised I didn't have any little packets floating around my apartment... To tell you the truth, if I had closed my eyes I would have sworn I had just pulled out of the drive-through. Note: do not make them to far in advance because similar to T-Bell DDTS, the hard taco will get soft if it sits for too long. Eat immediately after assembly for the perfect crunch and soft combo.


Double Decker Taco Supreme (inspired by Taco Bell, obviously)
Ingredients (per taco, although how you could eat only one, I'm not sure):
1 hard taco shell
1 fajita sized tortilla, cut to about the size of the hard taco shell
2-3 tbsp refried beans, homemade or canned, warmed
taco meat*
shredded or torn lettuce
shredded cheddar cheese
diced tomato
sour cream
Taco bell sauce

Directions:
Microwave the tortilla for 30 seconds on high to soften. Microwave the hard taco shell on high for 45 seconds. Place the tortilla on a plate and spread the refried beans in an even circle. Top with the hard taco shell and press the tortilla to stick. Fill with taco meat, lettuce, cheese, tomato, sour cream and sauce. Serve immediately!

*Make your favorite taco meat with either ground beef or ground turkey. This is what I do-- for 1/2 lb meat (which will be about 6 tacos), brown over medium high heat. Drain off fat. Add 1/2 cup water, 1 rounded tbsp taco seasoning and 1 tbsp cornstarch. Cook until thickened.


Wednesday, January 16, 2013

Refried Beans in the Slow Cooker

I was all prepared to deem this recipe "refried" beans because they are not fried and by no means are they RE-fried.


But then I looked up refried beans on Wikipedia and I learned that frijoles refritos actually means "well-fried beans" not re-fried beans. And they are typically baked and not always fried. The misnomer is just in the English translation. So there you go.


In all honesty though, these were great. I made them on a Monday and used them for multiple meals throughout the week because I can never eat too much Mexican. The first night I just did some bean tacos, later I ate them as a side to a taco salad, and just wait until tomorrow to see the winning recipe of the week. :) If you are making them for a large family and want to have extra for leftovers, you could double the beans and seasoning without any issues. Alternatively, if you are anti-pinto beans, I could imagine you could substitute black beans and they would be just as excellent.


Slow Cooker Refried Beans (adapted from Chef in Training)
Ingredients:
1 1/2 cups dried pinto beans, rinsed and drained
cold water
1 chicken bouillon cube (or vegetable bouillon for vegetarian version)
1/2 tbsp garlic salt
1 small onion, skin removed and chopped in half
1-2 tbsp butter, optional*
salt and pepper, to taste

Directions:
Place the rinsed and drained pinto beans in your slow cooker. Fill almost to the top with cold water. Add the bouillon cube, garlic salt and onion. Cook on low for 10-12 hours (or high for 5-6 hours). Test to make sure the beans are soft.

Strain the beans, reserving some of the liquid. Place the beans and onion in a large bowl, add the butter, and mash with a potato masher or fork until the desired consistency is reached. Add some of the cooking liquid if they begin to dry out. Season with salt and pepper to taste.

Makes about 6 cups. Store in an airtight container in the refrigerator.

*For a non-fat version, do not add butter.


Tuesday, January 15, 2013

Quinoa and Nut Granola

Saturday was an up-and-down type of a day. I was invested in two very important sporting events. Duke basketball vs cross-triangle rivals NC State and Ravens vs Broncos football playoff game. Unfortunately only one of those had the outcome that I desired. The Ravens are moving on to the AFC championship this coming Sunday night. Bdddddd (in case you are wondering, that is a bird sound). Both games were up and down, nail biting, pacing the living room types of games. I will spare you all my thoughts on the Duke loss and just take a moment of silence for R. Kelly and Spice to heal rapidly and get back on the floor (for a detailed recap of the game and my thoughts on how the team is doing this year, feel free to email me). 


Since I knew I was going to be spending the majority of the afternoon yelling at the TV, I figured I would treat myself to a nice breakfast. I debated pancakes or waffles or eggs but I decided instead on homemade granola. I always enjoy yogurt topped with granola and since I had seen one my regular food bloggers post about quinoa granola, I knew I had to try it out. I changed around a few things to use what I had on hand. You could certainly use any combination of nuts and dried fruit that you like the most. I think the quinoa gives it an extra crunch (and a boost of protein) over "normal" granola, and the sweetness of the sugar combines well with the tartness of the applesauce. I have been enjoying it all week so far.


As I've told you with many of my DIY recipes, I enjoy making things at home that you can easily purchase at the store. Sometimes it takes about the same amount of time as a trip to the store; others may take a little bit of effort, but the ability to customize to your likes and dislikes and to control the additives (salt, MSG, etc) wins out for me. Many times it will also save you some money (especially when it comes to granola which I find is over-priced). I'm not strict about my homemade things because sometimes I'm lazy or in a rush or craving something that mass production just does better, but I would encourage you to try out a new homemade thing or two this year.

Anything in particular you want to see "homemade"? Let me know, I'll add it to my list!


Quinoa and Nut Granola (adapted from Two Peas and Their Pod)
Ingredients:
1/2 cup quinoa (I used a combination of white and red)
1 cup old fashioned oats
1/3 cup pepitas
1/4 cup raw sunflower seeds
1 1/2 tbsp brown sugar
1/4 tsp cinnamon
1/8 tsp salt
1/2 cup applesauce (I used granny smith flavored)
1 tbsp honey
1 tsp butter
1/4 tsp vanilla
1/3 cup dried cranberries

Directions:
Preheat oven to 300 F. Line a large baking sheet with parchment paper.

Rinse and drain the quinoa. Combine the quinoa, oats, pepitas, sunflower seeds, brown sugar, cinnamon and salt in a bowl. Toss to mix.

Melt the butter in a small bowl. Whisk in the applesauce, honey and vanilla. Pour over the dry ingredients and mix to coat completely. Dump out on the prepared baking sheet and spread in an even layer.

Bake for 35-40 minutes, mixing every 10 minutes, until everything is golden brown. Remove from the oven and mix in the cranberries. Let cool and store in an airtight container.


Monday, January 14, 2013

Homemade Basil Fettuccine

I have a problem. I have literally been listening to the Pitch Perfect soundtrack on repeat in my car since December 30. I cannot get enough of it. Unfortunately it has not been removed from CD player so it hasn't been synced with my iPod so I cannot rock out to it everyday all day. I think the people on my floor would thank my car for holding it hostage right now because I'm not sure if I would be able to refrain from dancing and singing along. Or putting my hands up when they sing "Party in the USA". I'm loving it. There is just something great about acapella, right? In case you need more explanation, Scott got me the CD for Christmas which meant that I opened it when we were in St. Louis before New Years. And it was put directly into the CD player. It has not even made a trip to my apartment yet.


However, one of my other Christmas presents has been thoroughly vetted in the apartment. Actually two of them-- Santa got me a red Kitchenaid Mixer (Thanks to the best two Santas in the world!) and Scott got me the pasta roller and cutter attachment. As you know, one of my bucket list to-dos is homemade pasta. These two presents allowed me to check it off the list... and want to do it over and over and over again. I have visions of spinach pasta, whole wheat pasta, beet pasta, squash pasta and etc etc etc. Don't worry, I'll share them with you. :)


I was surprised about how easy this came together. Step 1- Make the dough. Step 2- Rest the dough. Step 3- Roll the dough. Step 4- Cut the dough. Step 5- Boil the noodles. Okay, so maybe I'm belittling it slightly; it does take a bit of time but it is totally worth it. I made this quick garlic butter basil sauce to enhance the dried basil I put into the pasta and to let the pasta really speak out. I cooked up all I needed for dinner on that first night, tossed the rest of the uncooked noodles with flour and kept it in the fridge for later. They held up well to jarred spaghetti sauce and later cooked, refrigerated and reheated in the microwave worked out well.


So yummy. You should definitely do it!


Homemade Basil Fettuccine (adapted from Better Homes and Garden Cookbook)
Ingredients:
2 1/3 cups all-purpose flour
1 tsp dried basil
2 eggs
1/3 cup water, plus more if needed
1 tsp extra virgin olive oil

Directions:
In the bowl of your stand mixer equipped with the flat beater, combine the flour, basil, eggs, water and oil. Mix on speed 2 for 30 seconds. Change the flat beater for the dough hook and knead on speed 2 for 2 minutes. Remove dough and hand knead for an additional 1-2 minutes. Let rest for 20 minutes. Divide into four pieces.

Flatten each piece to about 1 cm thickness. Connect your pasta sheet roller to the mixer and set to thickness 1. Turn on mixer to speed 2 and feed through the rollers. Fold in half and continue to knead until the dough widens to width of the roller. Lightly dust with flour as necessary. Continue to roll pasta increasing the knob from 1 to 2 and such until you reach 5. Repeat with the other 3 pieces.

Cut the dough with the fettuccine roller. Lay out flat, separating with your hands. Let dry for up to 1 hour. Cook immediately or after dried. To store in the fridge, toss in flour and refrigerate in an air tight container.


Garlic Butter Basil Sauce
Ingredients:
Per serving:
1 tbsp unsalted butter
1 tbsp garlic infused olive oil
1/2 cup fresh basil leaves
1 1/2 cup fresh pasta (from above)
Freshly grated parmesan cheese, for serving

Directions:
Bring a large pot of water to boil.

In a small pan, melt the butter over medium heat. Stir and cook until browned. Add the oil and reduce heat to low.

Add the pasta to the boiling water and cook for 2-6 minutes (depending on how dry your pasta is) until al dente. Drain.

Add the basil to the butter and oil and stir to wilt. Toss the pasta with the sauce and garnish with freshly grated parmesan cheese.

Serves 1.


Thursday, January 10, 2013

Ham and Ricotta Calzones

My mom told me about this new store downtown in my hometown that sells imported flavored olive oils and balsamic vinegars. While I was visiting for Christmas I just had to check it out. It was so fun because I got to taste all the different flavors (yes, I tasted ALL of the them). The owner also had a variety of different salts. One was a ghost pepper infused salt; I tried one little speck and it burned my tongue for about a half an hour. In case you didn't know, ghost peppers are the hottest commercially available peppers and are 100 times hotter than jalapenos! It was a fun experience though.


It took a lot of self control (and realization that I am still a poor postdoc) to not purchase up all the oils, vinegars and salts. I settled on a garlic infused olive oil that would be perfect for so many dishes and a small amount of garlic salt and Hawaiian red salt. The garlic salt is quite delectable and the red salt is huge crystals and red (duh!) that I thought would be great for garnishing.


When Scott was visiting for New Years, he suggested we make calzones so I thawed out some pizza dough and we opened up the garlic infused olive oil. It really enhanced the dish when brushed on top; next time I may brush the inside of the dough as well!

I just had to show you this picture of how Scott cut his calzone into bite-sized pieces and topped them with pizza sauce. Me? I just picked it up and shoved it into my face. ;)


Ham and Ricotta Calzones
Ingredients (per calzone):
1/5 batch pizza dough
2 slices deli ham
1/2 cup ricotta cheese
1/3 cup shredded mozzarella cheese
olive oil (I used garlic infused) for baking
dried parsley, oregano, shredded parmesan etc (garlic powder if using regular olive oil) for baking
cornmeal for baking
pizza sauce, for serving

Directions:
If pizza dough is frozen, let thaw in fridge over the course of the day. Preheat oven with a baking sheet or pizza stone inside to 500 F. Remove dough to clean work surface and cover with towel and let rest at room temperature as the oven preheats, about 10-15 minutes.

Stretch the dough out into an 8 X 11 inch-ish rectangle. If desired, brush the topside of the dough with olive oil. Spread the ricotta cheese over half the dough, leaving a 1/4 inch edge. Top with deli ham slices and shredded mozzarella. Fold the un-garnished half over the half with the topping, pressing down to seal. Brush the top of the calzone with olive oil and sprinkle with seasonings.

Place on preheated baking sheet or pizza stone sprinkled with cornmeal. Bake for 8-10 minutes until puffy and golden. Remove from oven and let sit for 5 minutes.

Serve with heated pizza sauce for dipping.


Monday, January 7, 2013

Cranberry Smoothie

I was trying to decide if I wanted to call this a cranberry smoothie or a cranberry milkshake or simple frozen goodness of cranberries. I think technically milkshakes contain ice cream so I went with the smoothie. Fair warning it has a consistency of a milkshake though because of the Greek yogurt.


Did you purchase a couple extra bags of cranberries over the holidays because they were so cheap? I certainly did. Then I threw them in the freezer for an occasion such as this. When it was freezing cold outside (literally, ice is everywhere!) and I just needed a frozen drink. Wait. What? If you haven't figured out that I'm a little bit crazy yet then you haven't been reading my posts thoroughly enough. Anyway, this cranberry smoothie is super tart because of the Greek yogurt and the cranberries; you may want to add more honey than I did if you want something a little sweeter.


Cranberry Smoothie
Ingredients:
6 oz carton non-fat plain Greek yogurt
1 cup frozen cranberries
1/2 cup low fat milk
1 tbsp honey plus more to taste

Directions:
Combine everything in a blender. Pulse until smooth. Taste to see if you need extra sweetener and add as desired.


Sunday, January 6, 2013

Sirloin Tip Roast

Let's talk New Years resolutions. Are you a "I'm going to work out everyday" person? Or did you decide you were going to avoid fast food and eat more salads? Do you want to lose 10 pounds? Did you resolve to make your bed every morning? Or maybe look for a new job? Finish your education?

Me? I'm not a huge resolution person. BUT I do have desires for 2013. They include publishing a number of papers, taking a preparing future faculty course, and applying for jobs this coming fall. Wow. Lots to do for my career.

I also decided it would be fun to add some goals for the blog. I'm planning on checking more things off on that bucket list. AND I'm starting this new series; I'm calling it "Science Sundays". Here I will explain some aspect of science behind food, cooking and baking. Then, of course, I'll have a recipe to highlight what I'm talking about. I'm not promising a Science Sunday every week but I'll shoot for at least a few each month. This will be fun for those of you who care to learn a little bit about science and it will be fun for me to bring my two loves together.

So let's get started!

I'm kicking off the first few weeks of Science Sunday talking about the major food molecules that we need to consume on a daily basis. First up is protein! As we all probably know, protein is a characteristic of food from animals such as milk, eggs, meat and fish. Additionally, we can find protein in a variety of beans and nuts. The basic building blocks of proteins are amino acids; which are linked end to end via amide bonds.


The sequence of the amino acid side chains is important, but the overall 3D shape of the protein is important to whether or not we can eat it and contributes to the flavor. When a protein is in a natural state, it is globular and there are interactions between individual amino acids that are not directly connected to one another. When we cook the protein, the internal bonds are broken and the shape is changed in a process we call denaturation. Visualize it like this-- say you had a long piece of string. If you randomly ball up that piece of string, you have the "natural" state of the protein. Now throw that ball up in the air and the string unravels. You have just cooked your protein and denatured it. Most proteins can be denatured at temperatures around 104 F (or 40 C). However, we don't need heat to denature proteins; we can use other things like salt, acid, base, alcohol, and stretching motion (like whisking). Once the natural state of the proteins are denatured, they don't just stop there, new bonds are formed as they continue to cook.


So let's denature some proteins. We made this sirloin tip roast for Christmas Eve dinner. It seems like a perfect example of cooking proteins. So enjoy the amino acids as you do some chemistry in the kitchen!


Sirloin Tip Roast (adapted from food.com)
Ingredients:
Sirloin tip roast (5 to 8 lbs-- ours was 7.3 lb)
6 garlic cloves, thinly sliced
1 cup water
1/2 cup red wine (we used Pinot Noir)
Dijon mustard
0.75 oz package au jus mix

1 1/2 tbsp dried minced onion
1 tbsp garlic powder
1 tbsp dried basil
1 tbsp dried rosemary
1 tbsp dried tarragon
salt and pepper, to taste
Extra virgin olive oil
Water and cornstarch, for making gravy

Directions:
Let the roast set at room temperature for 1 hour prior to cooking. Mix together the au jus mix, minced onion, garlic, basil, rosemary and tarragon. Set aside.

Preheat oven to 325 F.

Rinse and pay dry with a paper towel. Generously rub salt and pepper on all sides of the roast.

Cover the bottom of a large pan with olive oil. Heat over medium high heat until very hot. Place the roast in the hot pan (being very careful because the oil is hot!) and sear on all sides until nicely brown and some of the fat has been rendered. It should take 5-8 minutes.

Place the roast on wire rack sitting in a roasting pan. Poke 15-20 slits into the roast (enough for the garlic cloves) using a sharp knife. Push the slices of garlic into the slits. Pour the water and wine over the top of the roast. Generously brush the roast with Dijon mustard. Season the roast with salt and pepper again. Then sprinkle the mixed seasonings evenly over all of it, rubbing in slightly.

Bake in the middle of the oven for 2 1/2 to 3 1/2 hours until roast is a little bit less than you desire (if you want medium, remove from oven when medium rare). Make sure you use a meat thermometer pushed into the center of the roast to determine the temperature. Remove from the oven and tent with aluminum foil. Let stand for 20 to 30 minutes to continue to cook.

Pour all of the juices into a small saucepan, add a water until you get to the amount you need for the gravy and bring to a boil. Dissolve cornstarch in cold water and add to pan. Stir until thickened. Taste and season with salt and pepper, if desired.

Carve roast and serve with gravy.


Friday, January 4, 2013

Dark and Soft Dinner Rolls

So I told you that I did some cooking and baking while I was visiting my family over the holidays. When it came to preparing the meals, I was definitely the bread girl. I made pretzel rolls for our soup night. I made pizza dough for a pizza roll for our snacky Christmas day dinner. And I made these delicious dark and soft dinner rolls for our Christmas eve dinner.


 Before I left for home, I pulled out my handy dandy (aka amazing and you should definitely purchase this if you like to make yeast breads at home) King Arthur Flour Whole Grain Baking cookbook and read a number of the different dinner roll choices for my parents. Since my sister and my dad aren't the biggest fans of breads full of nuts and grains and crunch, we settled on this recipe.


They are marketed to resemble the little loaves of bread you get at a steak house; you know the ones that come on a wooden cutting board with a large knife and a tub of honey butter. I would say they turned out pretty close to those although mine were not quite as dark. They were quite delicious with a hint of sweet and even made a nice sandwich the next day. They are certainly hearty, large rolls so if you aren't big carbohydrate people (who in the world are you and why are we friends? Just kidding) then you could certainly shape them into 15-20 normal sized dinner rolls. If you are a big bread eater then stick to the 10 rolls.

You could probably make them even little larger, grill up a steak, whip up some honey butter, stick a large knife into one of them and split it over a nice dinner date at home.


Dark and Soft Dinner Rolls (adapted from King Arthur Flour Whole Grain Baking)
Ingredients:
1 cup lukewarm water
2 1/2 tsp instant yeast
1/3 cup orange juice
4 tbsp unsalted butter, cut into 6 pieces
1/3 cup honey
1 3/4 tsp salt
3 tbsp sugar
2 tbsp cocoa powder

2 1/4 cup whole wheat flour
2 1/4 cup bread flour

Directions:
In a large bowl, combine the water and yeast. Once it is bubbly, add the orange juice, butter, honey, salt, sugar and cocoa powder. Stir to combine. Add the flours stirring with a wooden spoon until you cannot stir anymore. Turn out on a lightly floured surface and knead in the rest of the flour. Knead by hand for 4-5 minutes until you have a medium-soft, smooth dough. Place in a lightly greased bowl and cover with plastic wrap or a towel and allow to rise until puffy, about 1-2 hours. It will not double in bulk.

Line a baking sheet with parchment paper.

Gently deflate the dough and place it on a lightly greased work surface. Divide into 10 even pieces. Shape each piece into 5 by 2 inch rolls. Place them on the prepared baking sheet, loosely cover with plastic wrap or a towel and allow to rise for an additional 1 1/2-2 hours. They will appear to rise more than the initial rise although they will not double in size.

Preheat oven to 350 F.

Uncover the rolls and bake until the slightly browned on the bottom, about 25-30 minutes.

Makes 10 large rolls.