Showing posts with label how to. Show all posts

Thursday, April 3, 2014

Garlic Sticks

I listen to the radio as I drive to and from work every day which means that typically my entire day only consists of 20 minutes of radio listening. Therefore, I have to pick my station very carefully. In the mornings, I am always hard pressed to find a station playing music constantly so I pick my go-to station by the characters on the morning show. I've settled into a station that I like here and one of the things that they do shortly before 9am (which is typically when I'm finishing up my drive in) is list 5 random facts of the day. Sometimes they are funny, sometimes they make you think, sometimes they are a little gross. But regardless I can start my day off my learning something.

Earlier this week, one of the facts of the day was that not having friends can be hazardous to your health. The study they were quoting apparently said that being friendless is like smoking 15 cigarettes a day. How or why someone measured that is beyond me but it made me thankful for all of my wonderful friends. Throughout all of the stages of my life, my friends have helped to brighten my days and I suppose to keep me healthy. For that, my friends, I thank you. And as I move on to the next stage of my life and make new friends (here's hoping), I want to thank you in advance for keeping me healthy.


So put down those "cigarettes", invite some friends over, and fellowship over these garlic sticks. They are a perfect combination of garlic and cheese and soft and crunch.


Garlic Sticks (Topping adapted from One Preppy Cookie)
Ingredients:
1/5 recipe frozen homemade pizza dough (if you want to up the amount of garlic, when you make the pizza dough use garlic infused olive oil instead of regular olive oil)
1 tbsp freshly shredded parmesan cheese
1/8 tsp kosher salt
1/8 tsp freshly ground pepper
1/4 tsp garlic powder
1/4 tsp Italian seasoning
1/4 tsp onion powder
2 tbsp unsalted butter, melted
1/2 cup mozzarella cheese

Directions:
Let the frozen pizza dough thaw over the course of the day in the refrigerator. Remove from the refrigerator and let stand at room temperature covered with towel for 10-30 minutes before baking.

Preheat oven and baking stone to 500F.

Whisk the parmesan cheese, salt, pepper, garlic powder, Italian seasoning, and onion powder into the melted butter.

Roll or pull the dough into a circular shape, as thin as you can; brush with the butter mixture and sprinkle with the mozzarella cheese. Transfer to the preheated baking stone.

Bake for 8-10 minutes until golden and crunchy. Let cool for about 5 minutes before slicing.

Serve with pizza sauce (homemade or other) for dipping.


Monday, July 8, 2013

Wine Slushies!!!

We know that I like to recreate recipes at home that I find at restaurants. Remember the potato pizza? And the immaculate reception inspired pot pie? And crab meat rangoons? What about the restaurant style dark dinner rolls? So from the moment I tasted the wine slushie at Sleepy Creek Vineyards, I knew I needed a homemade version. I loved the taste but could not justify buying both the wine and the slushie mix... especially since I was certain the mix consisted of sugar and only a few other ingredients. As is my norm, I immediately google-ed "homemade wine slushie mix" when I got home and found myself a recipe. And y'all, it is so simple. I've already made it twice! I plead the 5th in answering your question of how long it took me to finish the first batch (it was >1 day, however). Then my parents were in town for Sunday and I made it again because I like to be a bad influence on my mom and introduce her to alcoholic beverages that I think she will enjoy (she doesn't like beer or wine and will only occasionally drink a margarita or daiquiri). I was correct. The tartness and ice-y-ness of the drink was perfect for her. My dad enjoyed it too.


Here it is important to appropriately pick your wine. If you use a sweet wine, then your slushie will be sweet; if you use a drier wine, then your slushie will be even more tart. I like the latter best. This recipe only requires 4 ingredients: sugar, citric acid, a lemon and wine (I guess 5, if you include the water). FYI: Citric acid can be found in the canning section of your grocery store or Lowe's/Home Depot/etc.

I cannot express my enthusiasm for this drink enough. It is perfect for the summer. Do the darn thing!


Homemade Wine Slushies (adapted from Celebration Generation)
Ingredients:
1 1/3 cups granulated sugar
2 tsp citric acid
zest of 1 lemon
juice of 1 lemon
750 mL bottle of red wine*
3 cups water

Directions:
Combine the granulated sugar, citric acid and lemon zest in the bowl of a food processor. Pulse for about 3-4 minutes until the sugar is processed and everything is mixed well.

Place a gallon size freezer ziploc bag in a bowl. Pour the sugar mixture into the bag. Add the wine, water and lemon juice. Gently mix with a spoon to dissolve. Place into the freezer and allow to freeze for at least 3-4 hours until it reaches your desired consistency.**

*Note: the sweeter the wine you use, the sweeter the slushie will be. Also, I have only used red wine, but I imagine you could use white wine as well.

**Note: This will keep in the freezer for multiple days but will take on more of a granita or flavored ice texture. This is no problem- eat it with a spoon. Or remove it from the freezer and squish the bag with your hands after it has been sitting on the counter for a few minutes.


Monday, January 14, 2013

Homemade Basil Fettuccine

I have a problem. I have literally been listening to the Pitch Perfect soundtrack on repeat in my car since December 30. I cannot get enough of it. Unfortunately it has not been removed from CD player so it hasn't been synced with my iPod so I cannot rock out to it everyday all day. I think the people on my floor would thank my car for holding it hostage right now because I'm not sure if I would be able to refrain from dancing and singing along. Or putting my hands up when they sing "Party in the USA". I'm loving it. There is just something great about acapella, right? In case you need more explanation, Scott got me the CD for Christmas which meant that I opened it when we were in St. Louis before New Years. And it was put directly into the CD player. It has not even made a trip to my apartment yet.


However, one of my other Christmas presents has been thoroughly vetted in the apartment. Actually two of them-- Santa got me a red Kitchenaid Mixer (Thanks to the best two Santas in the world!) and Scott got me the pasta roller and cutter attachment. As you know, one of my bucket list to-dos is homemade pasta. These two presents allowed me to check it off the list... and want to do it over and over and over again. I have visions of spinach pasta, whole wheat pasta, beet pasta, squash pasta and etc etc etc. Don't worry, I'll share them with you. :)


I was surprised about how easy this came together. Step 1- Make the dough. Step 2- Rest the dough. Step 3- Roll the dough. Step 4- Cut the dough. Step 5- Boil the noodles. Okay, so maybe I'm belittling it slightly; it does take a bit of time but it is totally worth it. I made this quick garlic butter basil sauce to enhance the dried basil I put into the pasta and to let the pasta really speak out. I cooked up all I needed for dinner on that first night, tossed the rest of the uncooked noodles with flour and kept it in the fridge for later. They held up well to jarred spaghetti sauce and later cooked, refrigerated and reheated in the microwave worked out well.


So yummy. You should definitely do it!


Homemade Basil Fettuccine (adapted from Better Homes and Garden Cookbook)
Ingredients:
2 1/3 cups all-purpose flour
1 tsp dried basil
2 eggs
1/3 cup water, plus more if needed
1 tsp extra virgin olive oil

Directions:
In the bowl of your stand mixer equipped with the flat beater, combine the flour, basil, eggs, water and oil. Mix on speed 2 for 30 seconds. Change the flat beater for the dough hook and knead on speed 2 for 2 minutes. Remove dough and hand knead for an additional 1-2 minutes. Let rest for 20 minutes. Divide into four pieces.

Flatten each piece to about 1 cm thickness. Connect your pasta sheet roller to the mixer and set to thickness 1. Turn on mixer to speed 2 and feed through the rollers. Fold in half and continue to knead until the dough widens to width of the roller. Lightly dust with flour as necessary. Continue to roll pasta increasing the knob from 1 to 2 and such until you reach 5. Repeat with the other 3 pieces.

Cut the dough with the fettuccine roller. Lay out flat, separating with your hands. Let dry for up to 1 hour. Cook immediately or after dried. To store in the fridge, toss in flour and refrigerate in an air tight container.


Garlic Butter Basil Sauce
Ingredients:
Per serving:
1 tbsp unsalted butter
1 tbsp garlic infused olive oil
1/2 cup fresh basil leaves
1 1/2 cup fresh pasta (from above)
Freshly grated parmesan cheese, for serving

Directions:
Bring a large pot of water to boil.

In a small pan, melt the butter over medium heat. Stir and cook until browned. Add the oil and reduce heat to low.

Add the pasta to the boiling water and cook for 2-6 minutes (depending on how dry your pasta is) until al dente. Drain.

Add the basil to the butter and oil and stir to wilt. Toss the pasta with the sauce and garnish with freshly grated parmesan cheese.

Serves 1.


Saturday, December 15, 2012

Mushroom Pizza (with homemade pizza dough)

Raise your hand if you like pizza.


So everyone has their hand in the air, right?


Me? I definitely enjoy pizza. I won't turn down a stuffed crust slice from Pizza Hut or a thin and crispy Dominos. That super thick Chicago style pizza? Delicious! New York floppy and greasy? I'd fold that baby in half and eat that too. $5 from Little Caesars? Pizza! Pizza! I say. I especially like local places with different pizza specials. Whether it be thick or thin, you'll bet your bottom dollar I'll eat it.


When you're living alone, ordering and consuming an entire pizza yourself is not the best idea. For that reason, and to play around with yeast some more, I started making homemade pizza dough. And I'm telling you, best decision of my (culinary) life! I have made the following dough at least three times since I've lived in IL and another time I made it with half whole wheat flour.


This dough is great for a couple reasons. One- it is very easy to put together. Two- it freezes beautifully. That means you can whip up the dough and freeze it into individual sized portions to use whenever you have a hankering for pizza. It works great for calzones and as a vehicle for any combination of toppings you can come up with. This week I went with a simple tomato sauce, shredded mozzarella cheese and mushrooms.

Just look at that cheese!


Homemade Pizza Dough (from Annie's Eats)
Ingredients:
1/2 cup warm water
2 1/4 tsp instant yeast
1 1/4 cup room temperature water
4 cups bread flour
1 1/2 tsp salt
2 tbsp extra virgin olive oil

Directions:
Combine the warm water and yeast in a small bowl. Let sit for a few minutes. Add the room temperature water and olive oil and mix. In a large bowl, mix together the flour and salt. Mix in the wet ingredients, stirring with a wooden spoon until you cannot stir anymore. Then turn out the dough on a floured surface and knead to mix in the rest of the flour. Keep kneading until the dough is smooth, about 5 minutes. Place it into a lightly greased bowl and cover with plastic wrap. Let rise until doubled, about 90 to 120 minutes (the timing will change depending on the temperature of your house).

Lightly punch down the dough. Separate into 5* equal pieces. Form each into a ball. Wrap in plastic wrap, place in a freezer safe bag, and freeze until ready to use.

*The 5 portions will give you individual sized pizzas, if you want to do large family style pizza, separate the dough into 2 portions.


Personal Mushroom Pizza
Ingredients:
1/5 of pizza dough (from above)
1/3 cup tomato pizza sauce
1/2 cup shredded mozzarella cheese
1/2 cup sliced mushrooms
cornmeal

Directions:
If your dough is frozen, thaw in the fridge over the course of the day.

Preheat oven to 500 F. Place a baking stone or upside down baking sheet in the oven during the preheating process.

Remove the dough from the fridge (or use non-frozen dough from above). Place the ball on a clean surface and cover with a damp cloth. Let sit for 10-30 minutes while the oven reaches temperature. Prep your pizza sauce, cheese and mushrooms.

Stretch the dough into a flat shape. Remove the baking sheet or stone from the oven and sprinkle with cornmeal. Place the dough on top of it and moving quickly spread your sauce over most of the dough. Top with the cheese and mushrooms.

Bake for 7-8 minutes until crust is golden and cheese is hot.

Serves 1.


Wednesday, December 5, 2012

Turkey Stock

Question--- what's the difference between stock and broth?

I did some googling (side bar: can you believe that google is in the dictionary as both a noun and a verb? Google wasn't even started until the late 1990s and now we use the word so often; it is crazy.) and found a few answers. First, I think in order for something to be a "stock", it needs to have been made with bones. But then how can there be vegetable stock? I dunno. Broth, on the other hand, is typically made with more meat pieces, salt and other seasonings that make it something you could eat directly from the pot. Most places that you look, however, say that chefs tend to use the words interchangeably, especially when they are homemade. Since I don't add any salt to either stock or broth, I wouldn't suggest eating them directly from the pot without seasoning. But regardless of what you call them, I would definitely encourage you to make them at home. My parents and I made this turkey stock on Thanksgiving because why throw away the carcass without getting a little something extra from it? Play around with the vegetables and seasoning and use what you have in your fridge (or even scraps from your freezer would work). Alternatively, just sub bones and skin from a chicken to make chicken stock.


Turkey Stock (adapted from Vegetable Broth)
Ingredients:
1/2 to full carcass of roasted turkey, plus skin
1 medium onion, cut into quarters
2-3 celery stalks, cut into large chunks
8-10 baby carrots
1 bay leaf
large handful of fresh parsley
4-5 fresh sage leaves
2-3 sprigs of fresh thyme
2-3 peppercorns
Cold water

Directions:
After you have carved your turkey and picked off most of the meat (you don't need to pick it clean, some meat will help to flavor it), break down the bones and add them plus any skin and fat to a large pot. Add all of the vegetables and seasonings. Cover with cold water. Turn on the stove and bring to a simmer. Reduce the heat to low and simmer for 3-8 hours.

Pour the liquid through a small mesh strainer and remove all of the solids. Let cool to room temperature (or you could cover it and put it outside if it is colder out there); you don't want to put it directly into your fridge because the heat will warm up the inside of your fridge and it may not be at the correct temperature for everything else you have in there. Once it has cooled to room temperature, place it in the fridge overnight. In the morning, skim off the fat using a spoon or fat skimmer (you can leave some fat if you would like, if you remove it all, you have fat free broth!). Portion into 1 cup and 2 tbsp (ice cube tray) aliquots and freeze.

Thaw and use in place of chicken stock or broth for whatever recipes you desire!

Remember when you use this that you will want to taste your dish and salt generously. Unlike the stock/broth that you buy in the store, this is salt free!


Tuesday, December 4, 2012

Hashbrown Waffles

It's beginning to look a lot like Christmas...


Only in the house
Take a look at the rain and gloom pattering on the pane
With temperatures at sixty and above
It's beginning to look a lot like Christmas
Sales in ev'ry store
Where the prettiest sight you'll see is the tree that you put up
In your own front room.


Please re-read that and sing it out loud to the tune of, you guessed it, "It's beginning to look a lot like Christmas".


Really isn't it crazy that the weather this week as been so nice?!? It was in the 70s on Sunday and Monday and now it is rainy and in the high 50s. This so feels like spring weather not DECEMBER.

Okay, let's just take a moment to FREAK OUT that it is the last month of 2012 already?!?! How in the world did that happen?!?! Why is life flying by in a blink of the eye?!? AHHH!


Okay, freak out officially over.

Well, until you make these hashbrown waffles. If you are on Pinterest, you have probably seem them floating around all over the joint. And if you are like me, you probably thought to yourself, wow what an amazing idea and how did I not come up with that? I love love love love love crispy potatoes and that is exactly what these are. Plus you get to use that waffle maker for something other than waffles. And it's so easy. I mean all you do is shred your potato, season and let it cook. Have I sold you yet?

So make these for breakfast, brunch or even dinner. You won't regret it (although you may freak out a little bit... oh, you don't freak out at the drop of a hat like me? Okay, then maybe you won't freak out. Just don't judge me and my freaking out nature...please...please...please...).


Hashbrown Waffles (from Teas and Cookies)
Ingredients:
1 potato (per person)
Salt (start at about 1/2 tsp per potato)
Canola oil
Optional: eggs cooked to order and ketchup

Directions:
Shred the potato using a hand grater or food processor. Wrap a towel around the potatoes and squeeze to remove the water (you want your potatoes to be as dry as possible to get crispy potatoes). Place the potatoes in a bowl and season with salt. Toss to mix.

Heat your waffle iron to hot. Carefully oil the top and bottom of the hot iron. Spread the potatoes over the bottom of the waffle iron and close. Cook for 10-20 minutes until brown and crispy. Remove from the iron and top with the egg and ketchup, if desired.


Friday, November 9, 2012

Homemade Vegetable Broth

A couple of weeks ago Meijer failed me... in three consecutive trips. For some reason, completely unknown to me, the chicken/vegetable/beef broth/stock shelves were completely empty. I mean no expensive organic kind, no fully sodium-ed store brand, nothing. It was so weird. It was at this point that I thought, I gotta make some homemade broth/stock for my freezer so I never have this problem again. I also thought to myself, why purchase a whole bunch of extra veggies to use up in stock when every day when I cut up vegetables for recipes, I end up throwing parts of them away. So at this point, I started collecting my vegetable scraps in the freezer. I collected a whole gallon sized freezer bag of potato skins, onion skins, mushroom stems, carrot ends, celery pieces and such. Then I threw them all into a big pot, covered them with water, added some herbs (thyme, parsley and peppercorns), and simmered away for 1 hour. After straining and cooling I had myself a bunch of vegetable broth to be used in so many dishes.


This is so easy that you should really do it! The skins of the onion give it the beautiful brown color, so make sure not to skimp on them. Also make sure that you do include carrots and celery (potentially cut up some extra to add in) because they will make the broth more hearty. I wouldn't suggest using any super strongly flavored vegetables like cabbage or brussels because they will probably take over the flavor. Also, make sure that you do not include any vegetables that have become rotten!


Homemade Vegetable Broth
Ingredients:
Gallon ziplock bag of vegetable scraps such as potato skins, celery, carrots, onion (red or yellow with skin), bell pepper, mushroom stems, corn cobs etc.
2-3 garlic cloves, whole and peeled
Fresh herbs such as thyme, parsley, basil, oregano, etc.
3 whole peppercorns
Cold water to cover vegetables

Directions:
Collect vegetable pieces over the course of a few weeks to months in a ziplock bag in the freezer. When the bag is full, dump it into a large stock pot and cover with cold water. Add the garlic, herbs and peppercorns. Bring to boil, reduce heat and simmer for 1 hour, uncovered.

Strain the broth and cool to room temperature. Aliquot into freezer bags and ice cube trays and freeze.

Use in place of chicken or vegetable broth in whatever recipe you desire.


Wednesday, October 17, 2012

Homemade Pumpkin Puree (a how to)

I know I've said this a number of times, but sometimes spending the time and effort to make things at home instead of buying canned or prepackaged is great.

This weekend I made pumpkin puree. Yeah, that stuff you normally get out of a can. I spent $3 on two pie pumpkins and got around 5 cups of puree. I think that is maybe about equivalent to what it would cost you from the store. But the great thing is I also got some toasted pumpkin seeds out of the deal. And I supported a local farmer. If you've got the time you should do it; doesn't take a lot of effort, just follow the 6 easy steps below.


Step 1. Go to the farmer's market (or grocery store) and pick out some pie pumpkins. Clean the outsides. And get out a giant sharp knife.


Step 2. Cut the pumpkins in half and scoop out the insides. Place them cut side down on baking sheets. Roast in 400 F oven for 40-60 minutes (give or take some time depending on the size of your pumpkins).


Step 3. Remove from the oven and let cool completely.


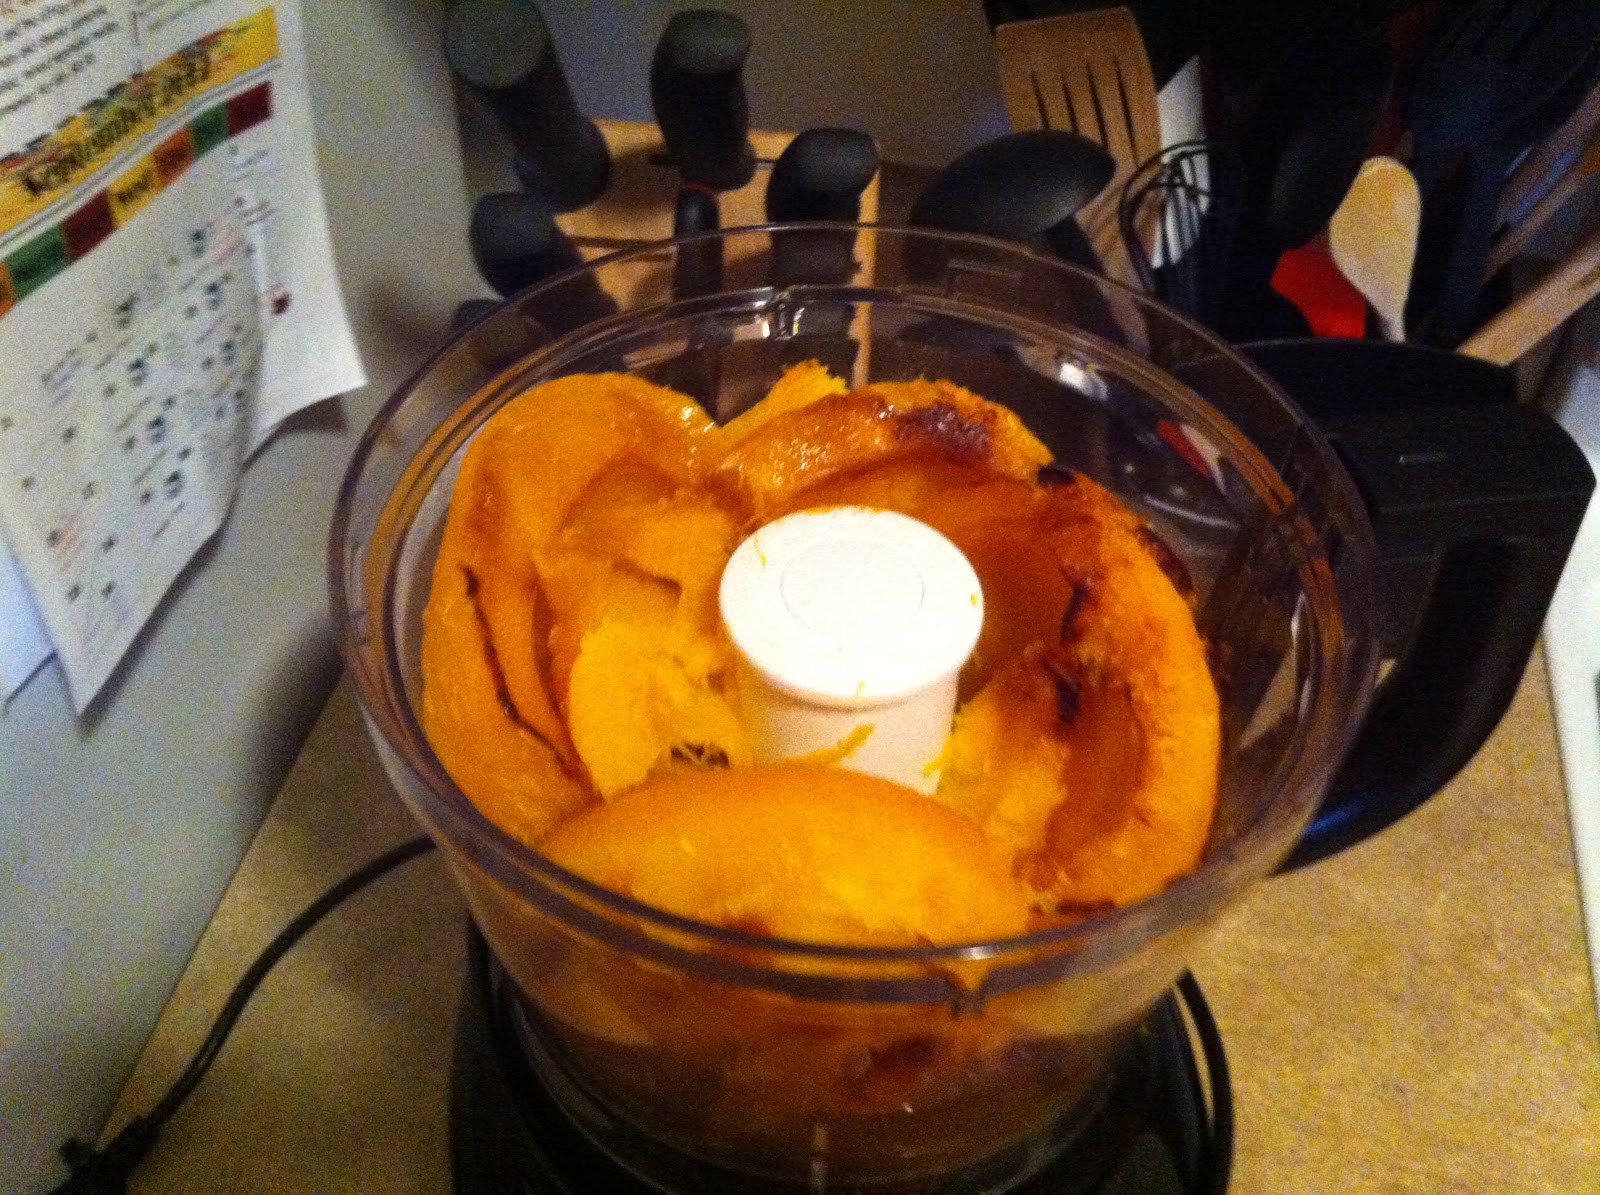
Step 4. Peel off the skin and put the flesh into a food processor.


Step 5. Puree until you get the desired consistency.


Step 6. Use in recipes!!

So simple. Do the darn thang!


Pumpkin Puree
Ingredients:
Pie pumpkins (also known as sugar pumpkins)*

Directions:
Preheat oven to 400 F.

Clean the outside of the pumpkin(s). Cut the pumpkin(s) in half using a sharp knife. Scoop out the seeds and strings. Place the pumpkin halves cut side down on baking sheet. Bake for 40-60 minutes (cooking time will vary depending on the size of your pumpkin) until the flesh is cooked completely.

Let the roasted pumpkins cool completely. Peel off the skin and put the flesh into a food processor. Pulse until a smooth consistency is reached.

Use in place of "canned pumpkin puree" for any recipe.

Freeze in freezer safe ziploc bags.**

*I used two pie pumpkins (Sorry I don't know how much they weighed because I got them from the farmer's market) and got around 5 cups of puree. Use as many pumpkins as you want :)

**I packaged some of mine in 1 cup aliquots in quart sized bags. I froze the rest in ice cube trays (about 2 tbsp per cube) then cracked the cubes out and put them in a gallon sized bag. The different amounts will allow me to thaw whatever I need, when I need it.


Wednesday, September 12, 2012

Corn and Roasted Tomato Risotto (a how to)

I'm not sure how much you have perused the website. Besides the (almost) daily recipes, there is a link to a page on right that takes you to my Recipe Archive. Use it to get back to those recipes you want to make most easily. I have them categorized by type of dish to help you sort through them.

---------------------------------------------------------------------

Additionally, awhile ago I added another page link on the right labeled My (Cooking) Bucket List. Here I started a list of the foods I would like to try my hand at sometime in the future. I'm hoping to continue this blog and add those recipes as I attempt them. Plus, the bucket list will likely grow as I find more desires in the kitchen.

This bucket list idea was partially inspired by my infatuation with competitive cooking shows-- in particular, MasterChef. I certainly do not have enough skill for shows such as Chopped and Next Food Network Star, but the home cook aspect of MasterChef makes it a potentially obtainable dream for me. However, on MasterChef there are certain types of cuisines and dishes that the contestants are expected to be able to make. Take, for example, a few weeks ago when the bottom two cooks were tasked with creating THREE souffles in one hour. Holy cow, talk about pressure. Not only are souffles technically challenging, but they needed to infuse the correct flavors and add a little bit of extra umpf to stand out. Before I would ever try out for the show (not saying I'm committing to season 4), there are some things that I need to give a once (or twice, or three times) over.

----------------------------------------------------------------------


The first thing I put on my bucket list (and that has been on my bucket list FOREVER) was risotto. From what I understand this dish is really a challenge and staple for cooks of all levels. Even on Chopped and NFNS, a bad risotto can send you packing. Many of the recipes out there are designed for making risotto for four and since I wasn't comfortable enough with the dish to adapt things right out of the gate, I turned to my trusty "Serve Yourself" cookbook. Of course, it has a risotto! And a perfect one for summer-- packed full of fresh corn and roasted tomatoes topped with fresh basil.

To tell you the truth, I had this recipe on my menu for 3-4 weeks in a row until I finally made it. I am usually pretty good at sticking to the menu plans for the week (since I've already bought the groceries and planned everything out), but this risotto was just overwhelming. Mostly, I think, because I would be exhausted at the end of a work day and just not ready for a labor intensive meal. So, I'd fall back on picking up Panera on the way home or whipping up a quick salad or grilled cheese and putting off the plan. But finally, on a Saturday night, I said, "Julie, you gotta bite the bullet and do it. It's going to be yummy and you won't know how much effort it actually takes until you make it." And so I did. With no regrets. It was delicious and not nearly as scary as I had imagined. Risotto can now be crossed off the bucket list, and certainly, I will be making more. Watch out, world (or kitchen)!


Maybe you are like me and you are intimidated by risotto. For that reason, I took some pictures along the way to guide you in your risotto making. Kind of a "how to". If you're an expert, skip ahead to the recipe at the bottom that is written like normal. And certainly, as always, feel free to double or quadruple the recipe to feed your whole family. :)


Also, please note that I followed Joe's suggestion of making corn broth. When I read this recipe in his book, I asked why I had never thought of to do this before. Especially since I'm now in the middle of corn country and I can buy 8 cobs for $1 sometimes! Of course, I can't eat 8 cobs before they go bad, so I typically cut the kernels off and freeze them for future use. I never once thought to do anything with the husks, silks and used cobs. Talk about wasteful. This broth is soooo easy and flavorful! You can use it as a substitute for vegetable or chicken broth or stock in just about everything. You not only avoid the high amount of sodium in the prepackaged kind (that's why I like to make chicken stock too), but it doesn't cost you a cent more than what you were paying for the corn anyway. Some people are so smart. I'm just piggy-backing off of them; feel free to jump on as well. ;)


Okay for real, I'm on to the recipe.


Talk about the longest post ever.


Thanks for sticking with me.

-----------------------------------------------------------------------------

First and foremost, prep your ingredients. Cut your onion and garlic, grate your cheese, and start your tomatoes roasting (sorry for the lack of photo, I wasn't committed to the how-to until after I started cooking).

Bring your corn broth to a simmer and cover.


Heat the oil and add your onion and garlic. Cook until softened.


Add the corn and rice and stir until they are coated with oil.


Add the wine first, but then add the hot broth (1/4 cup at a time*), stirring constantly until all the liquid is absorbed. *I found that about using a ladle about half full was a good approximation for 1/4 cup.


Continue to cook until the rice reaches the desired consistency.


Lastly, stir in the tomatoes, followed by cheese and butter. Serve topped with the basil leaves and extra grated cheese.


Corn and Roasted Tomato Risotto (very slightly adapted from "Serve Yourself" cookbook)
Ingredients:
1/2 pint grape tomatoes
2 tbsp extra virgin olive oil
salt and pepper, to taste
1 to 1.5 cups corn broth (see below) or vegetable stock
2 tbsp coarsely chopped onion
1 garlic clove, chopped
kernels from 1 ear fresh corn
1/3 cup Arborio rice
1/4 cup dry white wine
2 tsp unsalted butter
2 tbsp freshly grated parmesan cheese
3 basil leaves, thinly sliced

Directions:
Preheat oven to 400 F.

Please the tomatoes on a baking sheet covered with aluminum foil. Toss with 1 tbsp oil and sprinkle with salt and pepper, to taste. Roast for 30 min, until the tomatoes are lightly browned and collapsed, turning halfway through.

Bring the corn broth to a simmer over medium heat in a small saucepan. Reduce the heat to low and cover.

Heat 1 tbsp oil in a small pan over medium heat. Add the onion and garlic and cook about 3-4 minutes until softened. Add the corn and rice and cook, stirring quickly, until the rice is well coated, about 1-2 minutes. Add the wine and cook, stirring frequently, until the liquid is almost gone, about 5 minutes. Add in 1/4 cup hot corn broth and repeat the cooking and stirring until the liquid is absorbed. Continue to add the broth (1/4 cup at a time) and stirring constantly until the rice has been cooking for about 20 minutes total. Taste the rice to make sure it is tender but still slightly firm. Add the tomatoes. Cook for 2-3 more minutes until the rice in tender, but not mushy, adding more liquid if necessary.

When the rice is cooked correctly, stir in the butter and cheese. Add salt and pepper as you like. Transfer to a bowl and top with the sliced basil and more freshly grated parmesan.


Homemade Corn Broth (from "Serve Yourself" Cookbook)
Ingredients:
4 ears of corn (including husks and silks and everything)
7 cups water

Directions:
Rinse the corn. Remove the husks and silks, discarding any browned or blackened spots. Cut into about 2-3 inch pieces.

Remove the kernels from the cobs. I like to stand the cob upright in a large bowl and slice from the top downward. It doesn't make as big of a mess in the kitchen. Cut the cobs into 2-3 inch pieces. Freeze the kernels if you are not going to use them immediately, for another use.

Add the cobs, husks and silks to a large stockpot. Cover with the water and bring to a boil. Reduce the heat to low and simmer, covered for about 1 hour. No need to stir or disturb.

Strain the broth into a large bowl. Squeeze the solids to remove as much liquid as possible. Use in place of vegetable broth/stock immediately or freeze for future use.


Monday, May 21, 2012

Homemade Taco Seasoning.


I know, I know. Why make something at home that is super simple to pick up at the grocery store? Well, I can give you a few reasons why homemade taco seasoning is worth the effort (truthfully, it isn’t much effort at all):

1. You can control the amount of sodium.
2. You can control the amount of spice.
3. You can control the portion size.

For me, the biggest draw is #3. Since I’m cooking for myself most days, I’m not browning up a pound of ground beef to mix with one of the pre-packaged taco seasonings. If you only use a quarter to a third of the package, you have to wrap up the rest of it and wait until you’re ready for tacos again. So much effort, right? Ok, not really. Additionally, I don’t know about you, but I never know when I craving for tacos (or something Mexican inspired) will hit me, so having a jar full of taco seasoning at the ready is perfect. It is super simple--- just combine your spices and keep it in an airtight container. Then when you’re ready for tacos, combine the same amount of the seasoning with cornstarch in your pan with your ground beef (or ground turkey or pulled pork or black beans or whatever) and a little bit of water and you are all set.

I used it the other day to doctor up some leftover pulled pork to make a great taco salad. I loaded up the lettuce with tomatoes, cheese, avocado, celery and the pork. Served alongside some tortilla chips and it was perfect.


Try it out. You’ll like it.

Side note: I think I added closer to 2 tsp of CRP (crushed red pepper) because I love the spice. Feel free to experiment with what fits your taste buds.

Homemade Taco Seasoning (Adapted from All Recipes)
Ingredients:
1/4 cup chili powder
1 tsp garlic powder
1 tsp onion powder
1 tsp crushed red pepper flakes (more or less to taste)
2 tsp dried oregano
2 tsp paprika
2 tbsp ground cumin
1 tsp kosher salt
1 tsp black pepper

Directions:
Mix together all ingredients. Store in an airtight container. To use, combine equal parts seasoning mix and cornstarch with cooked meat or beans and water (approximately 2 tbsp of each for a pound of ground beef).